
How to Add a WordPress Author Bio Box to Your Post (4 Ways)

Wondering how to add WordPress author bio boxes to your posts? That’s certainly a good question to ask. The thing is that if you manage a larger blog with multiple writers and collaborators, including author information is a great idea. Providing it can help build trust among readers and provide credit when necessary.
The good news is that WordPress makes this simple. 😎 There are a variety of ways you can achieve this. For instance, you can use the Post Author Block (built into WordPress) or use a dedicated plugin.
👉 In this post, we’ll discuss why you may want to add author bio details to your articles. Then, we’ll show you four different ways you can do this. Let’s dive right in!
Why add WordPress author bio boxes to your posts
There are many benefits to adding WordPress author bio boxes to your blog posts . First of all, when readers know who the author is they may be more likely to trust the contents of the article.
For example, if a reader sees that an author has a license or an advanced degree in the subject matter of the post, they’ll probably be more likely to take its contents seriously:

Furthermore, author bio boxes can be a necessity if you’ve promised a writer that their work will be credited. This can be particularly useful for larger blogs with many contributors or guest bloggers .
How to add a WordPress author bio to your posts
Now that we’ve gone over some of the benefits of author bios, let’s go over four different ways you can add one to your WordPress posts!
- In your WordPress settings
- Using the WordPress Post Author Block
- With an author bio plugin
- In a sidebar widget
1. In your WordPress settings
One of the easiest ways to add author bio boxes is in your settings. This method is super convenient, because once you configure it, the bio is added automatically to new posts.
However, keep in mind that you can only use this approach if your theme already comes with an author bio box in its global design. For instance, the Twenty Twenty-Three theme doesn’t include this setting, but Neve Pro does.

To configure your author box settings in Neve Pro, navigate to your WordPress dashboard. Go to Appearance > Customize > Layout > Single Post . Then, scroll down to the Author Box section and make your selections.
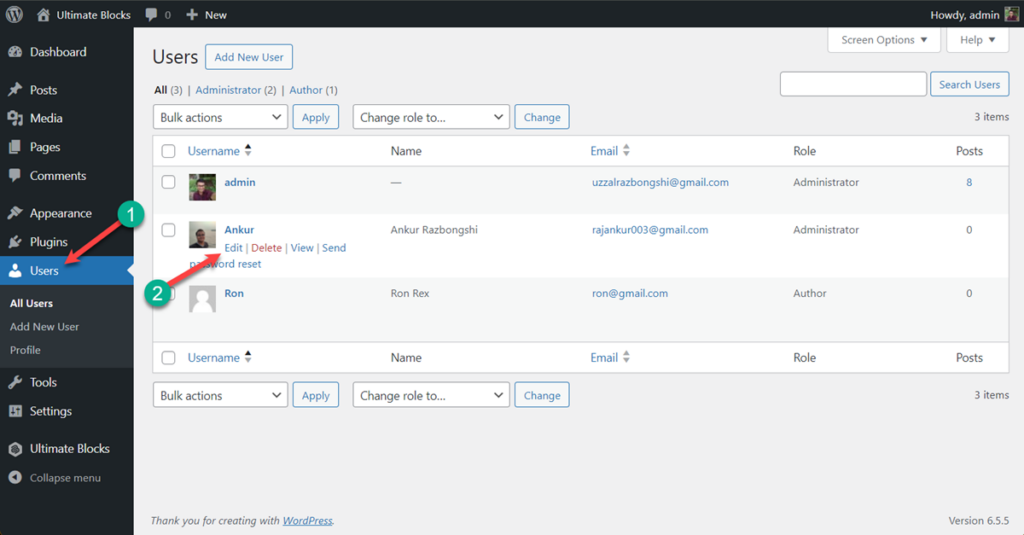
Next, return to your dashboard and go to Users > All Users :

Find the User (i.e., the author) for which you’d like to add an author bio. Then, hit the Edit link under their username. If you’re filling in your own author bio, simply scroll down to the About Yourself section:

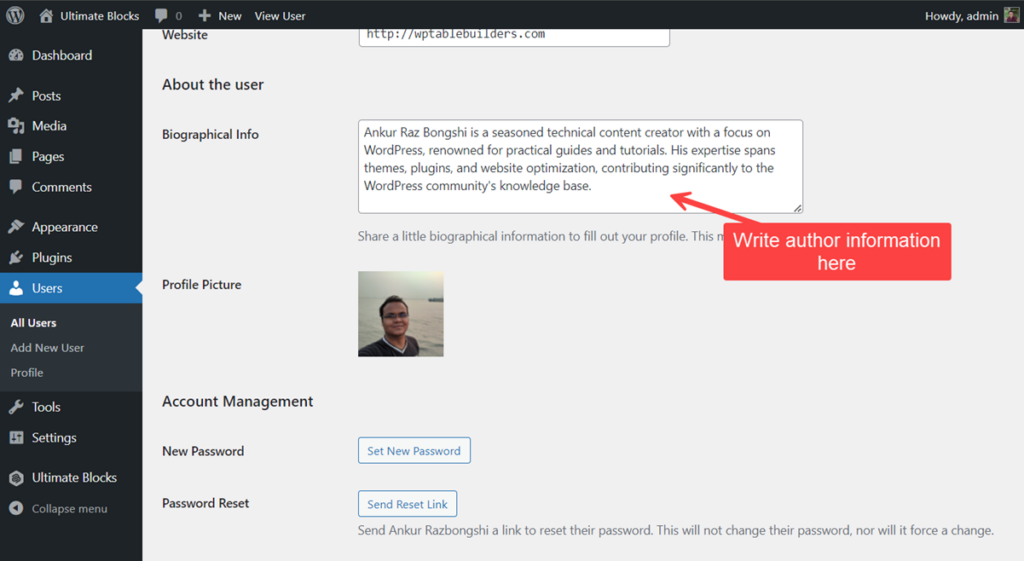
Here, you can fill in the Biographical Info section and add a profile picture.
If you are creating an author bio for someone else, the process is the same, but you’ll scroll to the About the user section instead:

It’s as simple as that! 🤩
2. Using the WordPress Post Author Block
If your theme doesn’t include an author bio block in its design by default, you can always add one manually. You can do this using the Post Author Block .
After you’ve filled out the author’s information in the user settings (as we did in the previous method), simply navigate to the post or page where you want to add a WordPress author bio. Click on the + icon to open up your blocks menu. Then, search for “post author:”

As you can see, this returns a few options. If you opt for the first option, Post Author , this will populate the user’s name and profile picture. It will also let you add an additional byline:

When you select the Post Author Name , this will simply add the name in plain text. If you choose the Post Author Biography block, you’ll get the biography but no author picture:

You can make your selection depending on how much information you have about the author in question.
As an example, for a guest blogger, you may just have a name. Alternatively, if the post was authored by a regular contributor, you might have both the bio and a picture.
3. With an author bio plugin
Now, let’s see how you can add author bio boxes using a dedicated plugin. For our example, we’re going to use Molongui Authorship.

Author(s): Molongui
Current Version: 4.9.5
Last Updated: July 9, 2024
molongui-authorship.zip
Molongui is a good option because it offers unique author bio features and customization that WordPress doesn’t offer out of the box.
For instance, molongui lets you create author bios without making a WordPress account for the writer. Plus, you’ll be able to create guest authors, co-authors, and more.
This can come in super handy if you run a larger blog that publishes one-off articles from lots of different writers . What’s more, limiting the amount of users you create can help keep your site secure.
After you’ve installed and activated the molongui authorship plugin, go to Authors > Settings to configure your preferences:

All types of author boxes are enabled by default, but you can turn certain options off if you’d like.
Additionally, under the Author Box tab, you can change the placement of author boxes. In the Users tab you can enable or disable additional field options such as phone, company, and socieal media links.
Then, you can go to Authors > Author Box Editor to customize the appearance of your WordPress author bios:

Just make sure to hit Save Settings when you’re finished!
4. In a sidebar widget
If you want to add author bio boxes, but you don’t want to include them at the bottom of the page, you can use a sidebar widget instead. For this approach, you’ll need the Meks Smart Author Widget tool.

Author(s): Meks
Current Version: 1.1.4
Last Updated: September 11, 2023
meks-smart-author-widget.zip
After you’ve installed and activated the plugin, navigate to Appearance > Widgets :

Once in the widget editor , select your Sidebar area:
Click on the + symbol to add a block. We’re going to add ours to the very bottom of your sidebar section. Now, search for and select the Meks Smart Author block:

This will instantly add it to your widget area:

Now go ahead and configure your settings. Then, click on Update to save your changes.
Here’s what this would look like on the front end:

Keep in mind, adding a WordPress author bio in a sidebar widget is likely best for single author publications, like personal blogs . That’s because it’s a universal feature that will appear on every page.
Conclusion 🧐
When you’re managing a multi-author WordPress blog, it’s important to let readers know who is writing your articles. This can help boost your reputation and gain trust among your audience.
The good news is that you can easily add a WordPress author bio box to your posts. Even better, there are a few different approaches, so you can choose according to your preferences. For example, you can configure this in your WordPress settings, use the Post Author Block, add one to a widget area, or even use a dedicated plugin for added customization options.
Do you have any questions about how to add a WordPress author bio box to your blog posts? Let us know in the comments section below!
By Sophia Lee
Themeisle contributor.
Sophia Lee is a writer and WordPress expert. She’s spent years working with WordPress development and design agencies to build and manage just about any type of website you can imagine. That includes everything from robust online stores to minimalist blogs. She also has a background in digital marketing and SEO.
Updated on:
You can check also:.

10 Best Free Blogging Sites to Build Your Blog for Free in 2024: Tested, Compared and Reviewed

All In One SEO vs Yoast SEO: Which Is Better in 2024

Naming Images for SEO: Here’s the Right Way to Do It

The SEO Framework vs Yoast SEO: Which Is Better in 2024?

How to Send a Mass Email in Gmail

How to Increase Organic Traffic to Your Website (7 Strategies)

7 Most Profitable Blog Niches for 2024 (Based On Real Data)

10+ Most Popular Types of Blogs: Your Blogging Inspiration for 2024

7 Best Gmail Alternatives in 2024 (Most Are Free)

How to Use Gmail With Your Own Domain Name (Free Methods)

How to Get a Free Email Domain: 4 Easy Methods

Do I Need a Website for My Business? 10 Reasons Why the Answer is Yes

13 Best Keyword Research Tools in 2024 (Including Free Options)

The History of Blogging: From 1997 Until Now (With Pictures)

3 Ways to Use Canva on WordPress Sites – From Basic to Brilliant

How to Increase Blog Traffic in 2024 (8 Essential Strategies)

3 Beginner-Friendly Ways to Reorder Posts in WordPress

AWeber vs Mailchimp Comparison: Which Is Better in 2024?
Or start the conversation in our Facebook group for WordPress professionals . Find answers, share tips, and get help from other WordPress experts. Join now (it’s free)!
- Privacy Policy
Most Searched Articles
Starting a blog without spending a penny is absolutely possible, and you’re in the right place to find out how to do it. Over the years, I’ve experimented with dozens of different blogging sites and tested how they perform for various purposes ...
How to Create and Start a WordPress Blog in 15 Minutes or Less (Step by Step)
Ready to create a WordPress blog? You've made an outstanding choice! Learning how to start a blog can be your path to an exciting new adventure. Lucky for you, WordPress is an excellent tool you can use for that. It's free, user-friendly, powerful, ...
The Complete Personal Blog Guide: How to Start a Personal Blog on WordPress
In this tutorial, we will lead you through all the steps you need to take in order to start a personal blog that is cheap, effective, good-looking, and that will set you up for future success. This is your ultimate guide to a personal WordPress blog ...
Handpicked Articles
How to make a wordpress website: step-by-step guide for beginners.
Even though it might not seem like so at first, knowing how to make a website from scratch is a must-have skill for today's small business owners. The following guide takes you by the hand and shows you all the steps to getting the job done with ...
7 Fastest WordPress Hosting Companies Compared (2024)
The web host you choose to power your WordPress site plays a key role in its speed and performance. However, with so many claiming to offer the fastest WordPress hosting out there, how do you decide which company to use? In this post, we'll look at ...
How to Install XAMPP and WordPress Locally on Windows PC
Installing XAMPP and WordPress to set up a local development site is a smart move when you need a private space for testing or experimenting. XAMPP allows you to host a website right from your own Windows PC. Once installed, launching a new ...
Share on Mastodon
Cut your WordPress site's TTFB to less than 1 second. 30-day money-back guarantee.
How to Change the Author in WordPress (5 Methods)

There are many circumstances in which you might find yourself needing to change the author of a post in WordPress. However, the platform doesn’t make it immediately clear how to accomplish this task.
Fortunately, there are several methods you can use to change, update, and edit the author of a WordPress post. All you need to know is where to look and which strategy is best suited to your particular situation and needs.
In this post, we’ll discuss some of the circumstances that might lead you to attribute a post to someone other than the original author. Then we’ll walk you through five different ways to do so, and explain when to use each method. Let’s get started!
Why You Might Need to Change a Post’s Author in WordPress
While this may seem like a rarely-needed task, changing a post’s author in WordPress may be necessary in a variety of different situations. This is especially true if you run a large, multi-author content hub .
Many content-heavy sites with more than one author consider posts the property of the publication, rather than individuals. If a writer chooses to leave your site for any reason, you may want to change their posts’ author to the name of a content creator who is still associated with your site.
Similarly, a change in user status may warrant updates to a post’s author. If your screening process involves initially publishing posts under an editor’s name, but you eventually decide to bring the writer on board, you might want to attribute the posts to their creator after the fact.
In other cases, you may want to remove or hide author names altogether. This can give your site a more cohesive identity, as your posts will appear to come from a single source. Plus, single-author sites can benefit from less-cluttered looking posts when the author names are invisible.
Finally, there may be times when you need to change an author’s display name in WordPress. Whether they have undergone a name change, wish to publish their posts under a pen name, or something else entirely, this is a courteous way to respect your authors’ preferences regarding how they’re presented online.
As you can see, the need to change a post’s author in WordPress comes up more frequently than you might expect. Learning how to address all of these situations will help your site run smoothly, and better equip you to maintain its identity and presentation.
How to Change the Author of a Post in WordPress (5 Methods)
Just as there are many reasons you may need to change a post’s author in WordPress, there are also many ways to accomplish the task. Below we’ll cover five methods and discuss the situations they’re each best suited to.
If you like, you can use the following links to jump directly to the section you’re most interested in:
- Change a post’s author to another existing user
- Add a new author and assign existing posts to them
- Remove or hide the author name on your WordPress posts
- Update an author’s display name in WordPress
- Bulk change post authors on your site
1. Change a Post’s Author to Another Existing User
If you’re using the new WordPress Block Editor , changing a published post’s author couldn’t be easier. First, access the post by navigating to Posts > All Posts and clicking on the relevant title.
In the post editor, select the Document tab in the sidebar. Under the Status & Visibility heading, you should see Author followed by a drop-down menu:

From here, you can select the name of any author with an existing account on your WordPress site. It’s important to note that you cannot create a new author from this screen – we’ll cover how to do that later in this post.
Once you’ve selected the new author’s name from the drop-down menu, select Update to make the change live:

If you’re still using the Classic Editor , the process will look a little different. First, you’ll need to expand the Screen Options menu above the editor:

Under Boxes , select the checkbox next to Author :

Then scroll down to the bottom of the editor. Here, you’ll see that there’s now a drop-down menu similar to the one in the Block Editor:

Select the name of the post’s new author, and then click on the Update button to make it official:

Regardless of which editor you use, you can also change a post’s author using the Quick Edit function in the Posts list. Simply select the Quick Edit option under the post’s title, and then choose the new author from the relevant drop-down menu and click on the Update button:

This method works well if you have a single post you need to reattribute because the original author left your site, or you otherwise have reason to credit a different existing user for the post. Changing a post’s author to a new user, on the other hand, will require a few extra steps.
2. Add a New Author and Assign Existing Posts to Them
In WordPress, you can only attribute a post to an existing author. In other words, there’s no way to create a new author for a post from either of the content editors.
So, let’s say you’re bringing in a new Contributor or Author , and you wish to more accurately attribute posts they’ve written that were published under the name of an Editor or Administrator . You’ll first need to create a user account for the new writer .
It’s worth noting that if you allow frontend user account creation, the post’s new author may already have an account. However, you’ll still need to follow these steps to give them the proper permissions, in order to credit them on their posts.
To handle this task, you’ll need Administrator status on your website. If you’re not a site Administrator , you’ll need to contact one to carry out these steps for you.
Then, navigate to the Users area of your WordPress dashboard . If you’re creating a new user, click on the Add New button at the top of the screen. If you’re editing a user’s permissions, you can simply select Edit beneath their username:

For new users, fill out the required fields and any others you wish to include. Make sure their role is set to Author or Contributor , depending on which is more appropriate:

To edit a user account created on the frontend, you can simply change their role by scrolling down to the relevant drop-down menu on the Edit User screen:

In either case, make sure to save your changes. Once the user has been added and has the proper role, you can attribute posts to them as described in the first method above.
3. Remove or Hide the Author Name on Your WordPress Posts
In some cases, it makes more sense to leave the authors’ names off of your WordPress posts. If you are the only author, removing the name eliminates redundancy and makes your posts less cluttered.
As for multi-author sites , leaving out authors’ names minimizes individuality on your site. You’ll present a more cohesive identity for your site and brand, which could be beneficial in business blogs where you want readers to see your content as originating from the company rather than specific writers.
There are two ways to go about hiding author names. To manually remove author information from your posts, you’ll need to edit your site’s theme . Navigate to Appearance > Customize in your dashboard, and then scroll down to the Additional CSS area of the Customizer :

In the field provided, you can add the following code :
If that doesn’t do the trick, you can also delete your theme’s metadata code . However, the location of this information varies from theme to theme . You may need to contact the theme’s creator in order to find it. Even then, editing theme files directly is always risky .
Instead, you might want to consider using a plugin that can remove metadata such as author names from your blog posts without touching a line of code. WP Meta and Date Remover is a sound option if you choose to take this route:

Once you’ve installed and activated the plugin , all you have to do is choose whether to hide meta information from the frontend, the back end, or both. Save the settings, and you’ll have a site that appears to be crafted by a single author, even if it isn’t.
4. Update an Author’s Display Name in WordPress
In some cases, what you really need is not to change a post’s author name. Rather, the user who wrote the post in question may simply wish for the posts attributed to them to display a different name than the one that’s currently listed.
This may occur in a variety of situations, including:
- If you want to display a full name instead of a username, to make your posts look more professional.
- When an author has legally changed their name and wants to update their posts to reflect that.
- Instances where an author has decided to use a new name for their posts on your site, in order to maintain consistency across content platforms or to differentiate between them.
- Cases in which you or an author wishes to use a pen name for their posts.
These scenarios warrant a change to the user’s account, rather than to the posts themselves. You can provide the instructions below to any user wishing to make a change to their name or follow these steps yourself for any other user’s account if you have Administrator status.
Access the user’s account settings, by navigating to Users in your WordPress dashboard. Under Name , you’ll see the author’s username as well as fields for their first, last, and nickname:

Fill in or change whichever of these fields you like (although you can’t change your username from this page. Here’s how you can change username .). Then, use the drop-down menu beside Display name publicly to select either the username, nickname, first, last, or full name.
Don’t forget to save your changes afterward. This will automatically change the author’s name on all of their posts, using the new display name instead. Often, updating the user’s profile can be the most efficient way to change a post’s author.
5. Bulk Change Post Authors on Your Site
Let’s say you have a situation similar to the one we described in Method #1, i.e. an author has left your site and you wish to reassign their posts to someone who still writes for you. However, instead of a single post, the ex-user has several.
While you could change the author for each individual post your previous contributor left behind, it’s much more efficient to use WordPress’ bulk editing capabilities. This way, you can change the name across all relevant posts with the click of a button.
To do this, navigate to your Posts list in WordPress and select the checkbox next to each of the posts you need to attribute to a new author. Then select Edit from the Bulk Actions drop-down menu:

This will open a window much like the one you see when using the Quick Edit function:

Select the appropriate name from the Author drop-down menu, and then click on the Update button. This will update the name of the author on all the posts you selected and make the changes live on your site:

As with the first method, this will only work if you’re attempting to attribute the posts to an existing author. If you want to add a new user to take over the former user’s posts, you’ll first need to follow the steps in Method #2 to create a new user account with the appropriate role.
Additionally, you can’t select multiple authors for the posts you’re bulk editing. So if you want to divide a former contributor’s posts among more than one user, you’ll need to bulk edit the relevant posts for each new author.
How to Change the Author Archive Slug in WordPress
Before we wrap things up, let’s talk about one more tangential aspect of changing authors in WordPress. Sometimes, instead of switching the actual author name, you might just want to change the author ‘slug’ that shows up in the URL for their archive page:

To do this, you can use a free plugin called Edit Author Slug . After installing and activating the plugin, head over to Users > All Users and open up the editing interface for the user you want to work with. Then, scroll to the bottom and find the Author Slug options:

Enter your desired author slug into the Custom box, and then click on Update User . The plugin will automatically update all links pointing to that author’s archive page, using the new slug.
You can also change the default base for your site’s author slug by going to Settings > Edit Author Slug . Enter your desired base into the Author Base box, and select Save Changes at the bottom of the page:

Just be aware that doing this will change every single author URL on your site. This could affect your Search Engine Optimization . As with any time you change your WordPress site’s URL structure , it’s a good idea to implement redirect rules if you change the default base author slug.
There are a variety of reasons why you may find yourself needing to change the author of a post in WordPress. There are also many ways to do so, which can present its own challenges. You’ll need to determine which method is the best choice for your situation.
To help you decide, we’ve looked at five different routes you can take to update an author’s name for one or more posts in WordPress:
- Change a post’s author to another existing user.
- Add a new author and assign existing posts to them.
- Remove or hide the author name from your WordPress posts.
- Update an author’s display name in WordPress.
- Bulk change post authors on your site.
Related Articles

How to Change Fonts in WordPress (And Change Size, Color, Optimize)

How to Monetize a Blog (13 Profitable Ways)

5 Things More Important for Your Content Than Content-Length
How to Add a Professional Bio in WordPress with About Author
Having professional bios or author information displayed in WordPress can be very important. It allows you to showcase an author and gives them credit for the work that they have done. This is handled several ways in WordPress, one of which is by using the About Author plugin.
There are a number of different ways to display author information in WordPress. You can use Gravatar , another WordPress authors plugin, or build full bio pages from scratch using the WordPress editor.
Today, I am going to show you how to use a smooth plugin in order to fill out display detailed author profiles on any WordPress post or page.
Why Display Authors in WordPress?
Displaying authors in WordPress has a few different benefits. Not only are you properly giving credit to the author of the post, but you are also allowing them to get their name and information out there for readers to see.
Oftentimes, website owners who hire writers to write content will allow them to submit an author bio that includes things like:
- Website URL
- Social Media Profiles
- Links to Content
Of course, these are just some examples of what can be included in an author’s bio. More complex author bios in WordPress may include a full page of information, background, photos, work history, and much more.
You can create these bios using several different methods as described above. However, today I am going to show you how to do it using a plugin. Let’s dig right in.
About Author

About Author allows you to build full author profiles and display them anywhere on-site using shortcodes that are generated each time you build a profile.
You can build small, compact profiles and show them at the end of articles. However, you can also build full, stylish profiles and add those to any post or page as well.
The plugin allows you to use multiple shortcodes on multiple posts and pages. So, if you want to list several author profiles in one spot, or on one page, then this plugin has you covered. You can also use multiple widgets to display authors in a sidebar or other widget area of your WordPress website.
It is lightweight and will not slow your website. The plugin has quite a bit of functionality built-in. Some of that includes features like:
- Complete Author Profile
- Author Name
- Description of Author
- Author Website
- 2 Author Templates Built-In
Simply put, this plugin gives you everything you need to create customized bios with tons of features and easily display them on your WordPress website.
Note: The plugin does have a pro version. It does include quite a bit more functionality. If this is something you are interested in, then feel free to give it a look. However, the tutorial below is based on the free version of the plugin.
How to Add a Bio in WordPress
Step 1: install and activate the plugin.
In order to use the plugin, you first need to install and activate it. You can do this by jumping over to the Plugins page of the WordPress admin dashboard.
Simply use the search field provided on that page and search the plugin by name. Once you see it pop up, install and activate it from there.

Step 2: Go to Author Settings
Once the plugin has been installed and activated, you need to access the main settings page before you add your first bio in WordPress.
To do this, click on About Author > Author Settings, located on the left-side menu area of the dashboard.

You see that this is now an available option for you after the plugin has been installed and activated.
Step 3: Configure the About Author Settings
At this point, you should be on the main settings page for the plugin. There are just a few things to configure how you want.

Go ahead and make your author selections and template layout configurations here. These are pretty basic and simply lay the groundwork for using the plugin.
Click the “Save” button when you are finished to apply all the changes.
Step 4: Add a New Author
Now you are ready to add a new author. This will be the first of many you add. Click on the “Add New” tab that is located on the left-side menu under the main plugin menu area.

This takes you to the author bio page where you can add a new bio and create your first shortcode to display it.
Step 5: Configure Your Author Bio
You can see that there are several great options available to you on the author bio editor page. Let’s get started.
First, add a bio title and select a template.

Now, scroll down a little and select the profile image you want to use, along with the layout.

Scrolling down a little more will take you to layout settings, color options, and name text settings.

Now go ahead and add the Website Text and Description Text for the bio. This is where a lot of the meat of the bio is handled.

Almost finished.
Scrolling down a little more, you will see the social link settings, colors, and size. Go ahead and fill those out appropriately based on what you want to be displayed.

Finally, if you know how to add custom CSS and want to do that, you can use the box at the bottom of the page to do so.

When you are satisfied with how you built your bio, go ahead and publish it to make it live.
That’s it! You have built your first bio. Go ahead and repeat this process as many times as you want to create other bios.
Note: All of your bio shortcodes that are generated will be house under the “All Shortcodes” section of the plugin.

To add a bio anywhere on the site, simply copy and paste the relevant shortcode where you want that bio to display. Easy as that.
What Additions Does About Author Pro Plugin Add?
As I stated above in a brief note, this plugin does have a pro version. The free version does have plenty of options, as we showed above. However, in many cases, the pro version may give you a little something extra that is important to what you are doing.
The main additions to the pro version of this plugin include:
- A Responsive Design
- 10 Author Templates
- 12 Social Media Profiles
- Over 500 Google and Generic Fonts
- Multiple Author Image Layouts
- Tons of Display Options For All Content
- Multiple Widget Display Options
- Live Preview in Admin Dashboard
So, if these are some things you feel are important, then go ahead a take a quick peek at the pro version.
Final Thoughts
Displaying author profiles and bios does not have to be a difficult process. There are multiple solutions, but the About Author plugin makes it simple, easy, and fun. You can build as many author bios as you want and easily display them on a post or page using a generated shortcode .
I hope this tutorial showed you how easy it is to add a professional bio in WordPress using the plugin above. It has everything you need in one place to properly display content.
Have you tried building author bios using different methods? Did you find that using the editor alone was more difficult?
Related Posts
How to install wordpress – the complete guide to wordpress installation, how to create a new category and move a post to a different category in wordpress, leave a comment cancel reply.
Your email address will not be published. Required fields are marked *
This site uses Akismet to reduce spam. Learn how your comment data is processed .
May 20, 2024
How to Change Author in WordPress: 4 Simple Methods (Including Classic and Block Editors)
When multiple people write for your WordPress site, you will need to change a post’s author from time to time. You might want to use an alias for multiple authors or assign an editor to a post instead of a writer.
This article will explain four different methods of how to change author in WordPress. You will learn how to change authors for multiple and individual posts on Classic Editor and WordPress Gutenberg .
Download All in One WordPress Cheat Sheet
How to Change the Author in WordPress Using the Block Editor
Important! Note that you can only assign existing posts to registered users.
Before proceeding, add a new WordPress account and give it the Author user role and permissions.
If you use the WordPress Block Editor , change the author via the Edit Post menu. As an administrator, log in to the WordPress dashboard and follow these steps:
- In the dashboard, go to Posts → All Posts .

- Select the post you want to change the author of, and select Edit .

- Click the gear icon in the top right of the post editor screen.

- Navigate to Post → Status and Visibility in the sidebar.
- Find Author and select a new username from the drop-down list.

- Click Update to save your changes.
Instead of changing authors, you can also hide them using the WP Meta Date Remover plugin. Simply activate the plugin to hide your posts’ metadata, including authors, dates, and categories.
How to Change the Author in WordPress Using the Classic Editor
The steps to change WordPress author using the Classic Editor are similar to Gutenberg. However, you need to enable the Author configuration panel first:
- Navigate to Posts → All Posts .
- Find the post you wish to tweak and click Edit .
- In the editor, click the Screen Options menu to expand it.
- Ensure that the Author option is selected.

- Find the Author panel
- Click the drop-down menu and pick a new author name from the list.

- Select the Publish tab and click Update .
How to Change the Author in WordPress Using Quick Edit
This WordPress feature makes it easy to change posts authors within a single screen. This method is ideal if you want to change multiple posts individually.
This feature is available and works similarly using the Block and Classic text editors. Here are the steps to change the author of an existing post using the Quick Edit feature:
- Hover over the post you wish to tweak and select Quick Edit .

- Choose a new author name from the drop-down menu.

- Select Publish to apply the changes.
How to Change the Author of Multiple WordPress Posts
Changing the author of an individual post can be time-consuming if there are many posts you wish to edit. Thankfully, you can change multiple WordPress posts’ authors at once.
WordPress’ Bulk Actions feature lets you simultaneously edit multiple posts’ settings, including changing authors. Here are the steps to change multiple posts’ authors in bulk:
- Go to Posts → All Posts .
- Select the posts you want to change the authors of by selecting the check mark box.
- Click Bulk Actions . From the drop-down menu, select Edit → Apply .

- Click the Author drop-down menu and select a new user.

- Click Update to confirm.
This feature only lets you assign one new author at a time. To assign multiple authors for different posts, repeat the previous steps.
You can also change the author of various posts attributed to the same user. However, this involves changing the author’s display name instead of assigning another existing user.
Ensure you have the administrator user’s role. Then, follow this instruction to change the author’s display name:
- Go to Users → All Users .
- Hover over the user and choose Edit .
- Find the Name section. Optionally, change the author’s name in the designated fields.
- Expand the Display name publicly as list and select a new name.
- Click Update User .
How to Change the Author Archive Slug in WordPress
Aside from changing the post’s author name, you may want to edit their archive page’s slug . In short, a slug is part of a URL that specifies your content’s information.
When you create a new post in WordPress, the slug will be automatically generated based on the permalink settings.
In the case of the archive page, WordPress names it after the author’s username and doesn’t let you edit it by default.
Thankfully, you can edit the author’s archive slug using a plugin. Here is how to do it using the Edit Author Slug WordPress plugin:
- Download and install the Edit Author Slug plugin.
- On your WordPress sidebar, go to Users → All Users .
- Hover over the user and select Edit .
- In the Edit User window, scroll down to the Edit Author Slug section.

- Select one of the listed slugs or enter a custom one.
- Click the Update User button to save your changes.
After you change the author archive slug, set up a redirect link to the new URL. This allows visitors to land on the new page when visiting the old URL
Important! Changing the URL of your WordPress site may affect search engine optimization (SEO) . Create a redirect to ensure the search engine crawler can access the new page, preserving site ranking.

If your WordPress site has multiple writers, you may want to change the author of a post for various reasons. Thankfully, there are several ways to do just that.
Note that you can only assign a WordPress post to an existing author. So, you must create a new user account first before assigning a new author.
Change the author of a single post via the editor menu or the Quick Edit feature. To change multiple posts’ authors simultaneously, use WordPress’s Bulk Edit feature.
You may also need to change the author archive page slug. For this task, use the Edit Author Slug WordPress plugin and set a redirect to the new permalink.
We hope this article helps you understand how to change a WordPress post author. If you have any questions, don’t hesitate to leave a comment below.
How to Change Author in WordPress FAQs
Here are frequently asked questions about how to change the author in WordPress posts.
Does Changing the Author of My WordPress Post Affect SEO?
No, changing the author of a WordPress post may have a minor impact on SEO if the author has a strong personal brand or following. However, it’s unlikely to have a significant effect on rankings, as search engines prioritize content quality and relevance over the author’s name.
How Do I Add Another Author to My WordPress Post?
Go to the post editor, click on the Document tab, and under the Author section, select the additional author from the drop-down menu. If the author is not listed, you can create a new user profile and assign the role of Author .
How Do I Change the Author Display Name in WordPress?
Go to Users → Your Profile in the dashboard. Then, under the Name section, update the Display name publicly as option to your preferred name. Click the Update Profile button to save the changes.

Aris Sentika
Aris is a Content Writer specializing in Linux and WordPress development. He has a passion for networking, front-end web development, and server administration. By combining his IT and writing experience, Aris creates content that helps people easily understand complex technical topics to start their online journey. Follow him on LinkedIn .
Related tutorials

15 Jul • WordPress • Plugins •
10 best WooCommerce affiliate plugins to start an affiliate program
Choosing the right WooCommerce affiliate plugin can boost your marketing efforts and drive significant sales growth. With many options available,...
By Kotryna Kiviliene
21 Jun • WordPress • Customization •
Using the WordPress Command Palette to Work With Faster and Smarter
If you’re a WordPress user, you might be overlooking something that makes working with WordPress more efficient than you thought possible – the...
By Bud Kraus
12 Jun • WordPress • Themes •
15 Best Free WooCommerce Themes to Enhance Your Online Store
WooCommerce is an excellent eCommerce plugin for starting an online business on WordPress. It’s free, yet offers robust eCommerce features for all...
By Jordana Alexandrea
What our customers say
Leave a reply cancel reply.
By using this form you agree that your personal data would be processed in accordance with our Privacy Policy .
How To Add an Author Bio Box to Your WordPress Posts
- February 29, 2020
- Tony Teaches Tech

Hey there! Some links on this page may be affiliate links which means that, if you choose to make a purchase, I may earn a small commission at no extra cost to you. I greatly appreciate your support!
In this quick tutorial, you’ll learn how to add an author bio box to the bottom of your WordPress blog posts. This can be something as simple as a short blurb about who you are to introduce yourself to your readers.
By doing this, you’ll increase engagement by automatically linking to other pages on your website.
Install the Ad Inserter Plugin
You’ll need to install the Ad Inserter plugin by Igor Funa . You can also find the plugin from your WordPress dashboard by going to Plugins > Add New > and search for “ad inserter”.
If you are using the GeneratePress theme , you don’t need to install a plugin. Instead, you can add a Hook under Appearance > Elements > Add New Element and paste in the HTML code below.
While this isn’t specifically an author bio box plugin, it does exactly what we need it to do. Plus, it’s smart to limit the number of WordPress plugins you install so your website runs fast. The Ad Inserter plugin allows me to not only add an author bio box, but also insert affiliate disclosures .
After installing and activating, find Ad Inserter in your list of plugins and go to the plugin’s settings page.
Meet the Author Bio Box
Within the large text box on the plugin’s settings page, copy and paste the following code. Modify the title between the <b> tags and your author info between the <p> tags as necessary.
The above code generates a “meet the author” box that looks like this.

The great thing about this chunk of code is that it’s mobile friendly. If necessary, you can also change the max-width value from 623px to whatever your mobile breakpoint is set to. If you’re not sure, just play around with how the author bio box looks on various screen sizes.
Ad Inserter Plugin Setting
Next, we need to configure a few settings to make sure the author box shows after the content of your blog post. There are four setting we need to change according to the screenshot below:

- Rename the block of code to Author bio
- Enable PHP code execution
- Select After content for the insertion type
- Save Settings 1 – 16
Now, you can go to a blog post and see the meet the author box below the last paragraph of your article. You can change where the box shows up by selecting a different insertion location.
Choose Your Headshot Image with Gravatar
The final step is to choose your headshot image. We do this with Gravatar which is built into WordPress.
From the upper-right corner of your WordPress dashboard, click where it says Howdy > Edit My Profile > and in the Profile Picture section, click the link that says You can change your profile picture on Gravatar .
Here, create a Gravatar account with your WordPress admin email address and upload your headshot. It might take a few minutes, but eventually when you refresh your blog post, you’ll see your headshot appear in your WordPress author bio box.
For more cool ways to use the Ad Inserter plugin, check out my tutorial on inserting affiliate disclosures to your blog posts .
If you have any questions about the Ad Inserter plugin or adding an author bio box to your website, let me know in the comments below.
- WordPress Plugin

With a strong software engineering background, Tony is determined to demystify the web. Discover why Tony quit his job to pursue this mission. You can join the Tony Teaches Tech community here .
3 Responses
How to make this for many authors? There are many names and bio
The author avatar/picture is dynamic and will work for multiple authors. A more complete example can be found here https://www.wpbeginner.com/wp-tutorials/how-to-add-an-author-info-box-in-wordpress-posts/
Is it possible to make one word of the text in the affiliate disclosure into a link – to take the reader to the blog disclaimer page? Thank you in advance!!
Leave a Reply Cancel reply
Your email address will not be published. Required fields are marked *
Save my name, email, and website in this browser for the next time I comment.
Ultimate Blocks
How to add an author bio in wordpress posts (without a plugin).
Uzzal Raz Bongshi

Have you ever been impressed by the author’s bio? Adding an author bio can significantly enhance your readers credibility and engagement. An author bio not only make an introduction with your readers to the person behind the content but also helps to built trust and a deeper connection.
If you don’t know how to add one, then you’re in the right place. Here I’ll show you how to display the author bio box in WordPress. The author bio box is a small section that allows you to display information about the author of the post with social media profiles.
In this tutorial, we will cover three easy ways. So let’s get started.
Method 1: Using the Block Editor
Method 2: using an author bio box plugin, method 3: using custom code, adding an author bio box in wordpress.
There are several ways to add an author info box in WordPress. You can add the author info box by using the block editor, plugin, custom code, etc. Let’s see the block editor option first.
To show author bio box, make sure you have author biographical info written. If you don’t know, then follow below steps.
Step 1: Write Author Bio
navigate to the Users -> All Users page. Now click on the user’s ‘Edit’ button.
A new page will open, scroll down to the ‘Biographical Info’ section. In this section, add all the information of the author. You can also add HTML in this field to add links.
If the author has no profile picture, tell the author to set it from Gravatar . Finally, click on the update user, and user information will be saved.
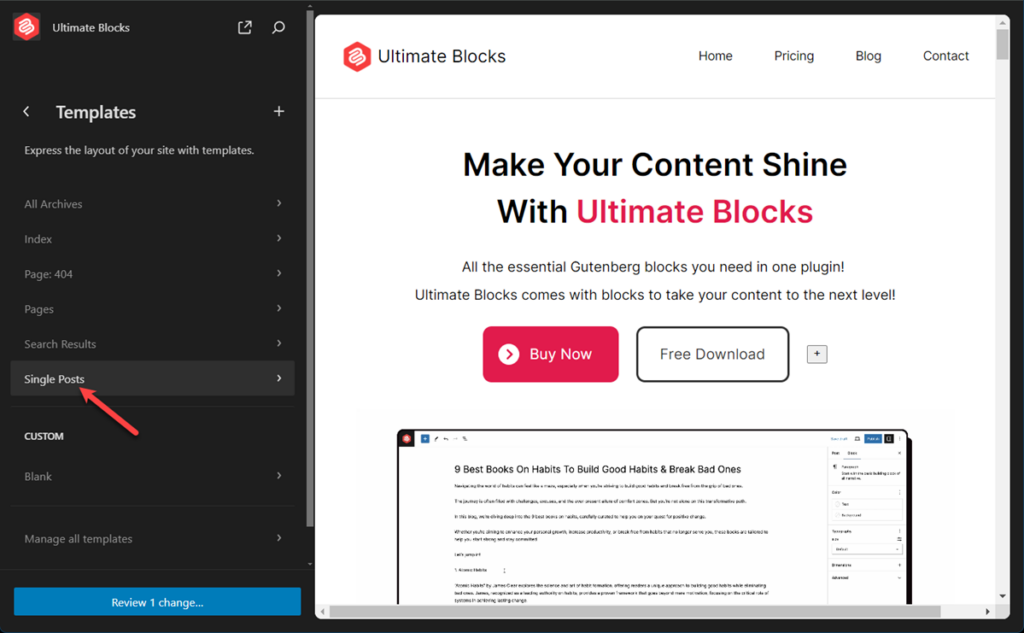
Step 2: Open ‘Single Post’ Template
Navigate to Appearance -> Editor.
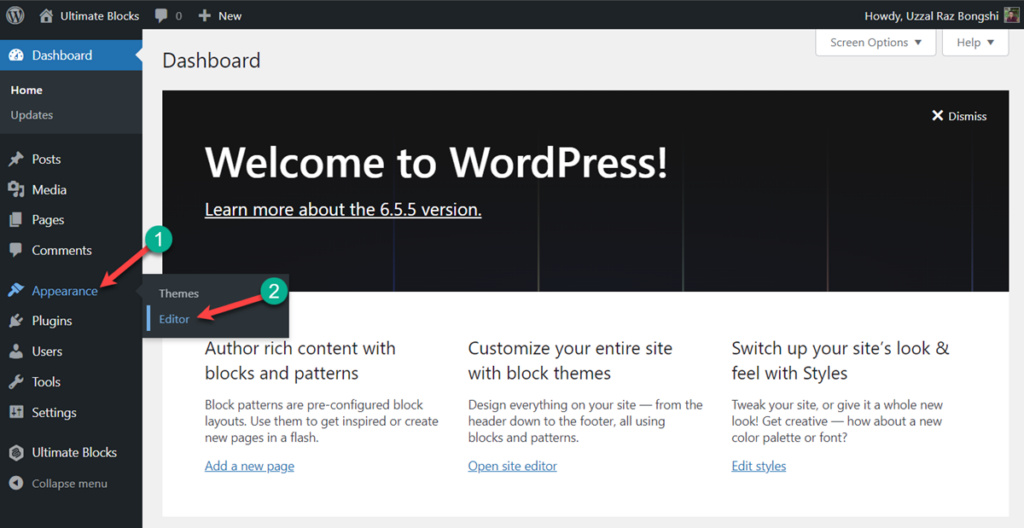
Click on Templates.
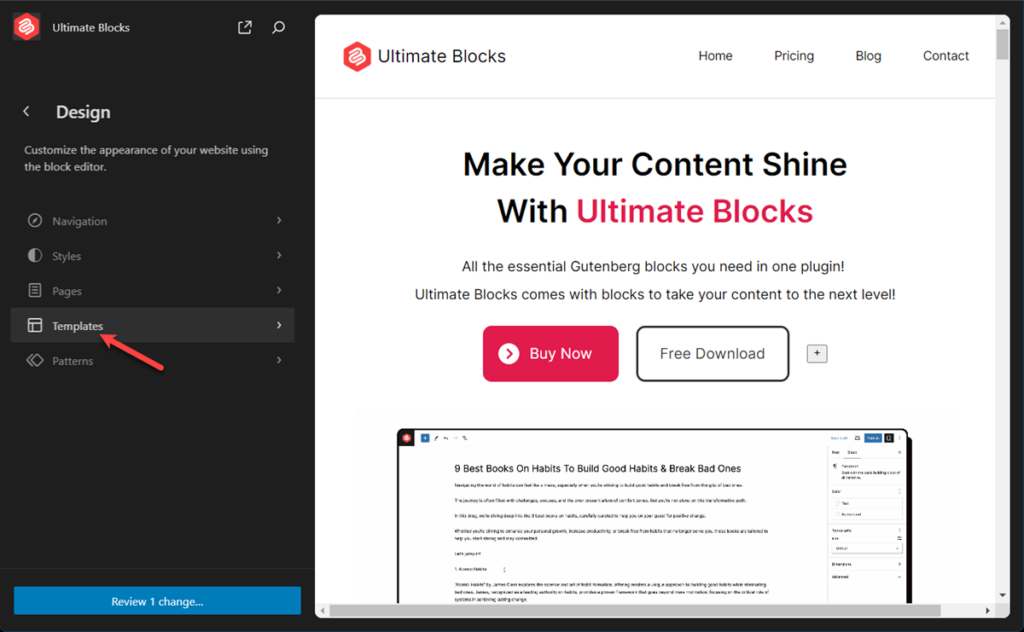
Hit ‘Single Posts’.
Step 3: Add Author Bio Block
Now, you will see the single post template. Click anywhere in the template and it will be expanded.
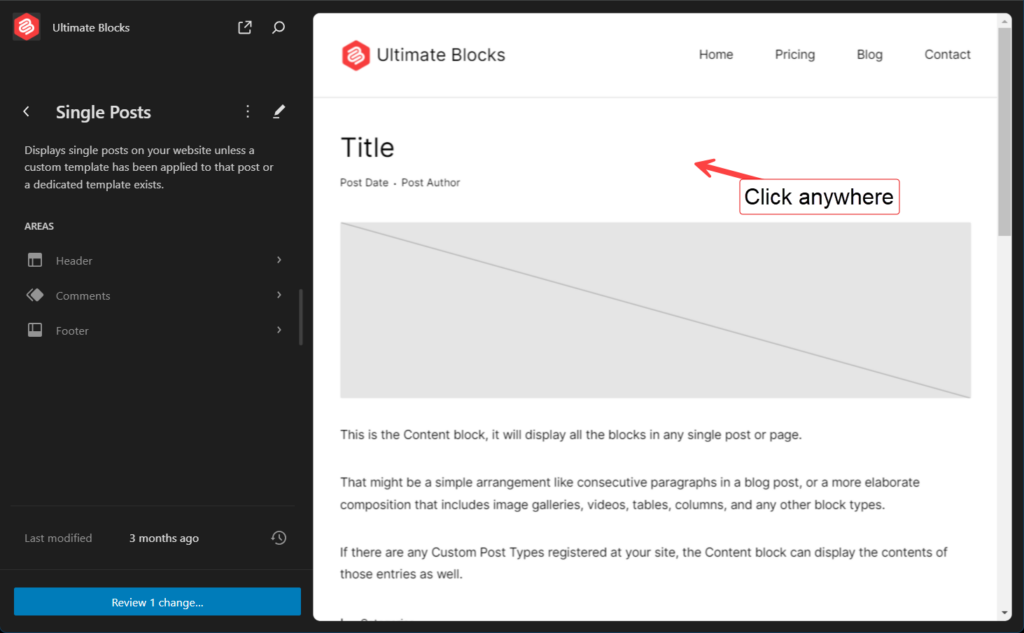
Scroll to the area, where you want to add author bio box. For me, I am going to add author bio box above comments.
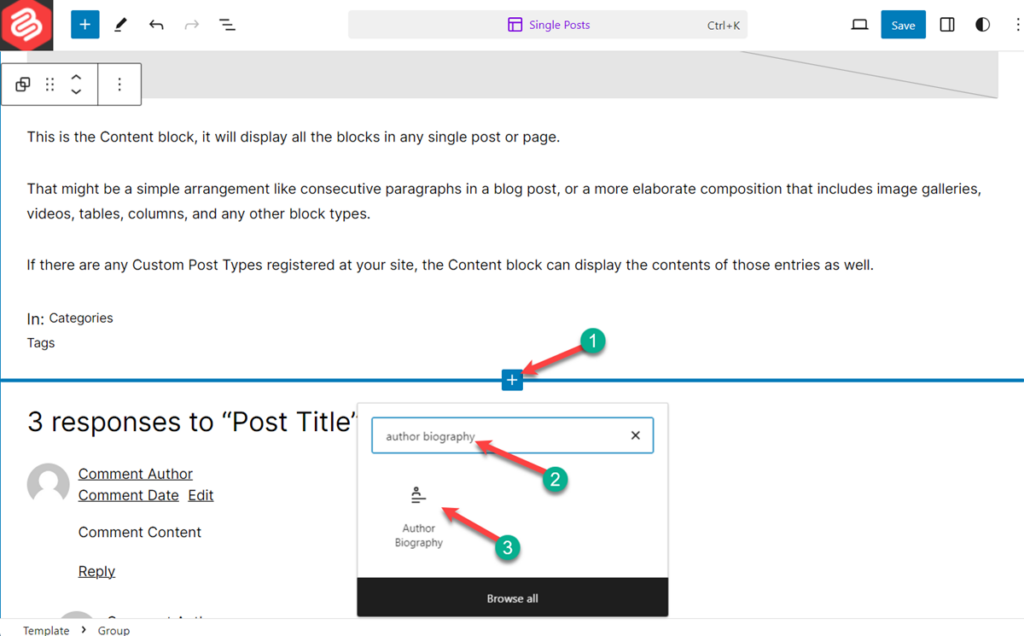
Click on the add block button and search for ‘Author Biography’ block. Insert the block by clicking on it.
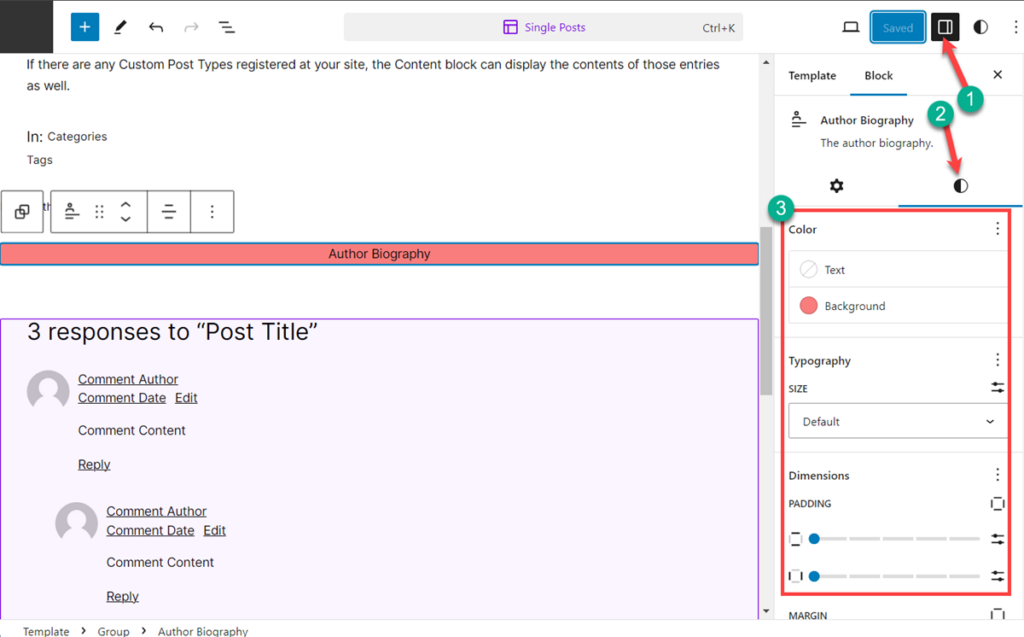
If you like you can also customize your author bio box from the block settings.
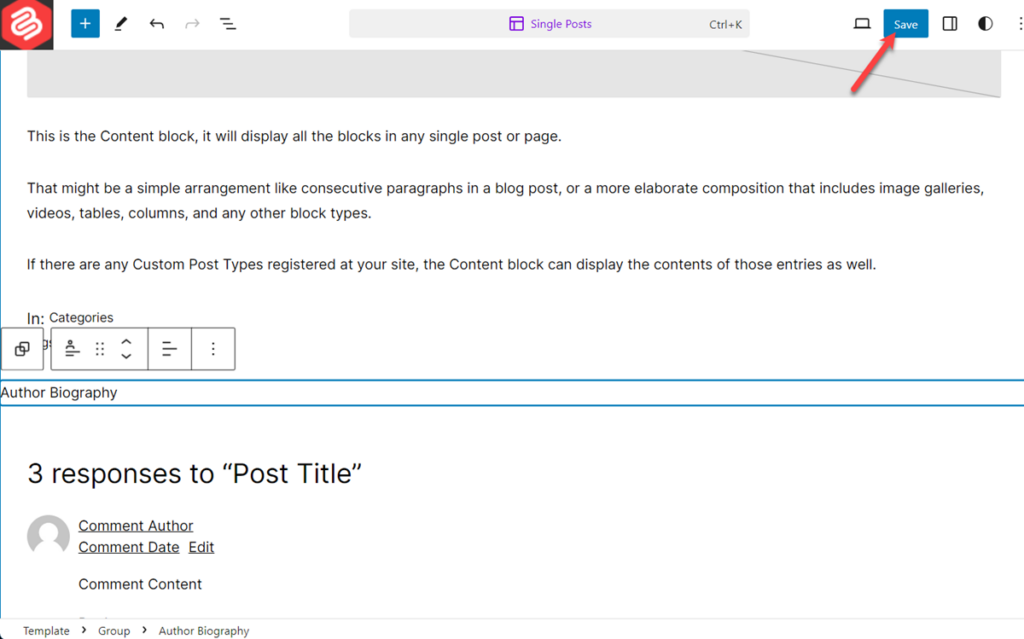
Finally, hit ‘Save’ button.
Now, you will have a author bio box in your post’s.
If you are using a theme that doesn’t come with an author info box, then you can use this method. In this method, you are going to need a plugin named Simple Author Box .
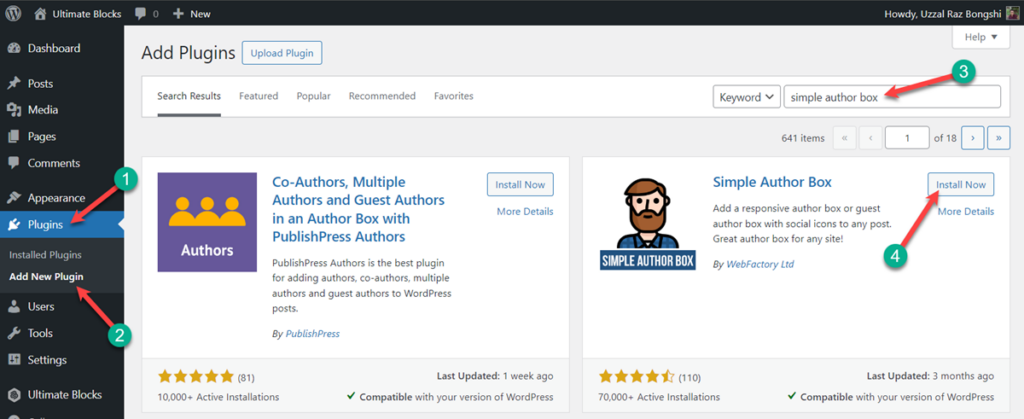
Install & activate the plugin. If you like to customize any settings then navigate to Appearance -> Simple Author Box.

From here, you will be able to customize your author box.
To add a author box, your don’t need to do anything. After the activation of the plugin, an author box will be automatically added to every post.
Here’s a look of the author box.

In this method, you need to add code to your website.
First, navigate to ‘ Appearance -> Theme Editor ’ then click on Theme Functions(functions.php)

Now copy the below code and paste it in the editor.
Don’t forget to update the file. Now the styling of the info box is left.
Navigate to Appearance -> Customize, then click on Additional CSS

Now paste the following code in the editor.
Then click on the Publish button above. Now you got a designed author info box.
No matter which method you follow here, you will always be able to add an author info box very easily. But it is recommended to use method one, as it is easy and doesn’t involve any hardship. If you face any problem, ask without any hesitation. If you have liked this article, then help us by sharing this article.
Updated on 2024-06-30 (Uzzal Raz Bongshi)
- Updated ‘Method 1’Method 1: Using the Block Editor’.
- Updated ‘Method 2: Using An Author Bio Box Plugin’.
- Updated meta description.
- Updated intro.
- 6 Best Author Bio Box WordPress Plugins
- How to Add New Users & Authors in WordPress
- How to Add an Author Photo in WordPress
- How to Change the Author of A Post in WordPress
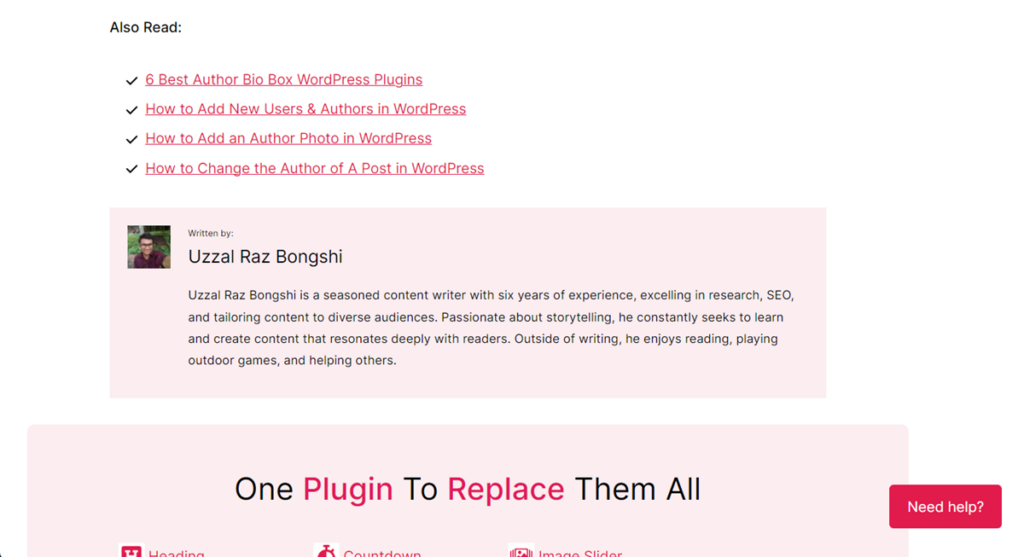
Written by:
Uzzal Raz Bongshi is a seasoned content writer with six years of experience, excelling in research, SEO, and tailoring content to diverse audiences. Passionate about storytelling, he constantly seeks to learn and create content that resonates deeply with readers. Outside of writing, he enjoys reading, playing outdoor games, and helping others.
One Plugin To Replace Them All

Call To Action

Click To Tweet

Content Filter

Content Toggle

Image Slider

Progress Bar

Social Share

Star Rating

Styled List

Tabbed Content

Testimonial

Leave a Reply Cancel reply
Your email address will not be published. Required fields are marked *
- Free Themes
- Premium Themes
- Free Course
How to Add an Author Bio to Your WordPress Posts

Disclosure: This post may contain affiliate links. Purchasing a product through one of these links generates a commission for us at no additional expense to you.
Give yourself some credit!
A bio is an excellent addition to your posts and will boost your personal brand and build your influence online.
If you regularly have guest posters, an author bio box after the content is a great way to reward them with a place to promote their own offers and social profiles. It also makes it clear who wrote each post on your site.
In this post, you’ll learn how to add an author bio to the posts in your WordPress site using the Simple Author Box plugin.
How to add an author box
If you’d rather watch a video than read the instructions, watch this video tutorial from our Youtube channel:
Subscribe to Compete Themes on Youtube
The first step is to install and activate the Simple Author Box plugin.

What’s great about Simple Author Box is that it’s easy to configure, and the templates look nice with most themes.
To get started, search for “simple author box” via the Plugins menu to locate and install it.

Once you install the plugin, you’ll find a new Simple Author settings menu added to your admin dashboard.

In the settings menu, you can see a preview of how the box will look. It’s using fake filler content by default, including all of the available social icons. Up top are links to edit your profile, change your avatar, and edit the social icons.
Below the author box preview, you’ll find settings to control where it displays on your site and customization options for the colors, typography, and general appearance.
Here’s a close-up of the display settings:

And here’s a quick look at the color options available:

Before you adjust any settings, the author box already looks good.

Style options are nice, but the most important thing to update is the bio displayed in the box.
How to edit your bio
What I like about Simple Author Box is that it doesn’t create its own system for managing bios. Rather, it integrates with the options already built-into WordPress.
To edit the info in the author box, you can visit the Users > Your Profile menu. Scroll down a bit, and you’ll find the Biographical Info section included in all WordPress sites.

While WordPress normally requires you to use Gravatar for your profile image, the Simple Author Box plugin also adds a custom image uploader for your avatar.
You can also see above the social media icons section, where you can quickly add links to any social profiles you’d like to promote in your author box.
Once you’ve entered a custom bio, uploaded a profile image, and added links to your social profiles, your author box will be complete.
Author bio added
While some themes, like Challenger , include an author box, most themes don’t have this feature. In this case, you can easily add an author bio to your posts with a plugin like Simple Author Box.
Once you’ve got Simple Author Box installed, it takes only a few minutes to fill out your profile.
If you want to keep improving your site, follow our ultimate guide on WordPress site customization .
I hope this guide helped you get a beautiful bio displaying on your WordPress website, and thanks so much for reading.
Get a beautiful beginner-friendly theme
Browse our collection of free WordPress themes
Running smoothly on thousands of websites right now.
- Skip to primary navigation
- Skip to main content
- Skip to primary sidebar
WPBeginner - WordPress Tutorials for Beginners
WPBeginner » Blog » Plugins » How to Add an Author’s Photo in WordPress
How to Add an Author’s Photo in WordPress
Last updated on April 12th, 2024 by Editorial Staff | Reviewed by: Syed Balkhi
Do you want to add an author’s photo in WordPress?
By default, most WordPress themes show the author’s gravatar as their profile picture. However, authors may want to replace this gravatar with another image.
In this article, we will show you how to add an author’s photo in WordPress.

When Do You Need to Add an Author’s Photo in WordPress?
If you run a multi-author WordPress site, then you may decide to add an author info box in WordPress posts . These author bio boxes typically show the author’s profile photo, a brief bio, and link to their website or social profiles.
By default, most WordPress themes use the person’s Gravatar as their author photo. However, sometimes you may prefer to use a different image for the author photo.
As a WordPress website owner, you may even have rules about the kind of photos you want to show in your author bio boxes. For example, maybe you require your authors to use a professional headshot.
If the author’s Gravatar doesn’t meet your rules, then you may want to edit their profile and upload an image that better suits your WordPress blog .
With that in mind, let’s see how you can add an author’s photo in WordPress.
How to Add an Author’s Photo in WordPress
The easiest way to add an author photo in WordPress is by using the PublishPress Authors plugin. This plugin lets authors edit their own profile and author photo by adding a new ‘Author Profile’ area to their WordPress dashboard.

It also gives site admins the power to edit the author’s profile, including changing their photo.
First, you’ll need to install and activate the PublishPress Authors plugin. If you need help, then please see our guide on how to install a WordPress plugin .
Upon activation, head over to Authors » Settings . You can then go ahead and click on the ‘Display’ tab.

Once you’ve done that, open the ‘Layouts’ dropdown and choose a layout that includes an author photo.
The default layout is ‘Boxed.’ This shows the author’s information in a box, complete with their author photo.
The ‘Centered’ layout is similar to boxed, but with all of the author’s information centered inside the author bio box.
‘Inline with avatar’ and ‘Simple List’ are both layouts that include space for an author photo. Here’s an example of the Simple List layout.
Just be aware that those two layouts don’t have space for a bio. Even if the author has added a bio, it won’t be shown on your website.
After choosing your layout, click on the ‘Save Changes’ button. You can now visit your website to see the author’s photos on your WordPress posts and pages.
Anyone who has registered on your site with the Author role will now be able to upload a photo using the ‘Author Profile’s settings in their WordPress dashboard.
How To Change an Author’s Photo in WordPress
As an admin, you can also use PublishPress Authors to change any of the individual author photos that appear on your website. This is useful if an author chooses a photo that isn’t a good fit for your site.
To change an author’s photo, simply go to Authors » Authors .

You will now see a list of all the authors who are registered with your WordPress blog.
From here, you can click on an author’s ‘Edit Author Profile’ link.

Then, just click the ‘Image’ tab.
By default, PublishPress will try to find a gravatar that’s linked to the author’s email address . To use a different author photo, click on the ‘Custom image’ radio button.

Once you’ve done that, click on ‘Select Image.’ You can now choose any image from your WordPress media library, or upload a new image.
Then, just click on the ‘Update’ button.
Your website will now use this new image as the author’s photo.
PRO TIP: If you like this tool, we recommend checking out the entire suite of PublishPress plugins . They offer a lot of really powerful tools that can help you produce the best content possible.
We hope this article helped you learn how to add an author’s photo in WordPress. You can also go through our comparison of the best WordPress membership plugins , or see our expert guide on how to install Google analytics in WordPress .
If you liked this article, then please subscribe to our YouTube Channel for WordPress video tutorials. You can also find us on Twitter and Facebook .

How to Easily Move Your Blog from WordPress.com to WordPress.org

How to Install Google Analytics in WordPress for Beginners
")
Revealed: Why Building an Email List is so Important Today (6 Reasons)

How to Fix the Error Establishing a Database Connection in WordPress
Disclosure: Our content is reader-supported. This means if you click on some of our links, then we may earn a commission. See how WPBeginner is funded , why it matters, and how you can support us. Here's our editorial process .
About the Editorial Staff
Editorial Staff at WPBeginner is a team of WordPress experts led by Syed Balkhi with over 16 years of experience in WordPress, Web Hosting, eCommerce, SEO, and Marketing. Started in 2009, WPBeginner is now the largest free WordPress resource site in the industry and is often referred to as the Wikipedia for WordPress.
The Ultimate WordPress Toolkit
Get FREE access to our toolkit - a collection of WordPress related products and resources that every professional should have!
Reader Interactions
59 comments leave a reply.
Syed Balkhi says
Jul 19, 2024 at 2:24 pm
Hey WPBeginner readers, Did you know you can win exciting prizes by commenting on WPBeginner? Every month, our top blog commenters will win HUGE rewards, including premium WordPress plugin licenses and cash prizes. You can get more details about the contest from here . Start sharing your thoughts below to stand a chance to win!
Dennis Muthomi says
Jun 16, 2024 at 2:34 pm
The solution that I have REALLY wanted!! I have been looking for ways to add an author photo without using Gravatar option. You always the best solution! THanks WPBeginner.
Arshad says
Aug 10, 2023 at 9:10 am
Always got a perfect solution! Thumbs Up..
WPBeginner Support says
Aug 11, 2023 at 8:39 am
Glad to hear our guide was helpful!
Rachel says
Jul 6, 2020 at 1:08 pm
I have followed these steps, but there is still no option to add a profile pic – it just shows the ‘blank’ image and no button to ‘add image’. Any ideas?
Jul 7, 2020 at 1:41 pm
You would want to reach out to the plugin’s support if the add image option is not available and they should be able to assist.
Amanda Don Williams says
Sep 14, 2019 at 4:42 am
Thanks…. awesome plugin very easy to use…
Sep 16, 2019 at 10:05 am
Aditya says
Apr 4, 2019 at 12:46 am
Hi, i have a user registration page on which user registers as a contributor. Then he/she can submit blogs for moderation. However, on that registration page i want users to add their photos mandatorily so we don’t have to rely on them adding it later from their profiles or do the task ourselves.
Apr 4, 2019 at 11:27 am
To set a requirement like that, you would want to take a look at our article here: https://www.wpbeginner.com/plugins/how-to-create-a-custom-user-registration-form-in-wordpress/
Sébastien says
Mar 4, 2019 at 12:38 pm
How to show avatar on the frontpage? This method only show on the loaded pages.
Mar 4, 2019 at 1:44 pm
If you are displaying your posts on your home page instead of a static home page then you would need to reach out to the support for your specific theme to edit the theme’s template
Jan 2, 2019 at 7:55 am
Thank you! Been trying to work this out for ages!!
Jan 2, 2019 at 3:10 pm
Dec 24, 2018 at 6:11 pm
If anyone else is wondering why your photo isn’t showing up in author bio, it may be because there’s also separate settings for the plugin itself. You have to check the box that says, “display author avatars”. At first all I did was went to the author settings and uploaded the photo not realizing that there was extra settings for the plugin itself.
Alexander says
Apr 6, 2018 at 10:12 pm
awesome resource….my picture appeared in a twinkle of an eye.thank you very much
Sep 15, 2016 at 7:59 pm
Doesn’t seem to show my picture. It uploads and shows in the Author page in Word Press but not showing on the actual site. Help!
nestor fuhr says
Apr 25, 2015 at 7:49 pm
after proving a dozen plugin…. this is the only that works correctly. Thank you
Adey Jones says
Apr 7, 2015 at 5:53 am
I am using this plugin on a site that also uses co-authors plus as some posts are written by 2 people, but this plugin only allows 1 author image to display, how can I amend the userphoto_the_author_photo() to display both authors images in 1 post?
Apr 22, 2014 at 9:23 am
Hey, just wanted to add that there’s a function for exactly that:
<?php echo get_avatar( get_the_author_meta( 'ID' ), 32 ); ?> 32 being the size of the image but that’s optional. If you only want to add a picture of the author, this function seems better than a plugin. Source: https://codex.wordpress.org/Function_Reference/get_avatar#Return_Values
Constantin Colac says
May 25, 2015 at 6:06 pm
Thanks mate. I was actually surprised people go for a plugin instead of a function..
Sep 9, 2016 at 2:27 pm
Is there a way around having to deal with Gravatar.com or whatever? It seems crazy it isn’t just a built in feature of WordPress.
Simon Green says
Mar 27, 2014 at 12:13 pm
Just use gravatar! Tried this plug-in and was not satisfied. I don’t want the author photo pasted everywhere that there’s a post, multiple times on the site. No good.
Keith Agnew says
Mar 9, 2014 at 6:48 pm
Awesome Plugin. Worked perfect immediately. Thanks!!!
Raj Kumar says
Dec 31, 2013 at 10:19 am
Thanks, but can we do it without any plugin?
Keme Kenneth says
Nov 18, 2013 at 12:18 pm
Simple Local Avatars is working fine for me. Thanks all.
Nov 10, 2013 at 1:42 am
Thank you!!!
heny astuti says
Jun 17, 2013 at 10:00 pm
it works..tx
Juan Manuel says
May 21, 2013 at 2:38 pm
Hello! Thanks for sharing this info. However I am not sure if this is what I need. When I write a post on my website ( http://juanmacarlupu.com.ar/blogdetraduccion ) at the end of each post it says: “This article was written by: Juan Manuel Macarlupu Peña” and a default picture and mi bio. I have tried everything on earth (or that’s what I think) and I cant change that default picture. Can you help me with that?
Editorial Staff says
May 22, 2013 at 8:25 am
It might be easier to just use Gravatar – https://www.wpbeginner.com/beginners-guide/what-is-gravatar-and-why-you-should-start-using-it-right-away/
May 22, 2013 at 9:44 am
I think it goes without saying that it worked! Thank you sooooo much!!! Regards,
May 10, 2013 at 5:18 am
Hi Can you help, I had this plugin working fine on a test site but not on the live site – the user pictures appear in the user back-end but not on the post or author pages?
Does anyone have any ideas why this would happen? thanks Kat
May 12, 2013 at 8:08 am
Extremely hard to tell without looking at the site.
Shonda Rogers says
Mar 16, 2013 at 1:48 pm
So I have to download the plugin to get the image to show on google searches, am I correct? I have everything else setup and linked with google+ profile, email verification etc. I was thinking the image would show up from my google+ profile. But it sounds like I need the WP plugin as well. Can you please confirm?
Mar 17, 2013 at 11:44 pm
No, this is for WordPress itself. If you want to show author picture next to google search results, then you need this article:
https://www.wpbeginner.com/wp-tutorials/how-to-get-googles-verified-authorship-for-your-wordpress-blog/
Nida's Beauty Bag says
Jan 28, 2013 at 11:00 pm
Is there any way that a non wordpress user can use an image while commenting on my blog??? whenever people comment on my blog , if they are non-wordpress user no display picture is shown
Jan 29, 2013 at 8:15 am
Most WordPress themes come with Gravatar support. If your users are signed up with Gravatar, then their picture will show up. Like your picture did in this comment.
https://www.wpbeginner.com/beginners-guide/what-is-gravatar-and-why-you-should-start-using-it-right-away/
Jun 18, 2012 at 6:45 am
A better and more updated plugin: Simple Local Avatars (search wordpress plguin reposiroty)
No need of editing any files.
Jul 20, 2012 at 3:48 pm
Joey, that plugin you posted is useless and very broken. The User Photo plugin is the best one out there right now and works perfectly!
Nov 12, 2012 at 2:39 pm
joey is the best, it’s working perfectly… thanks dude…
Emilio says
Dec 30, 2012 at 10:52 am
Thanks Joey! Simple Local Avatars was awesome! For anyone downloading this plugin, there plugin settings are not in the “settings” or “tools” section. Just upload the plugin and go to the “Users” section. The upload form will be in the users information where you put the bio, email, and other social media contact info.
Apr 23, 2013 at 4:18 am
Thanks Joey, it works… perfect… saved me from frustration
Jennifer says
Mar 22, 2014 at 5:15 am
Thank you! It realy works fine!
Apr 18, 2012 at 2:03 am
The image is not displaying in all user lists. Can any one help ?
wpbeginner says
Apr 19, 2012 at 6:19 am
@Sham You have to make sure that you have the php code to display the image in your template.
caspian says
Dec 15, 2011 at 2:29 pm
We have a theme that has a registration/profile page on the front end. any idea on how to add the upload image option to the front end? thanks.
ushackers says
Oct 17, 2011 at 1:49 pm
really helpful post
ArsalanTosifi says
Sep 17, 2011 at 10:11 pm
I have successfully uploaded user photo plugin. Successfully imported image. But image does not display. What is missing?
Rahoof PM says
Apr 7, 2012 at 5:57 am
Apr 9, 2012 at 7:31 am
@Rahoof PM @ArsalanTosifi You do not have the code in your theme to display it. You have to add the user photo code. Click on the plugin page, they have the code there.
Ruth Martin says
May 17, 2011 at 9:09 am
Hi! Thank you for this post and plugin! I have been searching for something and am so happy to have found my answer! Thanks again! Ruth M
Mar 24, 2011 at 3:03 pm
Any idea on how to integrate this with bbpress discussions?
Mar 26, 2011 at 10:15 am
Nope. We haven’t really looked into bbPress yet.
Jan 12, 2011 at 8:26 am
I have about 200 jpeg photossaved, and I would like to put them in the userphoto folder and have them become that person’s photo, and the user can come back and change it if they wish. I tested this out by placing a photo admin.jpeg in the folder, but it did not take effect. do you know how I can do a mass upload of photos for userphoto?
Jan 18, 2011 at 9:55 am
You can’t just FTP stuff because the value is also stored in the database. It is better to ask all your editors to add the pictures by themselves.
Omaha Homes says
Mar 20, 2010 at 3:23 am
Yeah this is nice good wp plugin to share author’s picture.
TeShadow says
Jan 23, 2010 at 8:20 am
Thankyou for this Useful plugin
Jan 15, 2010 at 1:01 pm
Thank you for highlighting this plug-in.
Luke Jones says
Dec 31, 2009 at 7:49 am
Thank you, this is one thing that has stressed me out.
Leave A Reply Cancel reply
Thanks for choosing to leave a comment. Please keep in mind that all comments are moderated according to our comment policy , and your email address will NOT be published. Please Do NOT use keywords in the name field. Let's have a personal and meaningful conversation.
Copyright © 2009 - 2024 WPBeginner LLC. All Rights Reserved. WPBeginner® is a registered trademark.
Managed by Awesome Motive | WordPress hosting by SiteGround
I need help with…
Popular searches:
Support and Account Management Panel Login
- Help Center
- 877-595-4HUB (4482)
- Support Chat
Contact Support:
- Create a Website
- Hosting Features
Knowledge Base
- Domain Names
Community Q&A
- Browse Questions
- Ask a Question
- User articles
Learning Corner
- OpenCart 1.5
- Premium Website Builder
- PrestaShop 1.4
- PrestaShop 1.5
- Website Design
WordPress Education Channel
Intermediate, adding an author biography with the author bio wordpress plugin.
Adding an author biography is a great way to add personalization to your WordPress site . There are several plugins available that can add this functionality to your site. As an example, we'll use the Author Bio plugin we found in the plugins directory on the WordPress website. This particular plugin can even pull in the author's Gravatar (Globally Recognized Avatar) image .
A Post Without a Biography
Here's an example of a post before we have added an author biography.

Not very exciting or personal. So, let's add that biography so our visitors can get to know us a little better.
Installing and Configuring the Author Bio Plugin
To begin, please search for and install the Author Bio WordPress plugin. If you're not familiar with how to install a WordPress plugin, please see our Searching for and Installing Wordpress Plugins article if you need any help with this step.
After we've installed our plugin, we'll want to navigate to the settings for this plugin ( Settings > Author Bio ). There are several settings you can adjust here, but for this example we want to make sure the option to "Show authors Gravatar" is selected. Feel free to try different settings and test them out on your site to find what works best for you.

Since this plugin pulls the biography information from your WordPress user Biographical Info, we'll want to make sure it has the information we want to show on our site. Navigate to the Users area of your WordPress dashboard, view All Users and select the appropriate user to edit. Usually this will be the Administrator, but you can also set this up for multiple authors if you like.

Once you have made any needed updates to the user Biographical Info, click the Update Profile button to save your changes.
A Post With a Biography
Now let's see how our post looks with our new Author Bio plugin:

This adds a much more personal touch to our blog so our readers can get to know us a little better.
We value your feedback!
new! - Enter your name and email address above and we will post your feedback in the comments on this page!
Post a Comment
| Name: | |
|---|---|
| Email Address: | |
| Phone Number: | |
| Comment: | |
| Submit | Please note: Your name and comment will be displayed, but we will not show your email address. |
News / Announcements
Help center login, related questions.

Help Center Search
Current customers.
| Email: | Ticket: | ||
|---|---|---|---|
| Call: | 877-595-4HUB (4482) 757-416-6627 (Intl.) | Chat: |
Ask the Community
Not a customer.
- Sign up today!

- Website Examples
- Website Builder Comparisons
- Hosting Comparisons
- WooCommerce
- HTTP Errors
- WordPress Errors
How to Add Authors in WordPress: A Step-by-Step Guide

Role definitions
User permissions, using the wordpress dashboard, editing author information, author profile pages, display name and bio, author credit and visibility, collaboration tools, co-author management plugins, updating author profiles, delete or unassign authors, author data preservation.
Managing multiple authors on your WordPress blog can significantly enhance the variety and volume of content, enriching the reader’s experience.
When you open your website to contributions from diverse individuals, you create a dynamic environment where fresh perspectives are shared regularly. This collaborative approach keeps your audience engaged and shares the workload among several users, making it more manageable for you to maintain consistent publishing frequency.
This article shows you how to add authors in WordPress so that you have control over who can draft articles, upload media , and publish posts on your website.
How do I change the author name for a post in WordPress?
How do I add a custom author name in WordPress?
How do I add a second author in WordPress?
What is the process to edit an author's page in WordPress?
Where are authors in WordPress?
How do I add an author block in WordPress?
Understanding user roles in WordPress
When managing a WordPress site, it’s crucial to understand user roles and permissions to maintain order and security. Proper understanding helps you delegate tasks efficiently while ensuring users only have access to the functions necessary for their role.
In WordPress, there are several predefined user roles , each with its specific capabilities and permission levels. When you add authors in WordPress, you’ll set the user’s permissions by choosing an appropriate role.
- Administrator : Has absolute control over the entire website, including the ability to manage other users’ roles and capabilities.
- Editor : Can publish, edit, or delete any posts, including those written by others, and manage categories , tags, and links.
- Author : Can publish and manage their own posts only.
- Contributor : Can write and manage their own posts but cannot publish them.
- Subscriber : Can manage their profile and has the least capabilities, mainly reading posts.
In addition, you can create custom roles with specific capabilities using plugins like User Role Editor . This gives you a high level of control over specific permissions for each user.
Some plugins automatically create custom roles . For example, WooCommerce creates the Customer and Shop Manager roles.
User permissions denote what each role can or cannot do within your WordPress site. These are integral in maintaining a secure and well-organized site.
Permissions can be adjusted when:
- You need to limit or grant access levels for certain tasks.
- You are assigning a role that aligns with the user’s responsibilities.
- You are customizing roles to create a more granular level of access.
For example, while an Editor can modify posts, a Contributor does not have permission to publish them. Each role is tailored to fit the necessary tasks without overextending access.
How to add authors in WordPress
To expand your site’s content creation capability, it’s essential to understand how to add authors in WordPress.
The process is manageable through the WordPress dashboard .
To add new authors in the WordPress Dashboard, navigate to the Users section and select Add New .

Here, you will be required to fill out essential information for the author’s user profile:
- Username : Choose a unique username for the new author.
- Email address : Enter a valid email where the author can receive notifications.
- Password : Automatically generate a strong password, which you can then share securely with the user.

After providing the details, click the Add New User button to add the new author in WordPress.
When you manually add a new user at Users > Add New User, you’ll have the option to send the new author an email notification about their new account.

Simplify WordPress with 10Web
Skip and automate manual work with 10Web Managed WordPress Hosting. Optimize your WordPress website effortlessly.
Customizing author profiles
Customizing author profiles in WordPress is essential to showcase your writers effectively. This involves personalizing display names, biographical information, and author pages to create a more engaging reader experience.
When you’re ready to update your author’s information, navigate to Users > All Users in your WordPress dashboard.

Click Edit under the author’s name you want to customize. In this area, you can change various details, including the following:
- First Name and Last Name : Enter the author’s real name.
- Nickname : This could be a pseudonym or another name they are known by.
- Email : A valid email address to which the user will be associated.
- Website : Add a URL to the author’s personal website or portfolio.

WordPress links the email address to a Gravatar account to display a profile image. Ensure the email used for the WordPress user is the same as the Gravatar account to show the author’s image accurately.
Your author’s profile page is a space that collects and displays all their contributions in one place.
To enhance the default author page, consider using a plugin like Ultimate Member or Simple Author Box.
Ultimate Member helps design a unique look for author profiles that stands out from the basic WordPress author profiles.
The Simple Author Box plugin is also handy for a more sophisticated display. It allows you to add additional details and social media profiles to the author’s info box that appears with their posts.
You’ll find an option to select a display name publicly within the author’s user profile.
This can be their real name, nickname, or any combination you have added to their profile.
Below that, you’ll have a large text area for Biographical Info . Here’s what to keep in mind:
- Keep bios concise and relevant, including professional credentials or personal tidbits that add to the author’s identity.
- Format the bio with headers or lists if necessary to ensure readability.
- Remember to click the Update Profile button when you’re done editing to update the author’s profile on your site.
How to add multiple authors in WordPress
With the right strategies and tools, you can maximize the potential of a multi-author blog by giving due credit to each author, facilitating smooth collaboration, and effectively managing co-authors.
It’s crucial to ensure that each piece of content properly credits its author(s) to foster a sense of ownership and accountability.
- Assign specific roles , such as Contributor, Author, or Editor, within your content management system, giving appropriate permissions and responsibilities.
- Display author profiles with their social media links and bio to enhance visibility and personal branding on the blog.
- When applicable, include multiple authors in a single post to showcase the collaborative effort.
For a multi-author blog, maintaining consistent content quality requires effective coordination. Here are some tips:
- Utilize editorial calendars to align the publishing schedule and avoid content clashes or gaps.
- Implement style guides and content strategies that authors can refer to, ensuring a unified voice and standard quality.
- Encourage communication platforms like Slack or Trello to discuss drafts and provide feedback before publication.
Leveraging plugins can be immensely beneficial in streamlining and managing multiple authors.
The PublishPress Authors plugin is particularly effective; here’s how you install and configure it:
Step 1: Install the plugin
- Navigate to your WordPress admin panel.
- Click Plugins > Add New .

- Click Install Now , then Activate .
Step 2: Configure the plugin
- After activation, go to Authors > Authors .
- Select Registered Author or Guest Author.

Step 3: Add multiple authors to posts
- Open the desired post in the editor.

Managing and maintaining author data
Effective management of author data is crucial for maintaining a professional and organized WordPress site. This includes when you add authors in WordPress, but don’t forget to also keep author profiles up to date and remove authors when necessary. This ensures data preservation while your website’s team and content continue to grow and change.
As an administrator of a WordPress site, you can update author profiles through the Users section in the WordPress dashboard.
Navigate to Users > All Users , hover over the author’s name, and click Edit . You can update the author’s name, email, biographical information, and password here.
To change the username, which is not directly editable in the WordPress dashboard, follow this comprehensive guide on how to change WordPress username .
It’s important to keep author profiles current to reflect their current role and contributions.
To delete an author, go to Users > All Users , hover over the user, and click Delete .

If an author has content on the site, WordPress will prompt you to either delete all content or assign it to another user.
Contributors who have yet to publish content can delete their profiles without affecting existing content. However, be cautious when deleting users, as this may impact your content strategy and site history.
Preserving their content is essential when an author leaves or their role changes.
Before deleting them, you can reassign their posts to another author via the bulk actions feature in Posts > All Posts .

For authors with valuable content, create a guest author profile to retain their work without maintaining an active user account.
Always back up your site before significantly changing user roles or deleting users to prevent data loss.
This preserves the integrity of the site’s content and author attributions.
When you learn how to add authors in WordPress, it not only enriches your content offering but also fosters a vibrant, collaborative publishing environment. By effectively utilizing WordPress’s robust user role management, you can streamline the process of adding authors and ensure that each contributes their best work under the appropriate permissions.
Whether adjusting author details, adding new user roles, or integrating author-focused plugins, the steps outlined ensure that your site maintains both quality and security. Embrace these practices to enhance your site’s dynamic, cater to a broader audience, and keep your content fresh and engaging.
Skip manual work with 10Web Managed WordPress Hosting.
How to Use WordPress: A Guide to Building a Website with WordPress
Creating a website is a pivotal step for businesses, freelancers, and hobbyists aiming to establish an online presence. With a plethora of website creation tools available, WordPress stands out as a leading platform, offering unparalleled versatility and ease of use. This comprehensive guide dives deep into WordPress, distinguishing between WordPress.com and WordPress.org, and providing a step-by-step roadmap on how to…

How to Change WordPress Username: A Step-by-Step Guide
Changing your WordPress username might seem simple, but the platform does not allow users to simply edit their usernames from the profile area. Whether you want to update your username for security reasons, branding purposes, or just as a change, understanding how to tackle this process is essential for effective website maintenance. There are a few different methods to change…

How To Manage Multiple WordPress Websites
Managing a single website is a tough job. Imagine having to deal with a couple of them. Ordinary hosting platforms won’t do the trick, you need special tools or special services to be able to manage multiple WordPress sites. Should you use a WordPress Management tool to manage multiple WordPress sites? Well if you’re a WordPress developer or an agency…

What’s the Fastest WordPress Hosting [5 Hosts Compared]
According to Google, “more than half of visits are abandoned if a mobile page takes over 3 seconds to load”. This is why the tech giant applied page speed as a ranking factor in mobile searches as early as July 2018. You may be wondering: why does this matter for my business? Well, according to Google: Google equates low speed…

How to Use SFTP to Connect to Your WordPress Site
10Web supports SFTP for secure data transfer. Here are 3 simple steps to connect to an SFTP client and tips for choosing the client.

How to Change Namecheap Nameservers
Purchased a domain name from Namecheap and want to use it with our premium 👍 DNS? Follow these simple steps to see how to change Namecheap nameservers.
How to Make a WordPress Website: A Step-by-Step Guide
How to install a wordpress theme, how to delete theme in wordpress, how to install wordpress plugins: a quick guide, how to install wordpress: a step-by-step guide, leave a comment cancel reply.
Your email address will not be published. Required fields are marked *
Your email address will never be published or shared. Required fields are marked *
Email address *
Save my name, email, and website in this browser for the next time I comment.
Get a head start on website creation with AI
Create a custom website tailored to your business needs 10X faster with 10Web AI Website Builder!
AllAbout Writing and Displaying a WordPress Blog Bio

Having a solid bio or about section on your WordPress site is a must.
It doesn’t matter what industry you’re in — you need a bio to let people know who you are, what you do, and why you do it. Even if you’re in business ( especially if you’re in business), you need to give people a little bit of yourself. After all, every transaction at the end of the day is between two people, so the more you can present yourself as relatable, the better.
That’s why we’ve put together this post, to answer every question you’ve ever had about writing a blog bio and how to display it properly on your WordPress site. So, get your pencils ready and prepare to take some notes!
What Should Be Included in a Bio?
What you include in your blog bio depends a lot on what industry you’re in and what the purpose of your blog is. If you’re in real estate, your blog bio will obviously say something different and focus on different things than if you blog to support your Etsy store.
First and foremost, you should emphasize your expertise. Those who click through to read your bio will want to know why you’re blogging in the first place and why they should even bother trusting your words. Using an example will probably make explaining this easier.
So, let’s say you sell an informational product and use your blog as a supporting platform for that. Your bio should talk about what experience you have that makes you an expert in the subject matter your informational product covers. You should talk about what training you have and what successes you’ve achieved in your field.
A few “must-haves” (if they apply) include:
- Your education
- Seminars, courses, or conferences you’ve attended
- Relevant publications
- Endorsements from respected peers
After you’ve talked about your qualifications as an expert, you can transition into talking about a bit of personal information. Some general background info is also nice for readers because it gives them context and a look at who you are outside of business.
Talk about where you grew up. Talk about your hobbies or interests. Talk about how you got into your chosen field. How much or how little personal information you include is up to you but it might help to read some of of the bios on blogs of other people in your industry. What do they do? What do they emphasize? Use that as your guide.
You’ll also want to make sure the tone of your bio matches the tone of your blog, so that means if you have an all-professional voice in your posts, your bio should stay true to that. And if you have a very conversational style, don’t suddenly get rigid in your bio. Consistency is key.
Structural Considerations
There are a few structural things you need to think about when putting together an effective blog bio. Before you get a single word down on the page, you should decide whether you want to write in first person or third person.
First person is much more direct and allows you to speak directly to your readers: “I grew up in Rugby,” vs. “Tom Ewer grew up in Rugby.” A bit of a personal touch can go a long way in terms of making you relatable to your readers.
You’ll also want to think about the length of your bio. Again, this will have a lot to do with what industry you’re in. A lawyer will need a much longer bio than a boutique business owner, for instance. But you’ll need to decide if you just want a small bio in an author box below your blog posts — which we will discuss more in a moment — a full dedicated “About” page, or a combination of the two. Look to your competitors for guidance and remember that sometimes less is more.
Note: even if your bio is relatively short, you’ll still only want to display a few lines below your posts and show the rest on its own page. It’s cleaner and makes for a less cluttered page.
The Author Box
As we mentioned previously, an author box is a little space that typically displays below blog posts that offers up quick facts about a post’s author. This is especially useful if you have multiple authors on your blog.
There are many plugins available, both free and premium, that accomplish this task. Here are just a handful that we’ve found useful and that you may want to consider:
Fanciest Author Box

The Fanciest Author Box plugin by Thematosoup is a personal favorite because it does absolutely everything you’d ever want an author box to do (checkout my full Fanciest Author Box WordPress Plugin review). You can customize it to accomplish anything you want from a basic bio box to something more complex. You can add or remove tabs across the top of the author box to display more information about you like your social media profiles, your most recent blog posts, and more. We actually use a customized version of the Fanciest Author Box here on WPExplorer- checkout my author bio box below.
It also comes with built-in Google authorship integration and you can easily customize the CSS to make it match your blog theme seamlessly. Fanciest Author Box costs $10 but there is a slimmed down, free version called Fancier Author Box if you want to give it a test drive before making any sort of financial commitment.
Author Box Reloaded

If you’re looking for something really simple that still displays all of your information in a stylish way, the Author Box Reloaded plugin is a good option for you.
Your author photo and a brief bio are displayed simply and tastefully beneath each of your blog posts. You’ll need to download an extension called Author Box Reloaded to add social media icons, however, which may be a drawback for some.
Again, this is a very simple option but if you don’t need anything robust, this is a good, free way to display your bio and let people in on who you are and what you do.
Custom About Author

The Custom About Author plugin is interesting because it’s one of the few out there that doesn’t require the creation of individual user accounts. Normally, you’d have to set up different user profiles, each with its own permissions, to get an author box to work effectively. This plugin, however, allows you to set up custom profiles for exclusive use with the plugin, rather than in the WordPress dashboard itself.
You can display your bio within this plugin however you’d like with HTML and with all the social media links you’d like. It’s free and another simple way to display your bio.
Writing a compelling biography for your WordPress site is difficult. It’s hard to sum up all of your relevant experience into a short space. And making decisions about how you’d like to display that information can also be tough. But hopefully you now have a firm grasp on how to go about both writing and presenting your “About Me” info and can proceed with confidence.
What’s in your blog bio? Do you even have one? Or, is that one of your rainy day projects? We’d love to hear your take on the blog bio, what it should and shouldn’t include, and your favorite way to display it. Sound off in the comments!

WordPress eLearning Course Creation Tips & Best Practices

6 Best Automation Tools for WordPress Email Marketing

How to Track Marketing Campaigns for WordPress
Get our latest news, tutorials, guides, tips & deals delivered to your inbox.
I completely agree with having a solid bio and ‘about us’ section. In sales and marketing you quickly learn that people-buy-people. I have noticed on my own website that the ‘about me’ page gets a lot of traffic. This page converts traffic to look at my shop and buy my poetry books or merch. It’s a good idea to tell a strong story and don’t be afraid about telling people a little about your personal life. But this needs to be considered, depending on your business model and offering. Good luck!
Leave a Reply Cancel reply
Your email address will not be published. Required fields are marked *
- Share on Facebook
- Share on Linkedin
- Share via Email
How to Add a WordPress Author Bio Image
One of the most-visited pages on a website is the About Me page. When a new visitor arrives on a site and likes the content, they tend to want to know who created it so they can put a face to the name. In addition to having a great About page, having an author bio image on each of your WordPress posts helps personally connect visitors with you, your content, and your overall online brand .
You can do this with a number of plugins or services, but one of the most prominent and ubiquitous is Gravatar , or the Globally Recognized Avatar. WordPress and a number of other sites and platforms use it to add author bio images and profile pictures to posts and comments, and it is by far the easiest way that you can add a face to the byline on your content.
Subscribe To Our Youtube Channel
- 1 What is a WordPress Author Bio Image?
- 2.1 Register for and Upload Your Gravatar
- 3 Wrapping Up with Your New WordPress Author Bio Image
What is a WordPress Author Bio Image?
A WordPress author bio image is a photo or picture that appears alongside your name. This might be a traditional head shot, or it could be an image that you want to associate with your brand, such as your company logo. Depending on the type of content you’re posting, you may even opt for something informal such as a cartoon or caricature. What matters is that the user sees you exactly as you want them to.

One of the easiest ways to add an author bio image to WordPress is through the service Gravatar . In a nutshell, you sign up for a Gravatar account and no matter whose site you’re on (your own or leaving a comment on someone else’s), the same author bio image will show up for people to easily recognize you.
Gravatar is a great set-it-and-forget-it service, too. You can use the same email on any number of sites or services and still not have to worry about having to set up a profile image. That feature alone is worth taking the time to set this up.
How to Set Up Your Gravatar
The first step is to check out your WordPress user profile . Make sure that the email registered to the WordPress account is the same one that you intend to use with Gravatar. That’s how Gravatar knows that you’re you when you post or comment somewhere. To check which email is registered, you just need to go to Users – Profile (1). You could see just Profile in the sidebar depending on your permissions .

Scroll down until you find the Contact Info section and check what email (2) is registered to the account. If it’s not the one you want to use with Gravatar, change it and go through the confirmation process. Once that is done, you will see a section called Profile Picture. WordPress calls the author bio image your profile picture.
Most WordPress themes come with Gravatar integration of some kind, so click the link that says You can change your profile picture on Gravatar (3) to begin the process.
Note: the profile picture in the image above is my Gravatar that I have already set. This will be blank if you have not or if you are using an email not connected to your Gravatar account.
Register for and Upload Your Gravatar
Clicking on that link will take you to gravatar.com , so feel free to navigate there on your own at any point. If you have never used Gravatar before, you will need to press the Create Your Own Gravatar (1) button.

Doing so will prompt you to create a WordPress.com account. If you already have one, great! Just sign in with it. If not, it’s a simple process. But make sure that you use the email registered to your WordPress user account from Step 1.
You should see a variation of this screen. You can either Add a New Image (1) or choose to A dd an Email Address (2) . Since you’ve already connected the two accounts, you should be fine with the email. But it’s a simple form/confirmation to add an email.

To add the WordPress author bio image using Gravatar, click Add a New Image (1). The next screen prompts you to upload an image (3) .

Click on Upload New (3) to start the process.

Just as a reminder, Gravatar images are square, so when you choose your author bio image for WordPress, make sure that you don’t upload a gigantic 16:9 HD picture. A small square is fine.

If, however, you don’t have an already-square image, that’s fine. You can edit and crop the picture (4) on the next page. Just resize the square and check the previews to the right (5) to ensure that your new author bio image is discernable at the smaller sizes at which it will be displayed. Then just press the Crop Image (6) button.
The only thing left is that you need to choose the rating for the photo so that your site and others can display the content only to those for whom it’s appropriate.

After that, your Gravatar is ready to go!

It will automatically populate to your website and anywhere else you’ve commented with that email address (that has Gravatar enabled, that is).

Wrapping Up with Your New WordPress Author Bio Image
By adding an image to your author bio, you’re putting a face to your name. That’s a great way to connect you with your audience on a person-to-person basis. And, if you’re working on building a name for yourself, using Gravatar for your author bio image is a great way to do that.
With so much content being published online, it can be difficult to establish your identity. By adding a bio image to your WordPress profile, you immediately make yourself more recognizable – even if someone is posting similar content under an identical name.
Do you have any questions about adding an avatar to your WordPress author bio? Let us know in the comments section below!
Featured Image via Majid Nawaz / shutterstock.com

Want To Build Better WordPress Websites? Start Here! 👇
Take the first step towards a better website.

By B.J. Keeton
B.J. is a content creator for Elegant Themes from North Alabama. He is a runner, runner, gamer, and all-around geek. When he's not digging through WordPress to find new topics, he manages Geek to Geek Media for funsies in his free time and even DMs a couple of D&D games each week.
Explore Divi, The Most Popular WordPress Theme In The World And The Ultimate Page Builder

Check Out These Related Posts

- Divi vs OceanWP: Which WordPress Theme is Better? (2024)
Posted on July 19, 2024 in WordPress
WordPress provides a variety of themes that simplify website design. Two veterans in the field, Divi and OceanWP, are among the most popular. Both offer professional designs, extensive customization, and broad compatibility, among other things. But which one should you choose? This comparison will...

- Free vs Paid WordPress Themes: Pros and Cons for 2024
Updated on July 19, 2024 in WordPress
Struggling to choose between free vs paid WordPress themes for your website? You’re not alone. Free WordPress themes are a great way to save money. But their limited features and support could lead to more problems that will cost you down the road. Premium WordPress themes generally offer...

- How to Install a WordPress Plugin in 2024 (3 Methods)
Updated on July 17, 2024 in WordPress
Plugins are the lifeblood of the WordPress ecosystem. They make the CMS (content management system) unique among its peers because of the sheer extensibility they bring to the platform. Many users are drawn to WordPress because of plugins, but don’t know how to install this one or that one they...

Well explained article. Now I got an idea about how to add an author bio on WordPress and to register and create an account on Gravatar.
I have one question. Once I register on Gravatar through an email id, can I change the email anytime?

You can! You can change the email on the Gravatar account or your WP account at any point, and as far as I know there’s no limit on Gravatar emails. Just make sure you change your WP user email, too, to line up with whatever is on Gravatar.
Leave A Reply Cancel reply
- Recent Posts
- Introducing Divi AI Section Generation + Unsplash Integration
- New Divi Starter Site for Spas (Quick Install)
- Divi Resources
- Theme Releases
- Tips & Tricks
974,872 Customers Are Already Building Amazing Websites With Divi. Join The Most Empowered WordPress Community On The Web
We offer a 30 Day Money Back Guarantee, so joining is Risk-Free!
Divi Features
- All Features Explore Divi
- Divi Modules
- Divi Layouts
- Quick Sites Brand New!
- No-Code Builder
- Ecommerce Websites
- Theme Builder
- Marketing Platform
- Speed & Performance
- Premium Support
- Divi Marketplace
- Divi Hosting
- Extra Theme
- Bloom Plugin
- Monarch Plugin
- Plans & Pricing Get Divi Today
- Documentation
- Help Articles & FAQ
- 24/7 Support
- Developer Docs
- System Status
- Product Updates
- Best Plugins
- Best Hosting
- Divi Meetups
- Divi Facebook Group
- Divi Examples
- Divi Integrations
- Divi Reviews
- Community Forum
- Affiliate Program
- Terms of Service
- Privacy Policy
Copyright © 2024 Elegant Themes ®
- Social Media
How to Display Author Biography on Every Post in WordPress

One of the fast growing stops for online blogs and webpages; WordPress has been catering to more and more number of requests to start on with webpages to casual blogs. And over time the layout as well as the tools and elements of WordPress has changed and in a way improved to suit best to the user.
If you have noticed, several blogs show the details of the author who wrote that particular post at the end of the article. You might also have noticed this on TheGeeksClub:
Here is how to do it on WordPress blogs.
From going multimedia to displaying ads as well as opening up to a whole new level of CSS style sheets, possibilities with WordPress are up to the user. With such tools and twists that can be discovered with each step in the CSS style sheets, the interface can not only be made simple and minimalistic but can also in the same time have interactive elements to make it come alive.
Add Author Biography to Blog Posts
Now moving onto the crux of the write-up, we have the option of adding a small note; say the author biography at the end of each post on WordPress. Although the idea would not be of much help and use for personal and single-user blogs, but for multi-user blogs, the idea is to increase the time viewers spend on the site by providing them the user info right along with the page instead of having to navigate to ‘about the author’ page.
To set it all up, the basic need is to do a teeny-weeny change to the theme files of your blog. To simplify it, we follow the steps below…
- To begin with one must fill out the user profile completely; i.e. in the author’s user profile for WordPress, the biography field must be filled up with the information one decides to show after each post.
It is important to note that this tag doesn’t accept any parameters and you should not employ any other alteration to it.
- The next step is to add the CSS class to the stylesheet of your theme and style it as you like. Once the styling is done, we are ready to make changes to the main theme file of the blog. .authorDetails { }
Once the entry has been found, a minimal amount of alteration to it would help setup the code for the desired look.
The above code is to be placed right below the class of codes mentioned in the previous step.
- Once the codes are in place, removing the unnecessary spaces and running the blog up from the newly saved style sheets should show the author biographies below each post.
So now you can style the class authorDetails and give your author details section the proper decoration. Here is a sample for you –
This is to give your the start that you need to show post author name, image, and other details. You can go on modifying the the_author_description() tag to add custom parameters like the author’s Facebook profile, Google Plus profile, Twitter account, etc which can give your blog much more professional look as well as your reader get to associate with your authors more closely. You can also use the template tag the_author_meta() where you get all the options under the profile of an author and show them separately on the page.
Check out more useful WordPress tutorials, tricks, and tips.
You may also like
Temu affiliate program 2024: earn up to £100,000 a month, the future of workplace security: trends and innovations to watch, affordable led display rentals for conferences and weddings, about the author, nitin agarwal.
A blogger, tech evangelist, YouTube creator, books lover, traveler, thinker, and believer of minimalist lifestyle.
Popular Posts
Embracing a minimalist lifestyle: finding joy in simplicity, the role of probability and math in winning poker strategies, follow us on social media.
- WordPress Hosting
- WordPress for Agencies
- Domain Names
- Website Builder
- Create a Blog
- Professional Email
- Website Design Services
- Course Maker
- Enterprise WordPress
- WordPress Themes
- WordPress Plugins
- WordPress Patterns
- Google Apps
- WordPress.com Support
- WordPress News
- Website Building Tips
- Business Name Generator
- Discover New Posts
- Popular Tags
- Blog Search
- Daily Webinars
- Learn WordPress
- Plans & Pricing
How to Create a Link in Bio WordPress Site That Gives You Total Control

For content creators and creative professionals, organizing your web presence can be challenging. Between your website , newsletter , and social platforms (the list goes on), you need somewhere to consolidate all your content. One place where your audience can find everything you do, on every platform where you’re active.
This is where having a Link in Bio page is invaluable. In this article, you’ll learn:
- Which platforms and tools you can use to create your page.
- How to personalize your page so it’s unique to you.
- Ways to promote your new page and maximize its value.
While these simple websites may seem basic, we’ll go through everything you need to know, including some tips you might not have heard. With a little bit of strategy and creativity, you can not only launch your new page in minutes, but also promote it effectively to reach more people.
In this article:
So … What Exactly is a Link in Bio Page?
Own your home on the web, grow your audience, drive more traffic and engagement, increase your revenue, who uses link in bio pages, what should you add to your link in bio page, why create a link in bio site with wordpress, create your w.link account, preview and launch your site, changing your w.link site design with patterns, examples of link in bio patterns you can use with w.link, changing your background color, link color, and text color, changing your typography, editing link in bio on instagram, editing link in bio on tiktok with a business account, editing link in bio on other platforms, keep your page updated with fresh links, share your link in bio page everywhere you can, get creative with your link button copy, write creative social media bios and post captions, measuring performance in wordpress with jetpack, measuring performance with google analytics, you’re ready to rock with a link in bio site.
Link in Bio pages are one-page websites where you can promote links to other sites and platforms. The phrase “link in bio” was originally a common reference on Instagram, where links can only be added to the bio field of a profile, and not in individual posts.
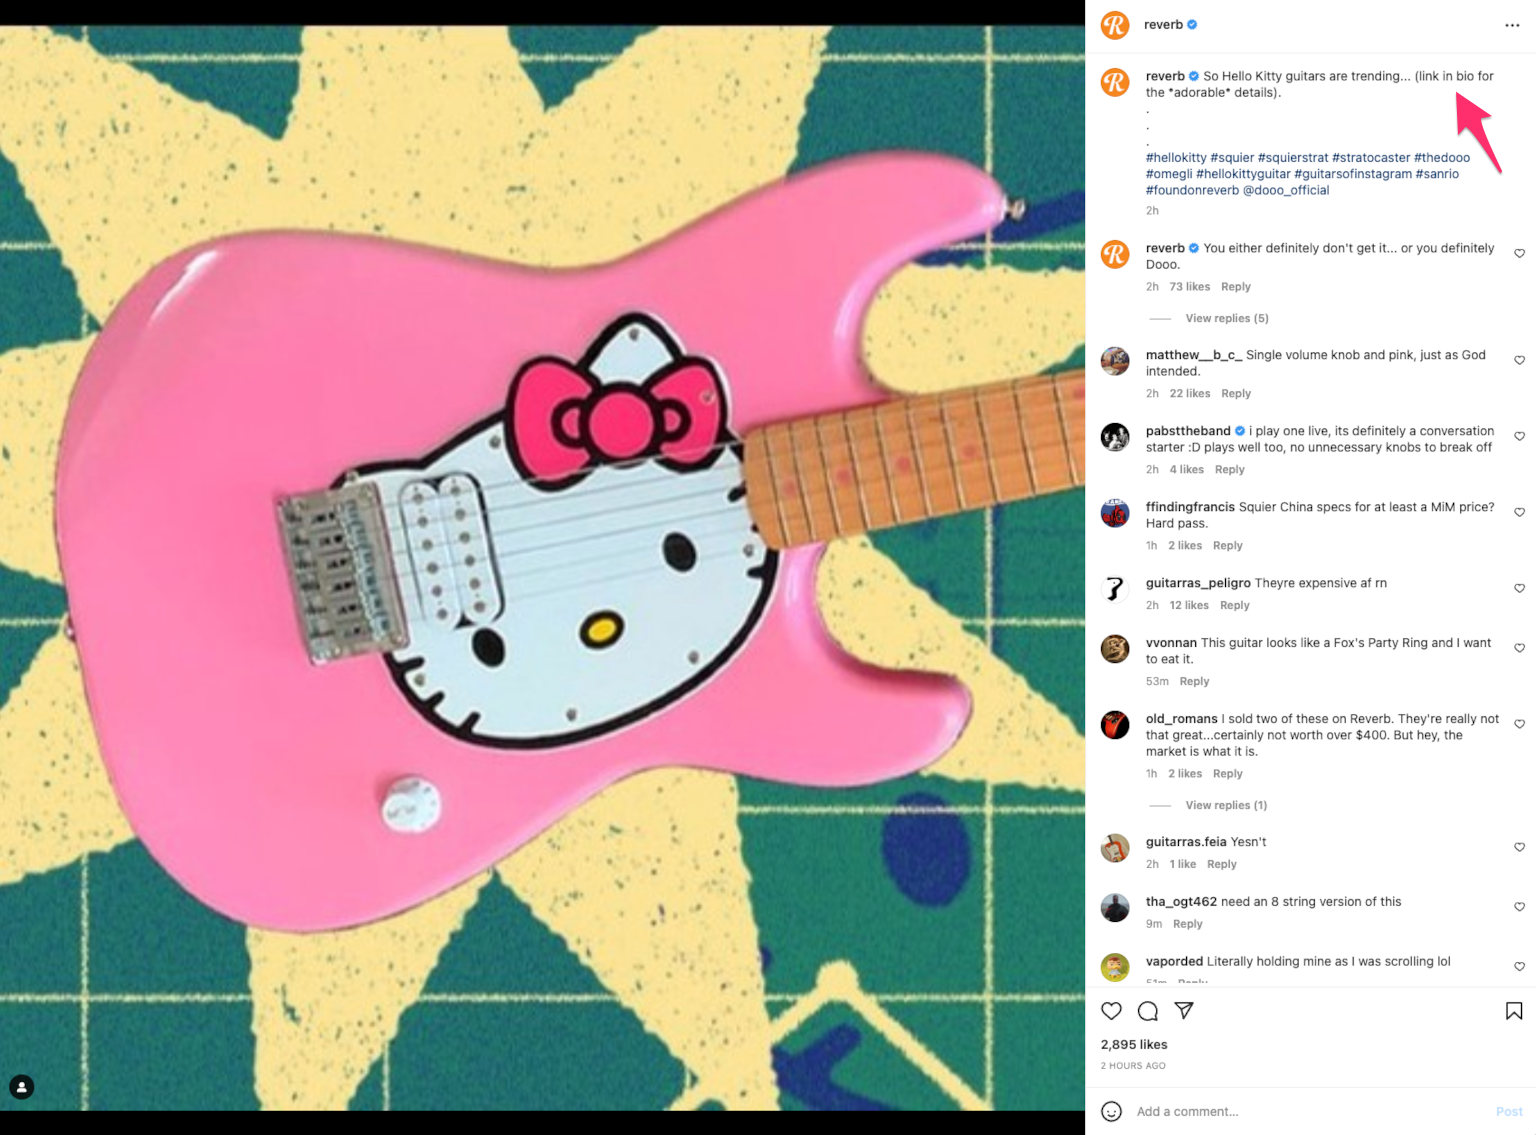
Instagram users responded by adding links to their bio and then adding the phrase “link in bio” to post captions, rotating in their newest links. This created the market for “Link in Bio” tools, which allow for multiple links to be added to one single site, which can then be placed in your Instagram bio (and lots of other places too).
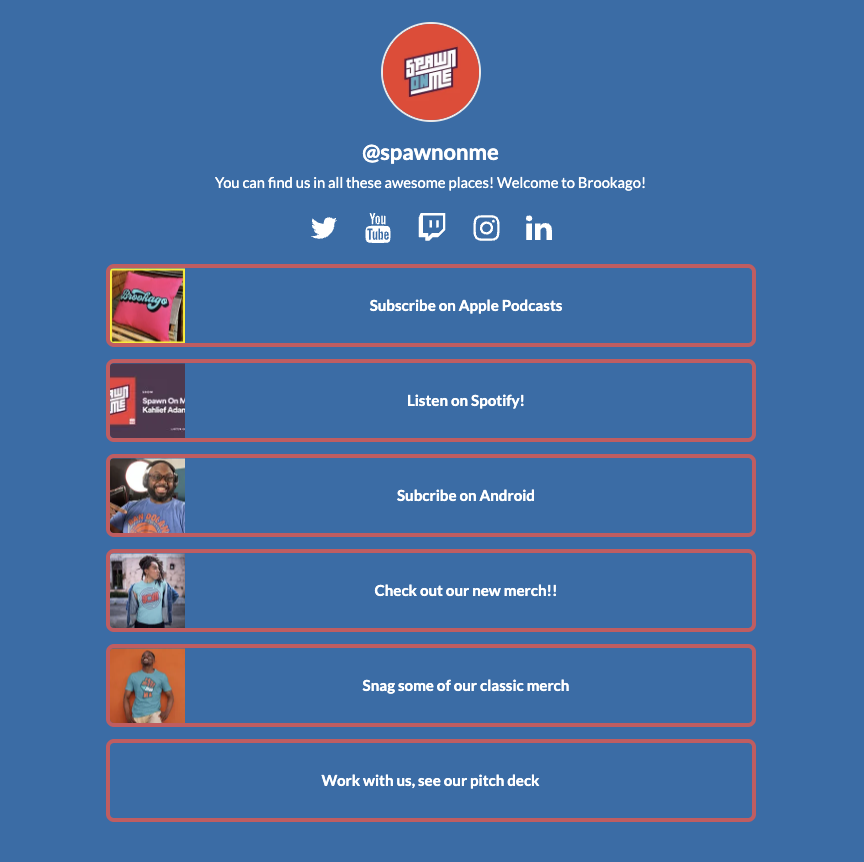
Why Do Content Creators Need a Link in Bio Site?
Having a Link in Bio page makes it easy to consolidate your web presence and promote your content in one single location. This makes sharing your work more convenient, but beyond saving time, what does this actually mean for your growth as a creator?
When you create your site with WordPress, you own your site (not a third-party or other social media platform). No matter what happens to your social networks and other platforms, you will always have full control over the content on your site.
Visitors who discover you on one platform might not know you’re active on other platforms as well. For example, if you have a podcast, a newsletter, and a YouTube channel, you could add all three of those links to your page, and cross-promote each channel everywhere. This means more subscribers and followers, everywhere that people can find you.
Growing your audience also means growing your traffic and engagement. Every post you create and piece of content you publish becomes more valuable as you’re able to reach more people (and you can easily prioritize your most important links first).
If you’re monetizing your content, then having a larger audience and more traffic naturally leads to more revenue. You can also add donation links or an online store.
All kinds of content creators and creative professionals use Link in Bio pages to promote themselves. Here are some examples (see if you can find yourself):
- Videographers
- Newsletter Writers
- Influencers
- Entrepreneurs
- Anyone creating content they want to share with the world
If you fit one (or even more) of these categories, then a Link in Bio site can be an essential tool to maximize the value of everything you’re creating.
Links may seem like an obvious answer. But what type of links? Here are some ideas:
- Your latest content that you’ve published.
- Top-performing posts that you want to promote.
- Signup pages on other platforms.
- Limited-time content.
- Partner content and products you’re promoting.
There are some other items to consider too, including:
- Profile photo that captures your personality.
- Short and sweet bio summarizing who you are and what you do.
Simple enough, right?
Choose a Link in Bio Page Builder
The first step is deciding which tool to use. There are several on the market, such as:
- w.link (this is our Link in Bio page builder, and we think you’ll like it a lot)
- ContactInBio
- Campsite.bio
We’ll be referring to w.link for demonstration purposes throughout the rest of this article, but scope out your options and choose one that speaks to you.
w.link sites come with the full power of WordPress. This means you’ll enjoy the following benefits:
- You own your site and your content.
- You can own your own domain and create a brand under it.
- You have access to amazing designs tailored to use for Link in Bio.
- Free analytics for site traffic, locations, and more to optimize your reach.
- No code needed , easy setup.
- Unlimited links to support your needs across platforms.
- Mobile and web-optimized designs.
- Ability to grow your Link in Bio page by adding an online store, donations, and more.
Create Your Own Link in Bio Page With w.link
Done reading background information? Cool, because we’re not going to make you read any more (but hopefully, it was helpful). Now, let’s build your site by walking through the following steps:
- Creating your account
- Choosing your design
- Adding your personal details
- Picking a domain
- Selecting a w.link plan
- Editing and customizing your site
Start here to create your account. You’ll see a page that looks like this (and that three-minute promise is real):

Next, you’ll see a simple account signup page:
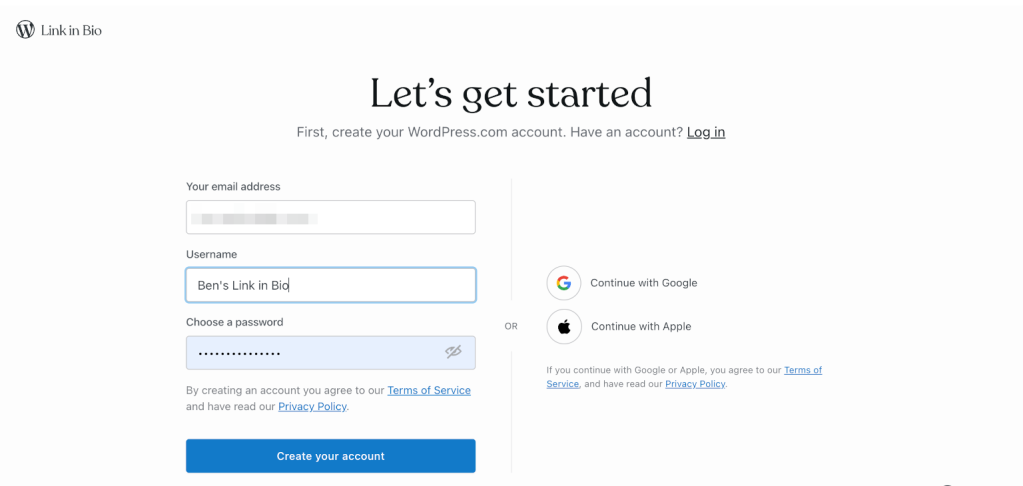
Then, you’ll choose a design to start (don’t worry if you want to change it later; switching designs is easy):
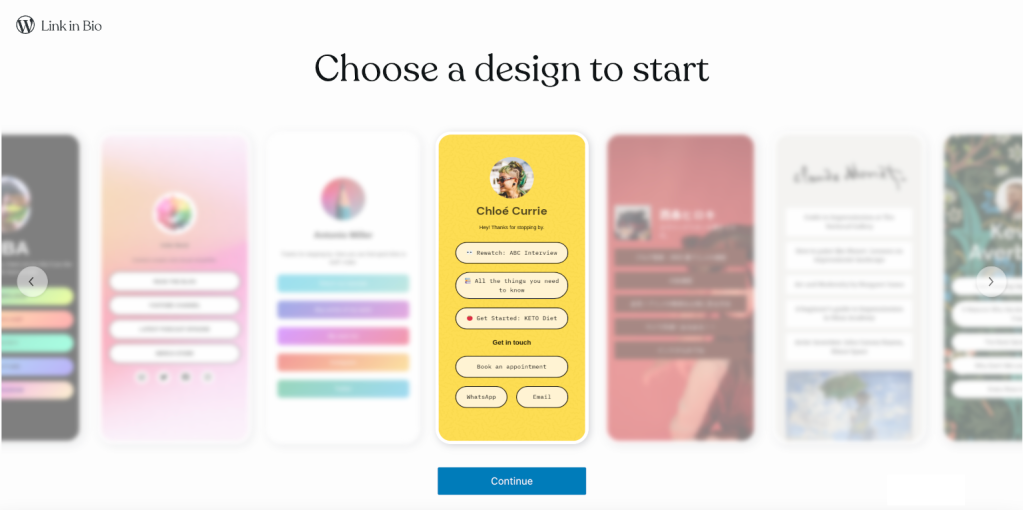
Once you’ve chosen a design, add your photo, site name, and a short description:
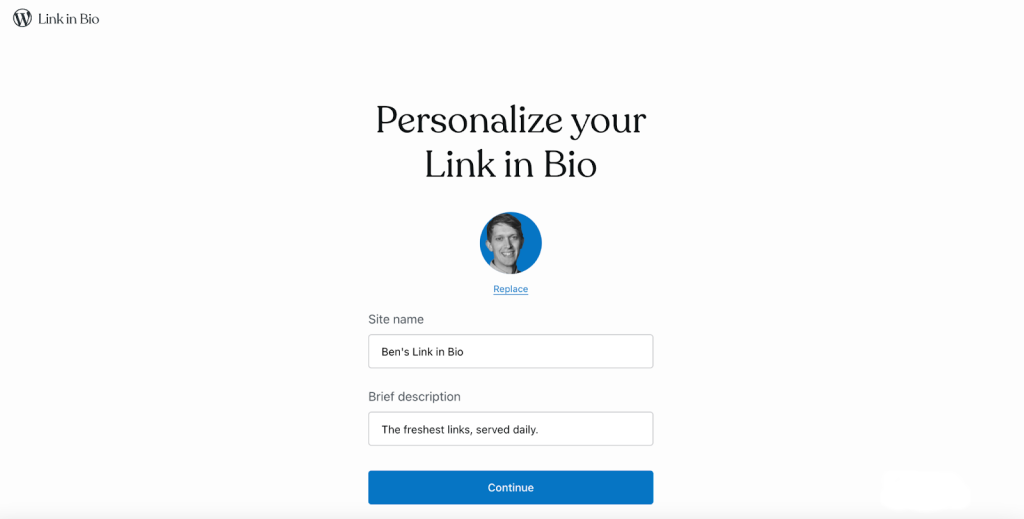
Now it’s time to choose a domain (you can select either a one-year paid domain or a free w.link subdomain):
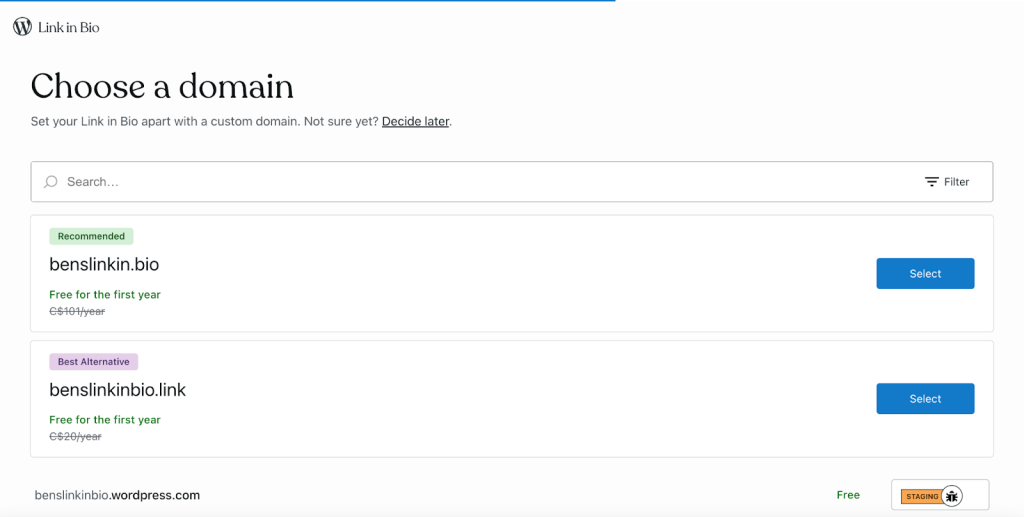
If you choose the Personal plan, you’ll get some awesome benefits, like unlimited links, advanced analytics, monetization features, and more:
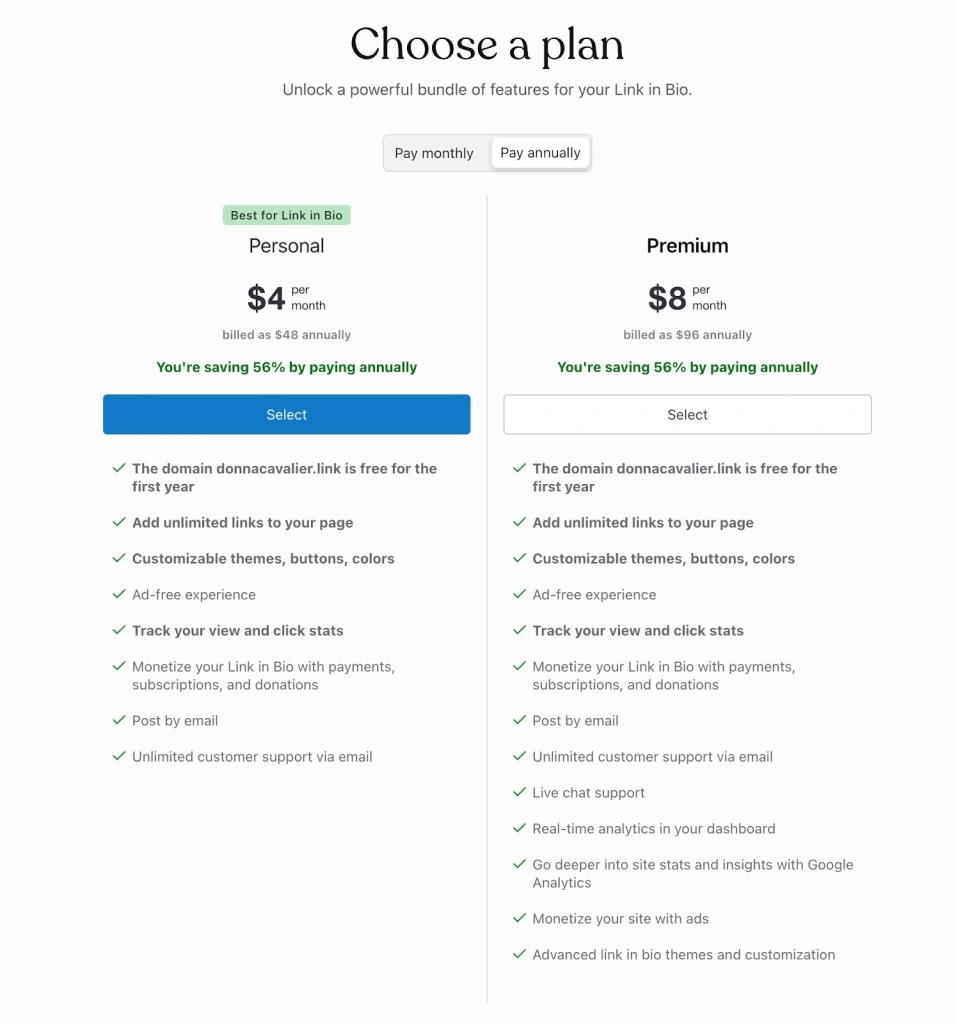
Click on “Add Links” to add your URLs:
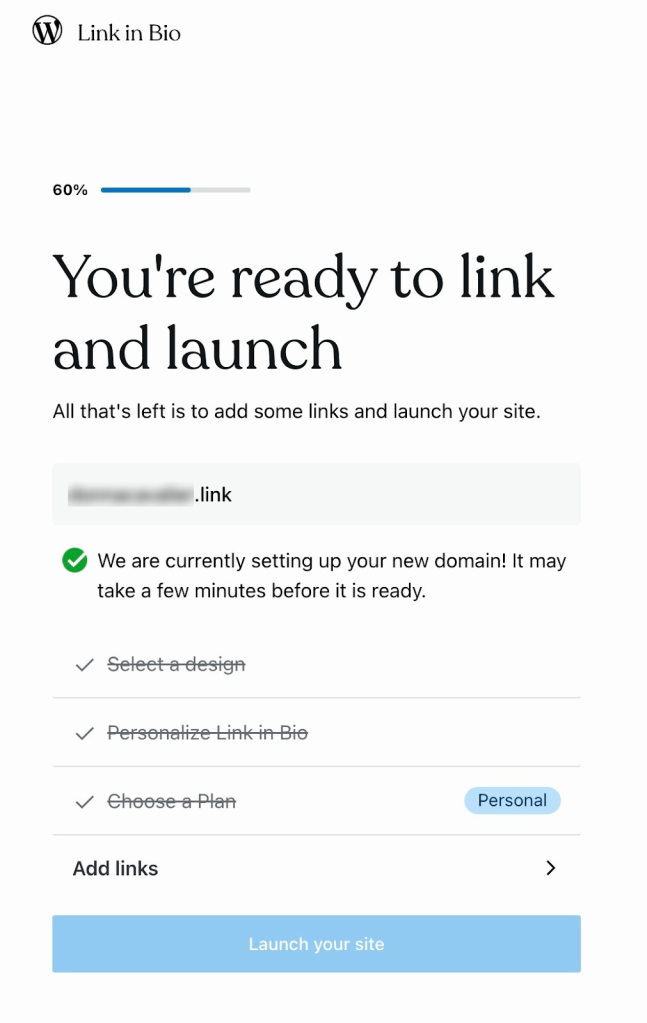
Take a moment to add your links (and preview how your page will look on mobile and desktop). You can fully customize your links and how they’re labeled. Start by clicking on a link block, then clicking on the link icon. repeat this process until you’re happy with your site, then click Save in the upper right-hand corner.
To see how your site looks, click View > View site in the upper right-hand corner. If everything looks good, click “Launch site” above your profile image, then click Launch Site. If you’d like to make some changes, then click Edit Page, or Change Theme to pick a different design. Accidentally closed out the View Site window? No worries. Just find your way back to launch your site (this is where you’ll find the Launch Site button).
w.link sites give you all the power and customization of WordPress.com (and that means you can make your site look exactly how you want it to look). If you’re new to WordPress, you might need a little bit of help finding your way around all the settings and options that are available.
One of the first things you might like to try is changing the overall design and appearance of your site. Fortunately, this is simple to do by selecting a new Pattern (keep in mind that switching designs will require you to re-add your links). Start by clicking on the plus icon in the top left-hand corner of your screen (this button is called the Block Inserter). You’ll then see selectors for Patterns and Blocks appear:
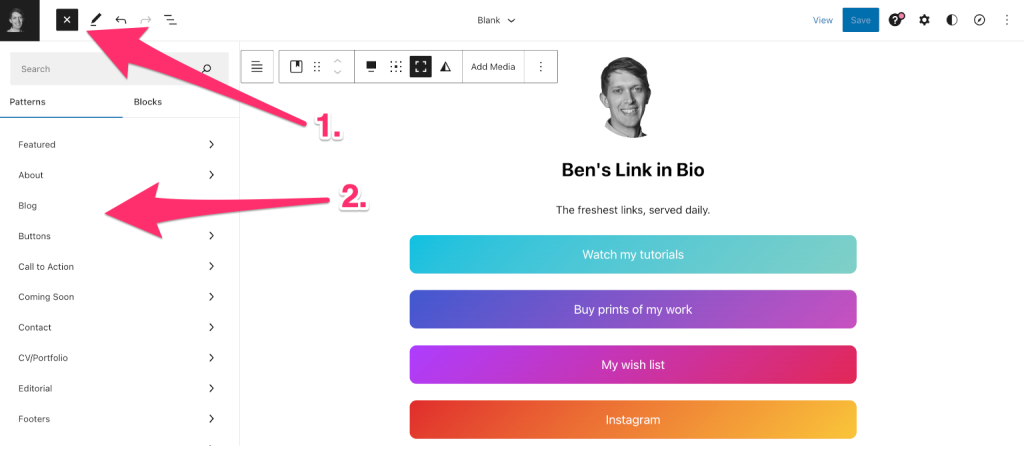
Scroll down under the Patterns column and find Link in Bio:
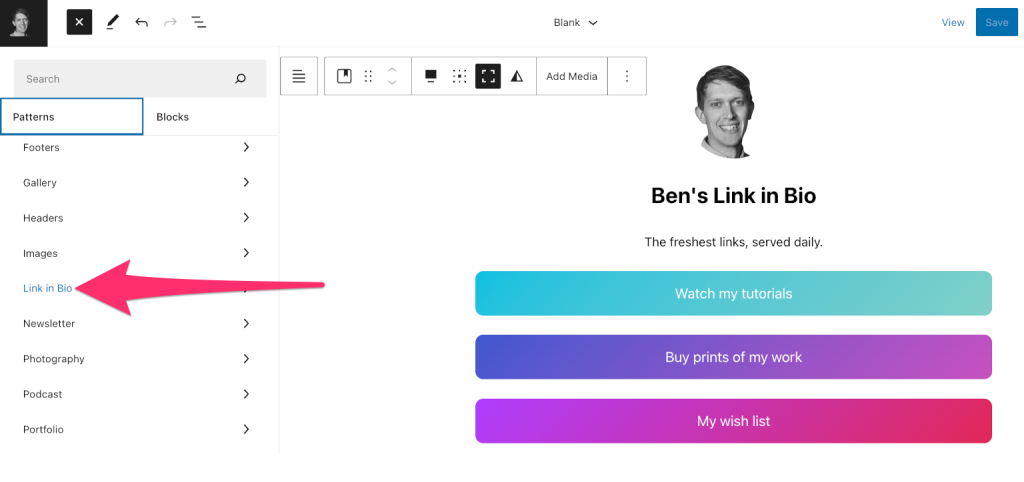
You’ll see tons of different design options for your site:
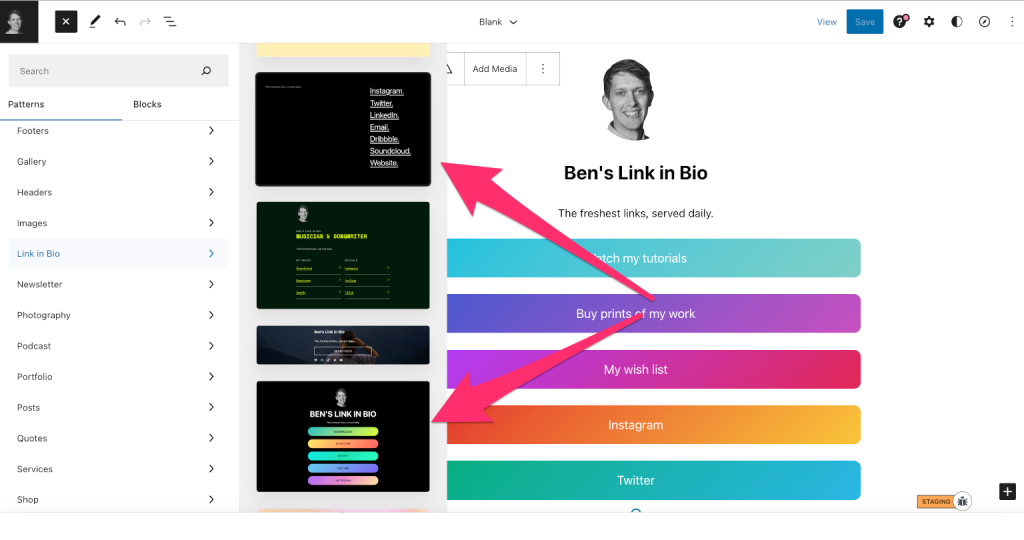
Clicking on a pattern will insert it into your site as a block. This gives you an opportunity to see how the new pattern looks compared to your previous one. If you’d like to use the new pattern instead, click into the block containing your previous pattern, and delete it.
You’ll now have a site with a whole new look (as a quick reminder, you’ll need to replace your links, and it’s best to think of this process as starting over from scratch):
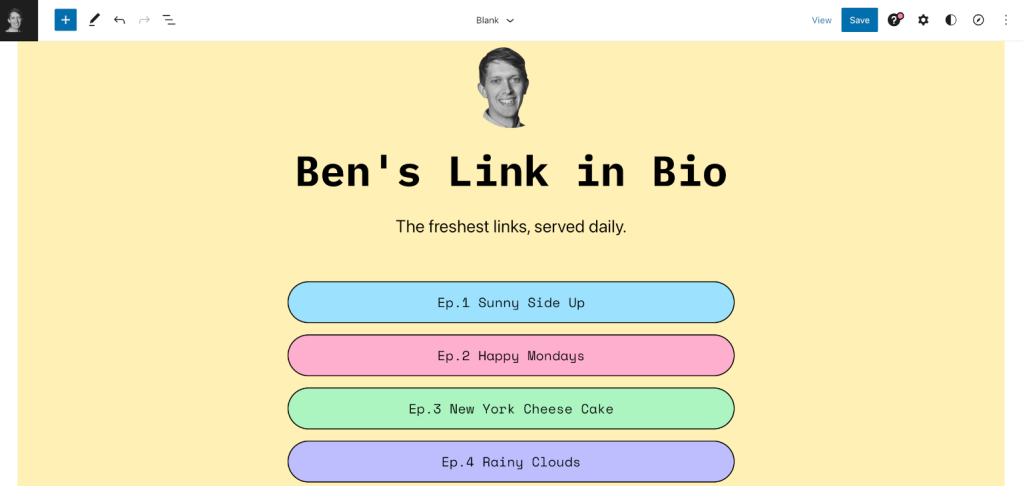
Now that you know how to choose patterns, let’s take a look at some available pattern options. Maybe you’re a musician or songwriter:
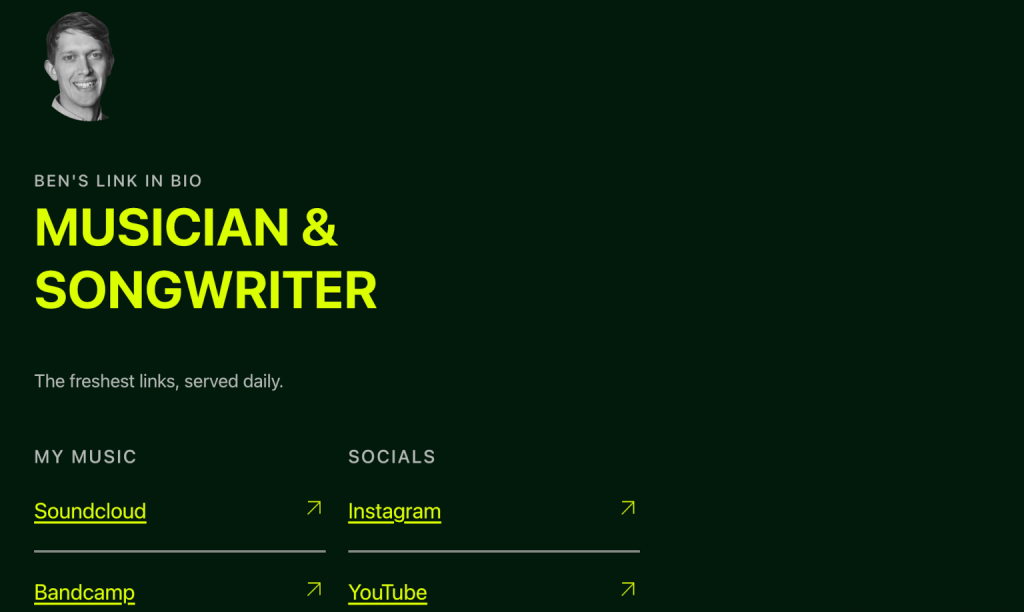
And another musician-oriented pattern, this one with a built-in album embed block:
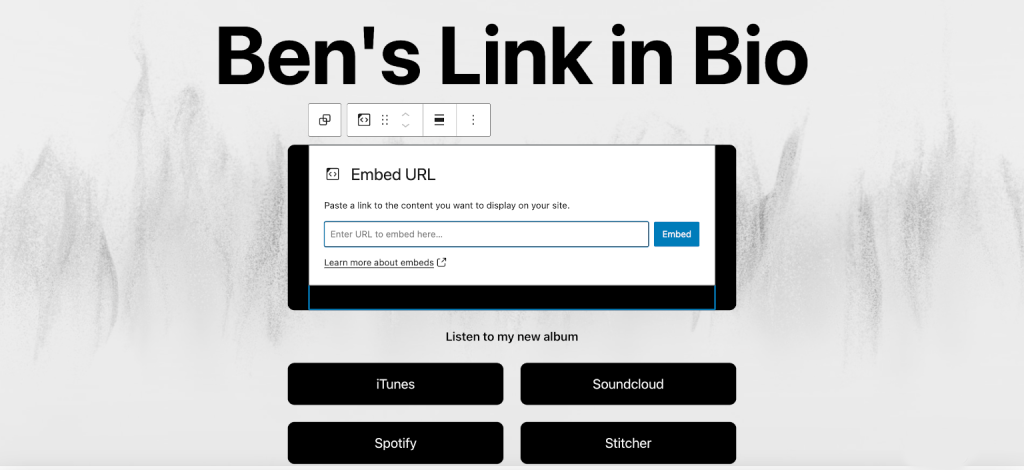
Or maybe you want a clean layout with some simple columns:
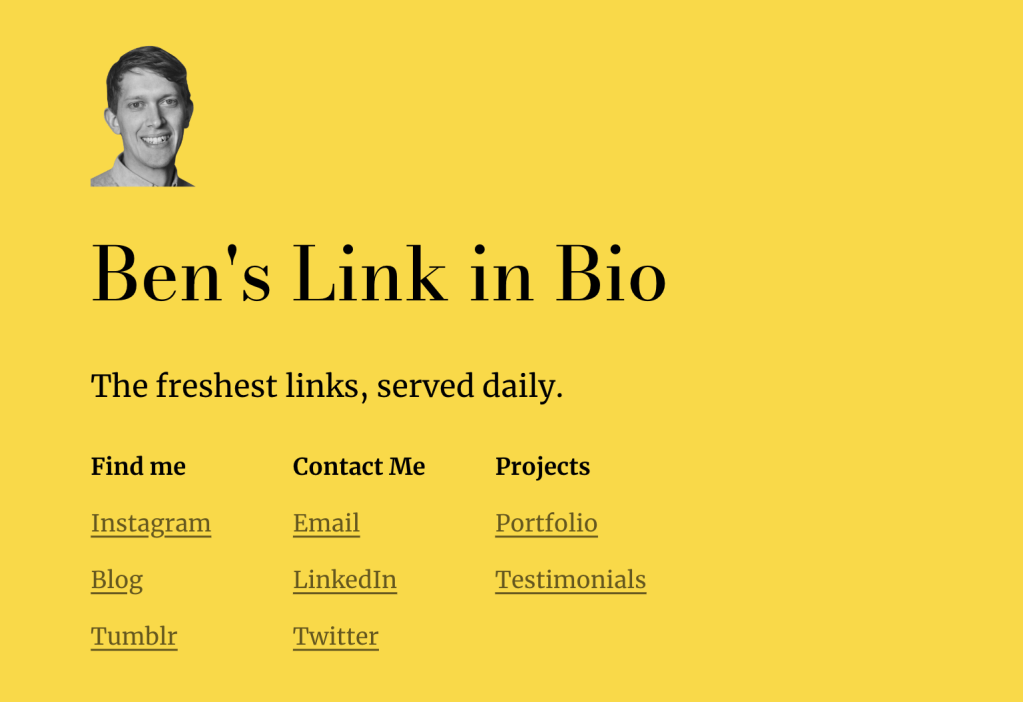
Here’s a more modern and minimalist look:

And one with a splash of color:
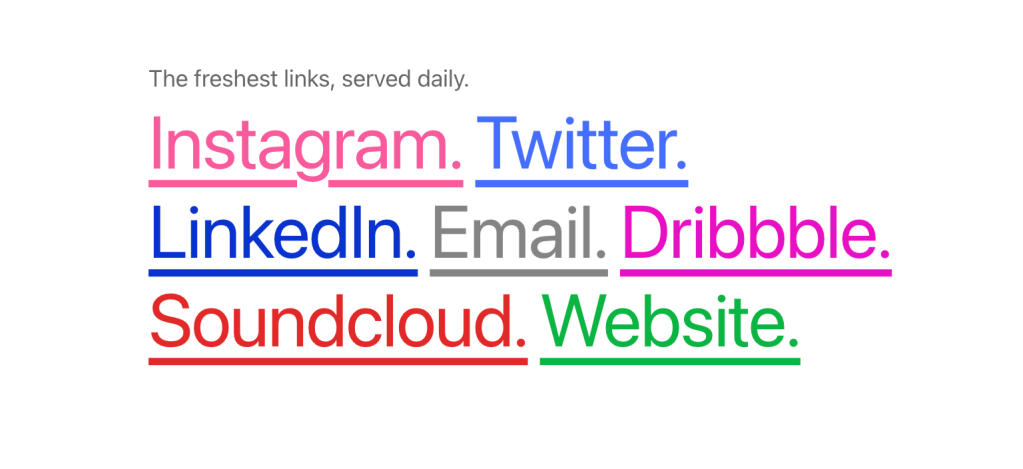
A custom photo could add some inspirational flair to your page:

Or maybe bright colors and bold fonts are more your style:
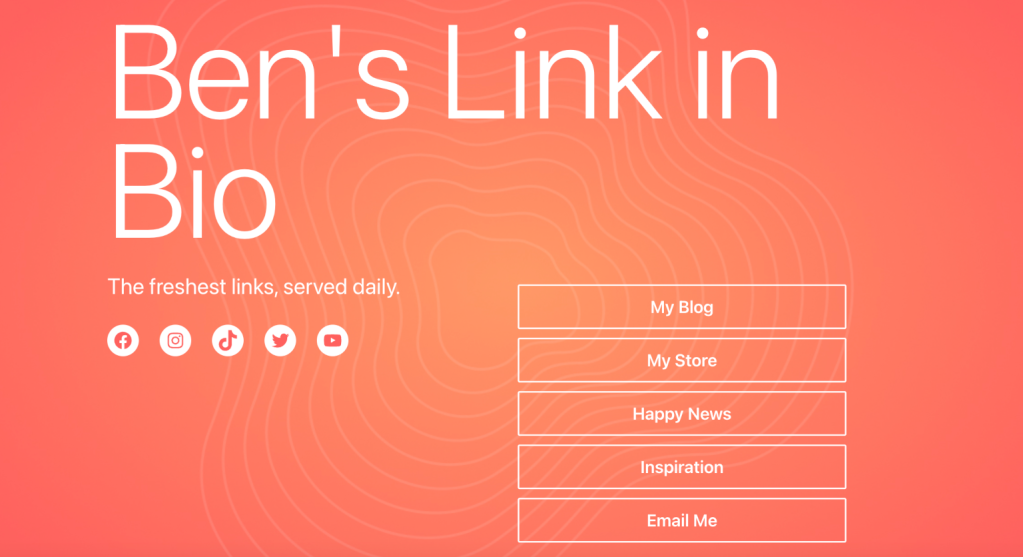
These are just some of the built-in options you can choose from. You can even add dynamic backgrounds to jazz up your Link in Bio. Plus, WordPress.com gives you the power to customize and personalize your site to reflect your own brand and style, so you’re not limited to default patterns and designs.
Customizing Your w.link Site
WordPress.com, like any WordPress host or website builder , gives you tons of flexibility to customize every aspect of your site. That includes your w.link website.
Want to switch the colors on your website? Click into the Block tab and use the Text, Background, and Link color selectors to select the colors you would prefer:
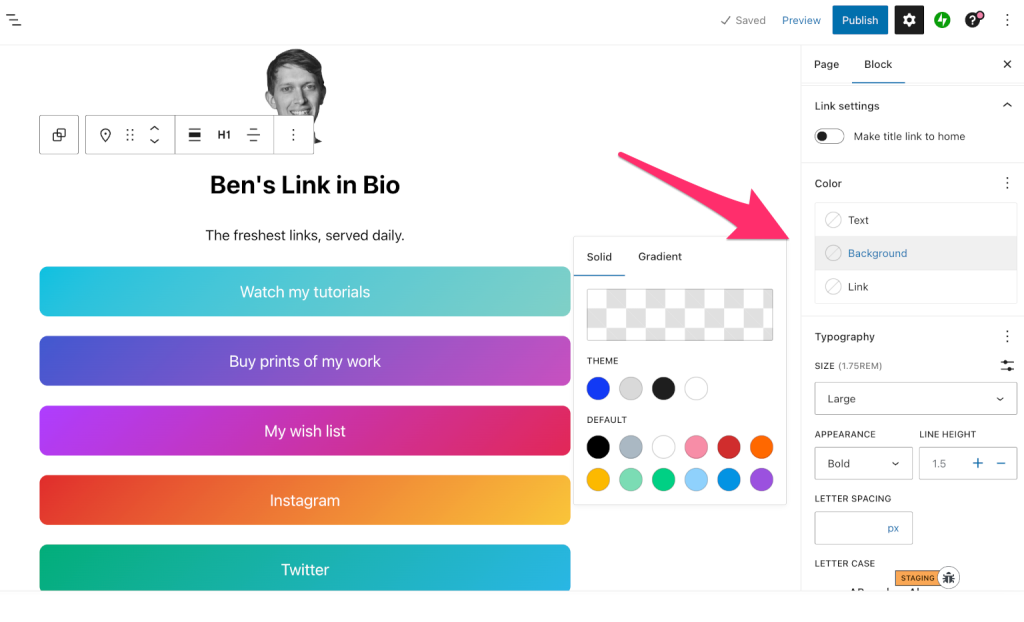
If you decide you don’t like the changes you’ve made, and you want to start over, that’s not a problem. Click the three dots next to Color, then click Reset to reverse changes made to individual elements of your site (text, background, or link), or Reset All to reverse all changes.
It’s easy to edit your typography too. Just below your controls for color options, you’ll find settings for font size, appearance, line height, letter spacing, and letter case.

Take some time to play around with your options. There are tons of different fonts and combinations of settings that are possible. You can also reset your changes by clicking the three dots next to Typography in the admin panel:
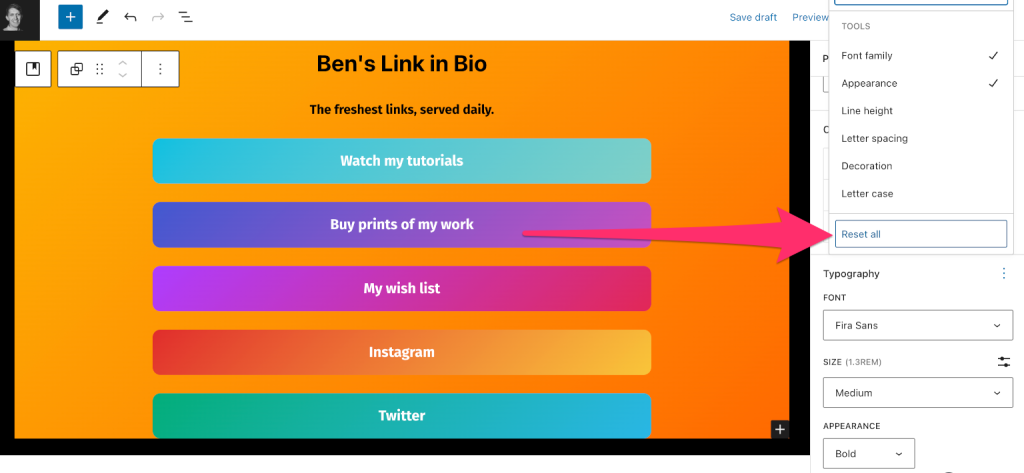
How to Use Your New Link in Bio Site
It’s easy to add Link in Bio URLs to your Instagram or TikTok profile and call it a day. However, that might not be enough to drive clicks by itself. Plus, there are also more places where you can add your page to cross-promote your links and content.
Adding a website to your Instagram profile only takes a couple of clicks. On your mobile device (links can only be edited on mobile), visit your profile and tap Edit Profile:
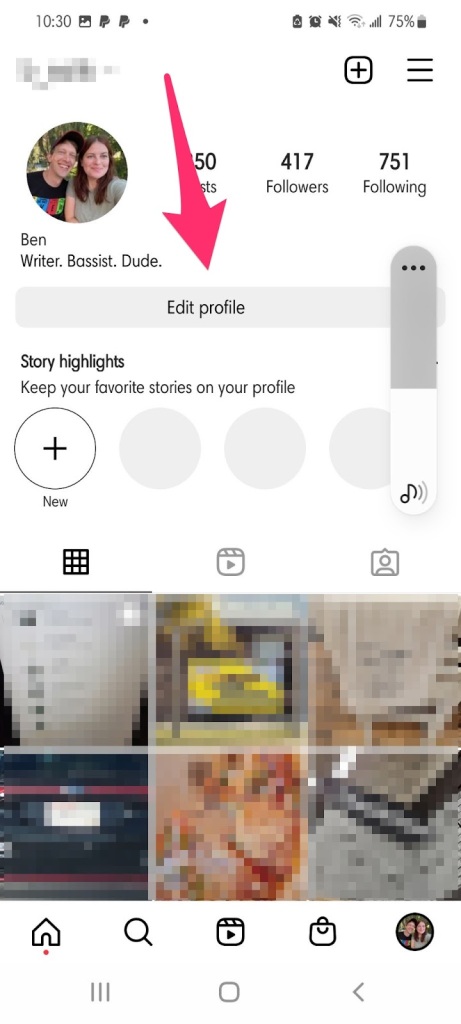
Then add the URL for your Link in Bio site:
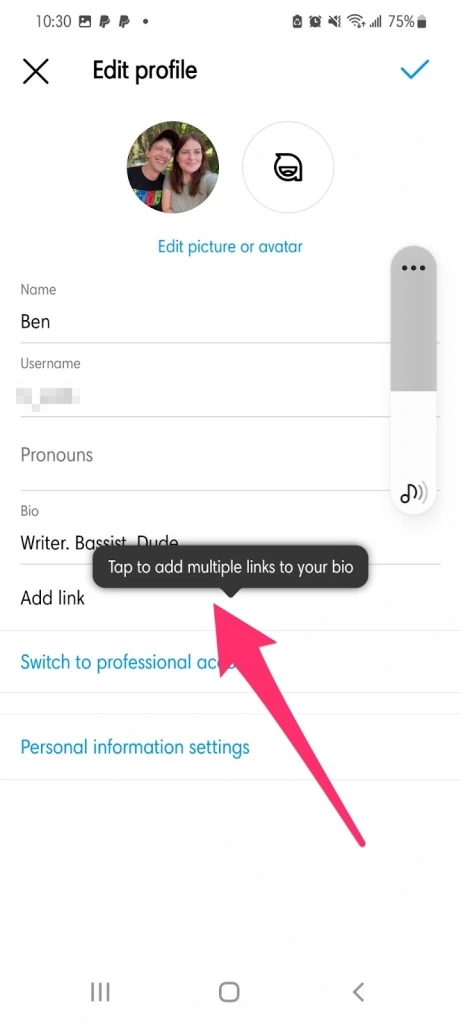
Business accounts on TikTok allow creators to add a link to an actual Link in Bio profile section. Follow these directions to get started:
- Switch from Personal to Business account
- Grow your audience to 1,000 followers or register your business profile by clicking through Edit Profile > Add Business Phone Number (this will generate the necessary prompt):
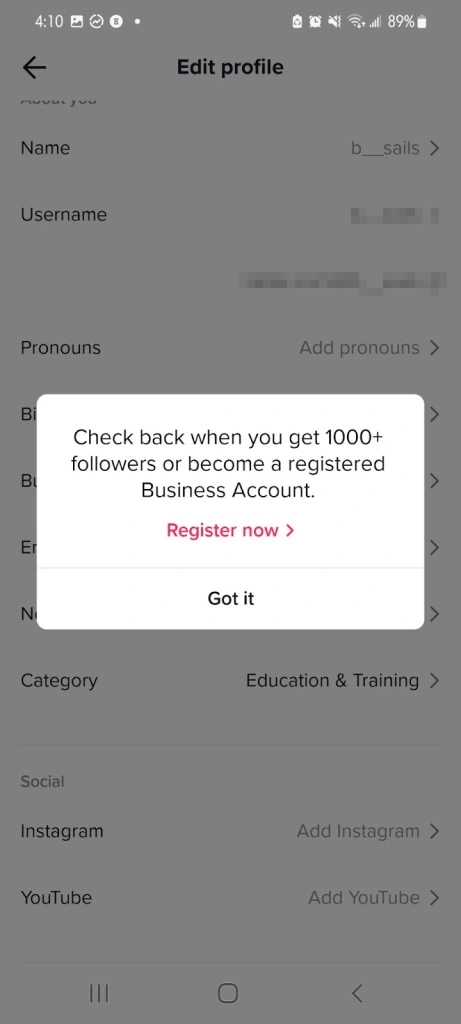
- Add your business information:
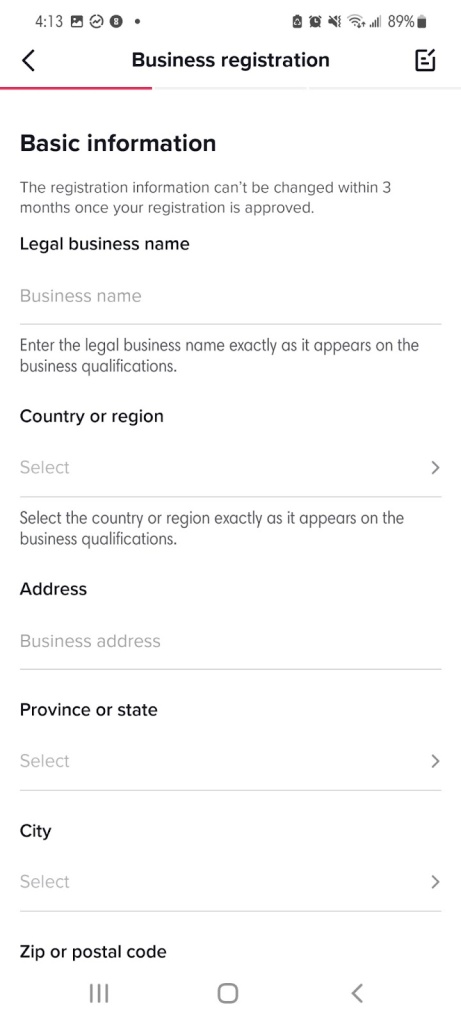
- Return to your profile and add your Link in Bio website URL.
Looking to drive more traffic from other sites? Here’s a short list of links with instructions for several popular platforms:
- Gmail (in your email signature)
How to Drive Traffic With Your Link in Bio Site
Once your site is set up, it’s time to make it work for you. Here are some tips to start driving more traffic and engagement from your page.
You might have evergreen links you want to share (meaning links that are relevant year-round). But if you’re consistently creating content, mix it up with your latest stuff, too.
Instagram and TikTok might be two obvious places to share your page, but the other sites and platforms mentioned in the previous section are worth considering too. Get creative and add your page wherever you think it might add value for visitors.
It’s easy to default to basic link button text like “Click Here” or “Visit Website.” Sometimes straightforward copy is best because it avoids confusing users about your links.
However, it’s also true that a little bit of creativity can help catch people’s attention. Here are some examples (with a generic option followed by a more engaging version of the same idea):
- Visit Store > Check out our goods
- Follow Us > Let’s be friends
- Sign Up > Join the cool club
You get the idea. Test some different variations and see what works best for you.
If you’re using your page on Instagram (where there is no ability to natively share links), you’ll need to give people a good reason to navigate away from the app to view your content. If you’re looking for social media writing advice, we’d defer to the following folks:
- The Ultimate Guide to Writing Good Instagram Captions from Later
- 264 Creative Instagram Captions from Hootsuite
- The Art and Science of Writing Good Instagram Captions from Foundr
Measuring Your Link in Bio Site’s Performance
How can you know whether people are clicking your links and engaging with your site? By using w.link’s robust analytics (which. like all WordPress.com websites are powered by Jetpack ) and/or connecting your website to Google Analytics .
Your website should help you achieve your goals. You can track your site’s performance by clicking on Stats in your dashboard:
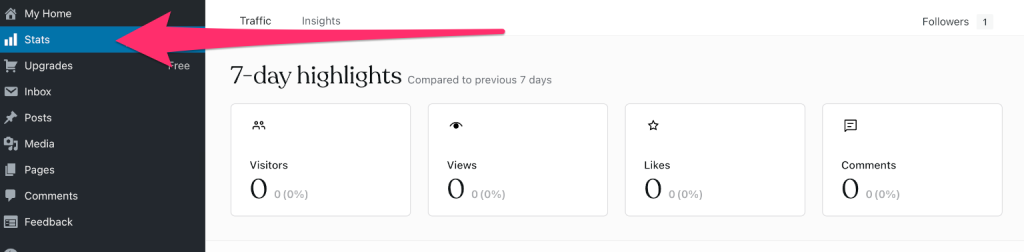
There are a lot of different stats you can track and view. Some of them are useful for Link in Bio sites, while others are more useful for other types of sites you might create with WordPress.
Here are the stats we recommend monitoring for a Link in Bio site:
- Visitors: The number of unique individuals who have visited your site.
- Views: The total number of times your page has been visited.
- Clicks: The number of times users click a link on your page.
- Referrers: Which other websites are sending traffic to your site.
- Countries: You can find where your audience lives to tailor your language and offerings to the area.
This is a short and sweet list of the metrics that matter most for our purposes here.
You can also access in-depth performance statistics and insights using Google Analytics. Here are some supporting resources you can check out to get started:
- Implementation Guide
- Tutorials and courses from Google
No matter what type of content creator you are, or what type of business you’re running, building an engaged audience online is a challenge. Fortunately, now that you know how to build and use a Link in Bio site, you can give yourself an edge with a centralized home for all your links and content. Ready to get started? Create your w.link site now .
Want more tips? Get new post notifications emailed to you.
Type your email…
Share this:
About the author.
Ben Sailer is the Director of Inbound Marketing for WordPress.com at Automattic. His areas of expertise include content strategy, search engine optimization, marketing analytics, and more. He is also a freelance journalist, covering underground rock music and video games. When he's not working, you can find him playing guitar and getting outdoors with his wife Rachel and their dog Audrey.
More by Ben Sailer
Design your portfolio. Open a store. Launch a business.
You can. you will. we’ll help..
Invent the world’s greatest cat food, save a rainforest, start a needlepoint club. Whatever it is, it’s going to need a website—that’s where we come in.

WordPress.com
- WordPress Hosting
- WordPress for Agencies
- Domain Names
- Website Builder
- Create a Blog
- Professional Email
- P2: WordPress for Teams
- Website Design Services
- Enterprise WordPress
- WordPress Themes
- WordPress Plugins
- WordPress Patterns
- Google Apps
- WordPress.com Support
- WordPress Forums
- WordPress News
- Website Building Tips
- Business Name Generator
- Logo Maker
- Discover New Posts
- Popular Tags
- Blog Search
- Daily Webinars
- Learn WordPress
- Developer Resources
- Remove Subscriptions
- Terms of Service
- Privacy Policy
- Do Not Sell or Share My Personal Information
- Privacy Notice for California Users
Mobile Apps
- Download on the App Store
- Get it on Google Play
Social Media
- WordPress.com on Facebook
- WordPress.com on X (Twitter)
- WordPress.com on Instagram
- WordPress.com on YouTube
- Already have a WordPress.com account? Log in now.
- Subscribe Subscribed
- Copy shortlink
- Report this content
- View post in Reader
- Manage subscriptions
- Collapse this bar
- Use the old theme
Home / Plugin: Gutenverse - Gutenberg Blocks - Page Builder for Site Editor / How to create Author Bio page + add author bio under very post
How to create Author Bio page + add author bio under very post

(@wellwisherasad)
12 hours, 50 minutes ago
Hi. I am looking into making author bio pages and adding a portion on every blog post for the author bio, description and links.
The page I need help with: [ log in to see the link]
- You must be logged in to reply to this topic.
- Gutenverse - Gutenberg Blocks - Page Builder for Site Editor
- Frequently Asked Questions
- Support Threads
- Active Topics
- Unresolved Topics
- In: Plugins
- 1 participant
- Last reply from: wellwisherasad
- Last activity: 12 hours, 50 minutes ago
- Status: not resolved
- Do Not Sell My Personal Info

- ⋅
WP Engine WordPress Hosting Acquires NitroPack
WP Engine managed WordPress web hosting acquired NitroPack, a SaaS website performance optimization solution

Managed WordPress web host WP Engine announced that they are acquiring NitroPack, a leading SaaS website performance optimization solution. The acquisition of of NitroPack by WP Engine demonstrates their continued focus on improving site performance for clients.
NitroPack is a relatively pricey but well regarded site performance solution that has for years been known as a leader. WP Engine and NitroPack formed a partnership in 2023 that would power WP Engine’s PageSpeed Boost product that is offered internally to customers. The NitroPack team will now become integrated within WP Engine this month, July.
There are no immediate plans to change the pricing options for NitroPack so it’s safe to say that it will continue to be a standalone product. WP Engine commented to Search Engine Journal that there will be no immediate changes in services pricing or billing for current NitroPack customers.
“We have no immediate plans to change the pricing options for NitroPack products. Today NitroPack works with page builders and other hosting providers and that will continue to be available. In the coming months, we will continue to leverage NitroPack to enhance additional functionality to Page Speed Boost for WP Engine’s customers.”
What the acquisition means for WP Engine customers is that WP Engine will continue to leverage NitroPack’s technology to add even more functionalities to their PageSpeed Boost product.
The WP Engine spokesperson said that these new integrations will be coming to WP Engine PageSpeed Boost in a matter of months.
They shared:
“In the coming months, we will continue to leverage NitroPack’s strength to enhance additional functionality to Page Speed Boost.”
Read the official announcement:
WP Engine Acquires NitroPack, Extending Leadership in Managed WordPress Site Performance
Featured Image by Shutterstock/Asier Romero
I have 25 years hands-on experience in SEO and have kept on top of the evolution of search every step ...
Subscribe To Our Newsletter.
Conquer your day with daily search marketing news.
Who is JD Vance? What to know about Donald Trump's VP pick

Former President Donald Trump tapped JD Vance to be his running mate at the Republican National Convention , catapulting the Ohio GOP senator even more into the national spotlight.
Here’s what you need to know about Vance.
More: Trump made MAGA happen. JD Vance represents those who will inherit it
Where is JD Vance from?
Vance grew up in Jackson, Kentucky and Middletown, Ohio. He described a childhood consumed by poverty and abuse in his best-selling 2016 memoir , "Hillbilly Elegy." Vance's mother struggled with drug addiction, so he spent many of his formative years with his grandmother – known to him as Mamaw.
How old is JD Vance?
Vance is 39. If elected, he would be the youngest vice president since Richard Nixon. His birthday is Aug. 2, 1984.
Did JD Vance serve in the military?
Vance joined the Marines Corps after high school and served as a public affairs marine in Iraq.
Is JD Vance married?
Vance had been working as a litigator Munger, Tolles & Olson, but a spokesperson said she chose to leave the firm in the wake of her husband’s vice presidential nomination.
The couple has three young children: Ewan, Vivek and Mirabel.
Where does JD Vance live?
Vance and his family live in the East Walnut Hills neighborhood of Cincinnati. The senator also bought a $1.5 million home in Alexandria, Virginia, last year, Politico reported .
How long has JD Vance been in politics?
Vance was first elected to the U.S. Senate in 2022 after defeating former Democratic Rep. Tim Ryan for an open seat in Ohio.
What’s the history between Vance and Trump?
Vance openly criticized Trump in 2016 as pundits used his memoir to explain the former president's popularity with white, rural voters. He previously suggested Trump could be "America’s Hitler," called him noxious and compared him to an opioid.
But Vance changed his tune as he geared up for his 2022 Senate run, deleting controversial tweets and crediting Trump for the work he did in office. He secured Trump's endorsement in a chaotic Republican Senate primary and is now one of the former president's most loyal allies.
JD Vance didn't vote for Donald Trump in 2016
In one NPR interview , he joked that he would rather write his dog on the ballot than vote for Trump or Hillary Clinton.
"I think that I'm going to vote third party because I can't stomach Trump," the "Hillbilly Elegy" author said at the time. "I think that he's noxious and is leading the white working class to a very dark place."
What are Vance's policy positions?
Vance personifies what's known as the New Right , a populist conservatism that rejects many traditional Republican views. He supports tariffs on trade and opposes U.S. intervention in foreign conflicts, particularly the war between Russia and Ukraine. He's also spoken out against potential cuts to Social Security.
Some of Vance's work in the Senate has been bipartisan. He introduced a rail safety bill with Sen. Sherrod Brown after the train derailment in East Palestine, Ohio. He also worked with Massachusetts Sen. Elizabeth Warren on legislation to hold executives accountable for failed banks.
At the same time, many of his other bills reflect conservative views. For example, Vance introduced legislation to ban gender-affirming care for minors and a bill to eliminate diversity programs in the federal government.
Where does JD Vance stand on abortion?
Vance opposes abortion and often says the government should find ways to encourage people to have children.
Like other Republicans, however, Vance changed how he discusses the issue after Ohio and other states voted in favor of abortion access last year. In a December CNN interview , he said Republicans must "accept that people do not want blanket abortion bans."
More recently, he told Meet the Press that he supports access to the abortion drug mifepristone.
Haley BeMiller is a reporter for the USA TODAY Network Ohio Bureau, which serves the Columbus Dispatch, Cincinnati Enquirer, Akron Beacon Journal and 18 other affiliated news organizations across Ohio.
- Nation & World
- Environment
- Coronavirus
Who is JD Vance's wife? Here's what we know about Usha Chilukuri Vance

Former President Donald Trump picked J.D. Vance, 39, to be the vice-presidential nominee for the Republican Party. Should the Trump-Vance ticket win in November, Vance's wife, Usha Chilukuri Vance, would become the Second Lady of the United States.
Usha Vance has traditionally stayed out of the spotlight, working as a litigator at a national law firm until recently.
Here's what we know about her.
How did J.D. Vance and his wife meet?
Vance and his wife, Usha, 38, have been married since 2014 and have three children: Ewan, Vivek and Mirabel.
The pair met at Yale Law School, which they both attended. Their wedding took place a year after they graduated.
Where is Usha Vance from?
The New York Times has reported Usha Vance is the daughter of Indian immigrants and grew up in the San Francisco area.
What is Usha Vance's educational background?
Usha Vance has her undergraduate degree in history from Yale University, according to her LinkedIn profile . She also has a master's degree in philosophy from the University of Cambridge.
While at Yale Law School, she worked on the Yale Law Journal and participated in the school's Supreme Court Advocacy Clinic, the Media Freedom & Information Access Clinic, the Iraqi Refugee Assistance Project and the Pro Bono Network, according to her LinkedIn.
Where did JD Vance go to college? Vice presidential candidate has multiple ties to Columbus
Usha Vance worked as a law clerk for both the Supreme Court of the United States, working for Chief Justice John Roberts, and the United States Court of Appeals for the District of Columbia Circuit, working for Judge Brett Kavanaugh.
What does Usha Vance do now?
Mrs. Vance had worked as a litigator for Munger, Tolles and Olson LLP , a national firm based in San Francisco. She chose to leave her job in the wake of her husband's vice-presidential nomination, according to a statement from the firm.
"Usha has been an excellent lawyer and colleague, and we thank her for her years of work and wish her the best in her future career," the statement said.
Where does Usha Vance stand politically?
According to Ohio voter registration records, Usha Vance registered to vote in Ohio in 2018.
Records show she pulled a Republican primary ballot in the 2022 election. She has not voted in Hamilton County since the 2022 General Election, including the 2024 Ohio presidential primary, according to the Hamilton County voter list.
Usha Vance's previous voting history shows she voted as a Democrat at least once while living in Connecticut.
You are viewing this page in an unauthorized frame window.
This is a potential security issue, you are being redirected to https://nvd.nist.gov
You have JavaScript disabled. This site requires JavaScript to be enabled for complete site functionality.
Official websites use .gov A .gov website belongs to an official government organization in the United States.
Information Technology Laboratory
National vulnerability database.
- Vulnerabilities
The NVD has a new announcement page with status updates, news, and how to stay connected!
| CVE-2024-6338 Detail The FV Flowplayer Video Player plugin for WordPress is vulnerable to time-based SQL Injection via the ‘exclude’ parameter in all versions up to, and including, 7.5.46.7212 due to insufficient escaping on the user supplied parameter and lack of sufficient preparation on the existing SQL query. This makes it possible for authenticated attackers, with Subscriber-level access and above, to append additional SQL queries into already existing queries that can be used to extract sensitive information from the database. NVD Wordfence CVSS:3.1/AV:N/AC:L/PR:L/UI:N/S:U/C:H/I:H/A:H --> NVD --> By selecting these links, you will be leaving NIST webspace. We have provided these links to other web sites because they may have information that would be of interest to you. No inferences should be drawn on account of other sites being referenced, or not, from this page. There may be other web sites that are more appropriate for your purpose. NIST does not necessarily endorse the views expressed, or concur with the facts presented on these sites. Further, NIST does not endorse any commercial products that may be mentioned on these sites. Please address comments about this page to .
Weakness Enumeration
Known Affected Software Configurations Switch to CPE 2.2Cpes loading, please wait.. Denotes Vulnerable Software Are we missing a CPE here? Please let us know . Change HistoryInitial analysis by nist 7/19/2024 4:24:40 pm.
New CVE Received by NIST 7/19/2024 4:15:02 AM
| |||||||||||||||||||||||||||||||||||||||||||||||||||||||||||||||||||||||||||||
IMAGES
VIDEO
COMMENTS
1-click Use in WordPress. Next, add the code directly to the 'Additional CSS' box. Then, click the 'Publish' button to make your changes live. Now, you can visit one of your WordPress blog posts and see your new author info box. Here is how the author bio box looked in our theme.
4. Fill in the information for the plugin name and description. If you go to your plugin list, you should see this new one in the list. Next, we'll add some information to the plugin file. When we are finished, the bio box will appear below posts. Here's the information we're going to display: Author's name.
Go to Appearance > Customize > Layout > Single Post. Then, scroll down to the Author Box section and make your selections. Next, return to your dashboard and go to Users > All Users: Find the User (i.e., the author) for which you'd like to add an author bio. Then, hit the Edit link under their username.
First, you need to open up the WordPress page or post where you want to change the author's name. Once you are there, you must make sure that the 'Post' tab is selected in the right-hand sidebar. Next, find the 'Author' option in the 'Summary' section, where you will see a list of available authors to choose from.
Author drop-down menu. Select the name of the post's new author, and then click on the Update button to make it official: Update author in Classic Editor. Regardless of which editor you use, you can also change a post's author using the Quick Edit function in the Posts list.
Click on the existing post of which you want to change the author. Once inside the post, if it is not open already, click on the Settings Wheel. Expand the Status & Visibility Section by clicking on it. Use the author drop-down box to select which author to use. Click on the "Update" button to finalize the changes.
Step 4: Add a New Author. Now you are ready to add a new author. This will be the first of many you add. Click on the "Add New" tab that is located on the left-side menu under the main plugin menu area. This takes you to the author bio page where you can add a new bio and create your first shortcode to display it.
Select the post you want to change the author of, and select Edit. Click the gear icon in the top right of the post editor screen. Navigate to Post → Status and Visibility in the sidebar. Find Author and select a new username from the drop-down list. Click Update to save your changes.
There are four setting we need to change according to the screenshot below: Rename the block of code to Author bio. Enable PHP code execution. Select After content for the insertion type. Save Settings 1 - 16. Now, you can go to a blog post and see the meet the author box below the last paragraph of your article.
Table of Contents. Adding An Author Bio Box In WordPress. Method 1: Using the Block Editor. Step 1: Write Author Bio. Step 2: Open 'Single Post' Template. Step 3: Add Author Bio Block. Method 2: Using An Author Bio Box Plugin. Method 3: Using Custom Code. Last Words.
To get started, search for "simple author box" via the Plugins menu to locate and install it. Once you install the plugin, you'll find a new Simple Author settings menu added to your admin dashboard. In the settings menu, you can see a preview of how the box will look. It's using fake filler content by default, including all of the ...
To add a new author: Navigate to People → Add in your My Sites menu. Type in the user's email address or WordPress.com username. Assign them a role. You can also enter a brief message letting them know that you're inviting them to be an author on your blog. Click the Send Invitation button.
The Post Author Biography block allows you to embed a user's biography from the About Yourself section in Users > Profile into your page or post. In order to add a Post Author Biography block, click on the Block Inserter (+) icon. You can also type /Post Author Biography and hit enter in a new paragraph block to add one quickly.
To use a different author photo, click on the 'Custom image' radio button. Once you've done that, click on 'Select Image.'. You can now choose any image from your WordPress media library, or upload a new image. Then, just click on the 'Update' button. Your website will now use this new image as the author's photo.
How to Add Your Author Bio Description? In order for the description to show up in the bio section you need to add it to your user profile in your WordPress dashboard. This is done under your user edit screen which you can access via Users > Your Profile and edit the " Biographical Info " field. Article by AJ Clarke WPExplorer.com staff.
Adding an author biography is a great way to add personalization to your WordPress site. There are several plugins available that can add this functionality to your site. As an example, we'll use the Author Bio plugin we found in the plugins directory on the WordPress website. This particular plugin can even pull in the author's Gravatar ...
This video shows how to edit your author biographical section on your Wordpress Website/Blog
Select Registered Author or Guest Author. Select the author's user account from the dropdown menu and click Add Author. Step 3: Add multiple authors to posts. Open the desired post in the editor. Under the Post tab on the right, use the dropdown menu in the Authors section to select the appropriate authors.
The Post Author block has a byline space in which you can write optional text, such as "Written by:" or "Post Author: " to precede the author's name. Moreover, there are options in the block settings to show author's avatar, bio, and link the author name to the author page. Single post templates already include the Post Author block ...
AllAbout Writing and Displaying a WordPress Blog Bio. February 26, 2014. Having a solid bio or about section on your WordPress site is a must. It doesn't matter what industry you're in — you need a bio to let people know who you are, what you do, and why you do it. Even if you're in business ( especially if you're in business), you ...
But it's a simple form/confirmation to add an email. To add the WordPress author bio image using Gravatar, click Add a New Image (1). The next screen prompts you to upload an image (3). Click on Upload New (3) to start the process. Just as a reminder, Gravatar images are square, so when you choose your author bio image for WordPress, make ...
To simplify it, we follow the steps below…. To begin with one must fill out the user profile completely; i.e. in the author's user profile for WordPress, the biography field must be filled up with the information one decides to show after each post. Next step is to understand the template tag: <?php the_author_description (); ?>.
Preview and Launch Your Site. To see how your site looks, click View > View site in the upper right-hand corner. If everything looks good, click "Launch site" above your profile image, then click Launch Site. If you'd like to make some changes, then click Edit Page, or Change Theme to pick a different design.
How to create Author Bio page + add author bio under very post wellwisherasad (@wellwisherasad) 36 minutes ago Hi. I am looking into making author bio pages and adding a portion on every blog post …
WP Engine managed WordPress web hosting acquired NitroPack, a SaaS website performance optimization solution SEJ STAFF Roger Montti 12 hours ago
Vance's family history is central to his name change, and equally critical to his selection as vice president. Vance's association with blue-collar, rust-belt America, a place he characterizes as ...
Former President Donald Trump picked J.D. Vance to be his running mate, catapulting the Ohio senator even more into the national spotlight.
Here's what we know about her. How did J.D. Vance and his wife meet? Vance and his wife, Usha, 38, have been married since 2014 and have three children: Ewan, Vivek and Mirabel.
Born James Donald Bowman in Middletown, Ohio, Vance's early years were marked by significant changes. After his parents divorced, his middle name was changed from Donald, his father's name, to ...
The FV Flowplayer Video Player plugin for WordPress is vulnerable to time-based SQL Injection via the 'exclude' parameter in all versions up to, and including, 7.5.46.7212 due to insufficient escaping on the user supplied parameter and lack of sufficient preparation on the existing SQL query. ... Change History 1 change records found show ...