Creating a Blank Presentation
When you create a new, blank presentationby choosing Blank Presentation in the New Presentation pane or by clicking the New icon on the Standard toolbarPowerPoint generates a new presentation and displays the Slide Layout task pane (see Figure 4 ).

Figure 4. Use the Slide Layout pane to specify which placeholders will go on a slide and where they will sit.

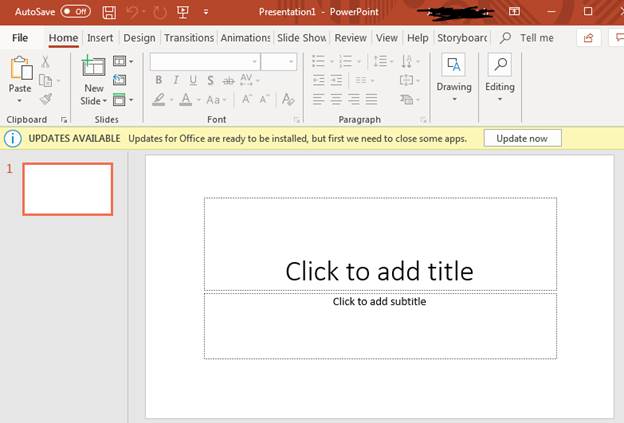
When you begin with a blank presentation, PowerPoint starts with a single title slide. Although it's a tedious way to work, you can build your presentation from this view, one slide at a time. Aim your mouse pointer at the layout that matches the kind of slide you want to add, click the arrow to the right of the slide layout icon, and choose Insert New Slide from the menu.
In a blank PowerPoint presentation, each new slide you create is completely free of any design elements whatsoever. You get a white background, with text formatted in the Arial font (44-point for slide titles and 32-point for body text) and generic round bullets.
It is hard to imagine a layout more dull than this default design. To replace it with one that contains coordinated colors, fonts, and graphics, click the Design icon on the Formatting toolbar (or choose Slide Design from the drop-down list at the top of the task pane). The Slide Design pane (see Figure 5 ) appears.
Figure 5. Switch to this larger preview to get a better picture of what each design template looks like.

When you click the icon for a design template, PowerPoint immediately applies the design to all slides in your presentation. The icons offer a thumbnail-sized preview of the design, but there's no substitute for experimentation. Feel free to apply different designs to the current presentation and then flip through the slides to see what each design looks like; if your presentation includes important content, create a copy first so that you don't have to worry about inadvertently messing up the existing design.
If you regularly prepare presentations for an organization or company that has certain standards for all presentationslogo in a specific location, identification of title slides, and so onyou might want to customize PowerPoint's "blank" presentation so that it reflects those standards. That way, whenever you begin a new presentation you'll have the basic requirements out of the way before you type your first bullet point.
To replace the PowerPoint default blank presentation with one of your own design, follow these steps:
With a Blank Presentation file in the correct location, all "blank" presentations whether created via the New Presentation task pane or using the New icon on the Standard toolbarwill be based on that file.
Critical PowerPoint Shortcuts – Claim Your FREE Training Module and Get Your Time Back!
How to Make a PowerPoint Presentation (Step-by-Step)
- PowerPoint Tutorials
- Presentation Design
- January 22, 2024
In this beginner’s guide, you will learn step-by-step how to make a PowerPoint presentation from scratch.
While PowerPoint is designed to be intuitive and accessible, it can be overwhelming if you’ve never gotten any training on it before. As you progress through this guide, you’ll will learn how to move from blank slides to PowerPoint slides that look like these.

Table of Contents
Additionally, as you create your presentation, you’ll also learn tricks for working more efficiently in PowerPoint, including how to:
- Change the slide order
- Reset your layout
- Change the slide dimensions
- Use PowerPoint Designer
- Format text
- Format objects
- Play a presentation (slide show)
With this knowledge under your belt, you’ll be ready to start creating PowerPoint presentations. Moreover, you’ll have taken your skills from beginner to proficient in no time at all. I will also include links to more advanced PowerPoint topics.
Ready to start learning how to make a PowerPoint presentation?
Take your PPT skills to the next level
Start with a blank presentation.
Note: Before you open PowerPoint and start creating your presentation, make sure you’ve collected your thoughts. If you’re going to make your slides compelling, you need to spend some time brainstorming.
For help with this, see our article with tips for nailing your business presentation here .
The first thing you’ll need to do is to open PowerPoint. When you do, you are shown the Start Menu , with the Home tab open.
This is where you can choose either a blank theme (1) or a pre-built theme (2). You can also choose to open an existing presentation (3).
For now, go ahead and click on the Blank Presentation (1) thumbnail.

Doing so launches a brand new and blank presentation for you to work with. Before you start adding content to your presentation, let’s first familiarize ourselves with the PowerPoint interface.
The PowerPoint interface

Here is how the program is laid out:
- The Application Header
- The Ribbon (including the Ribbon tabs)
- The Quick Access Toolbar (either above or below the Ribbon)
- The Slides Pane (slide thumbnails)
The Slide Area
The notes pane.
- The Status Bar (including the View Buttons)
Each one of these areas has options for viewing certain parts of the PowerPoint environment and formatting your presentation.
Below are the important things to know about certain elements of the PowerPoint interface.
The PowerPoint Ribbon

The Ribbon is contextual. That means that it will adapt to what you’re doing in the program.
For example, the Font, Paragraph and Drawing options are greyed out until you select something that has text in it, as in the example below (A).

Furthermore, if you start manipulating certain objects, the Ribbon will display additional tabs, as seen above (B), with more commands and features to help you work with those objects. The following objects have their own additional tabs in the Ribbon which are hidden until you select them:
- Online Pictures
- Screenshots
- Screen Recording
The Slides Pane

This is where you can preview and rearrange all the slides in your presentation.
Right-clicking on a slide in the pane gives you additional options on the slide level that you won’t find on the Ribbon, such as Duplicate Slide , Delete Slide , and Hide Slide .

In addition, you can add sections to your presentation by right-clicking anywhere in this Pane and selecting Add Section . Sections are extremely helpful in large presentations, as they allow you to organize your slides into chunks that you can then rearrange, print or display differently from other slides.

The Slide Area (A) is where you will build out your slides. Anything within the bounds of this area will be visible when you present or print your presentation.
Anything outside of this area (B) will be hidden from view. This means that you can place things here, such as instructions for each slide, without worrying about them being shown to your audience.

The Notes Pane is the space beneath the Slide Area where you can type in the speaker notes for each slide. It’s designed as a fast way to add and edit your slides’ talking points.
To expand your knowledge and learn more about adding, printing, and exporting your PowerPoint speaker notes, read our guide here .
Your speaker notes are visible when you print your slides using the Notes Pages option and when you use the Presenter View . To expand your knowledge and learn the ins and outs of using the Presenter View , read our guide here .

You can resize the Notes Pane by clicking on its edge and dragging it up or down (A). You can also minimize or reopen it by clicking on the Notes button in the Status Bar (B).
Note: Not all text formatting displays in the Notes Pane, even though it will show up when printing your speaker notes. To learn more about printing PowerPoint with notes, read our guide here .
Now that you have a basic grasp of the PowerPoint interface at your disposal, it’s time to make your presentation.
Adding Content to Your PowerPoint Presentation
Notice that in the Slide Area , there are two rectangles with dotted outlines. These are called Placeholders and they’re set on the template in the Slide Master View .
To expand your knowledge and learn how to create a PowerPoint template of your own (which is no small task), read our guide here .

As the prompt text suggests, you can click into each placeholder and start typing text. These types of placeholder prompts are customizable too. That means that if you are using a company template, it might say something different, but the functionality is the same.

Note: For the purposes of this example, I will create a presentation based on the content in the Starbucks 2018 Global Social Impact Report, which is available to the public on their website.
If you type in more text than there is room for, PowerPoint will automatically reduce its font size. You can stop this behavior by clicking on the Autofit Options icon to the left of the placeholder and selecting Stop Fitting Text to this Placeholder .
Next, you can make formatting adjustments to your text by selecting the commands in the Font area and the Paragraph area of the Home tab of the Ribbon.

The Reset Command: If you make any changes to your title and decide you want to go back to how it was originally, you can use the Reset button up in the Home tab .

Insert More Slides into Your Presentation
Now that you have your title slide filled in, it’s time to add more slides. To do that, simply go up to the Home tab and click on New Slide . This inserts a new slide in your presentation right after the one you were on.

You can alternatively hit Ctrl+M on your keyboard to insert a new blank slide in PowerPoint. To learn more about this shortcut, see my guide on using Ctrl+M in PowerPoint .
Instead of clicking the New Slide command, you can also open the New Slide dropdown to see all the slide layouts in your PowerPoint template. Depending on who created your template, your layouts in this dropdown can be radically different.

If you insert a layout and later want to change it to a different layout, you can use the Layout dropdown instead of the New Slide dropdown.
After inserting a few different slide layouts, your presentation might look like the following picture. Don’t worry that it looks blank, next we will start adding content to your presentation.

If you want to follow along exactly with me, your five slides should be as follows:
- Title Slide
- Title and Content
- Section Header
- Two Content
- Picture with Caption
Adding Content to Your Slides
Now let’s go into each slide and start adding our content. You’ll notice some new types of placeholders.

On slide 2 we have a Content Placeholder , which allows you to add any kind of content. That includes:
- A SmartArt graphic,
- A 3D object,
- A picture from the web,
- Or an icon.
To insert text, simply type it in or hit Ctrl+C to Copy and Ctrl+V to Paste from elsewhere. To insert any of the other objects, click on the appropriate icon and follow the steps to insert it.
For my example, I’ll simply type in some text as you can see in the picture below.

Slides 3 and 4 only have text placeholders, so I’ll go ahead and add in my text into each one.

On slide 5 we have a Picture Placeholder . That means that the only elements that can go into it are:
- A picture from the web

To insert a picture into the picture placeholder, simply:
- Click on the Picture icon
- Find a picture on your computer and select it
- Click on Insert
Alternatively, if you already have a picture open somewhere else, you can select the placeholder and paste in (shortcut: Ctrl+V ) the picture. You can also drag the picture in from a file explorer window.

If you do not like the background of the picture you inserted onto your slide, you can remove the background here in PowerPoint. To see how to do this, read my guide here .
Placeholders aren’t the only way to add content to your slides. At any point, you can use the Insert tab to add elements to your slides.
You can use either the Title Only or the Blank slide layout to create slides for content that’s different. For example, a three-layout content slide, or a single picture divider slide, as shown below.

In the first example above, I’ve inserted 6 text boxes, 3 icons, and 3 circles to create this layout. In the second example, I’ve inserted a full-sized picture and then 2 shapes and 2 text boxes.
The Reset Command: Because these slides are built with shapes and text boxes (and not placeholders), hitting the Reset button up in the Home tab won’t do anything.
That is a good thing if you don’t want your layouts to adjust. However, it does mean that it falls on you to make sure everything is aligned and positioned correctly.
For more on how to add and manipulate the different objects in PowerPoint, check out our step-by-step articles here:
- Using graphics in PowerPoint
- Inserting icons onto slides
- Adding pictures to your PowerPoint
- How to embed a video in PowerPoint
- How to add music to your presentation
Using Designer to generate more layouts ideas
If you have Office 365, your version of PowerPoint comes with a new feature called Designer (or Design Ideas). This is a feature that generates slide layout ideas for you. The coolest thing about this feature is that it uses the content you already have.
To use Designer , simply navigate to the Design tab in your Ribbon, and click on Design Ideas .

NOTE: If the PowerPoint Designer is not working for you (it is grey out), see my troubleshooting guide for Designer .
Change the Overall Design (optional)
When you make a PowerPoint presentation, you’ll want to think about the overall design. Now that you have some content in your presentation, you can use the Design tab to change the look and feel of your slides.
For additional help thinking through the design of your presentation, read my guide here .
A. Picking your PowerPoint slide size
If you have PowerPoint 2013 or later, when you create a blank document in PowerPoint, you automatically start with a widescreen layout with a 16:9 ratio. These dimensions are suitable for most presentations as they match the screens of most computers and projectors.
However, you do have the option to change the dimensions.
For example, your presentation might not be presented, but instead converted into a PDF or printed and distributed. In that case, you can easily switch to the standard dimensions with a 4:3 ratio by selecting from the dropdown (A).
You can also choose a custom slide size or change the slide orientation from landscape to portrait in the Custom Slide Size dialog box (B).

To learn all about the different PowerPoint slide sizes, and some of the issues you will face when changing the slide size of a non-blank presentation, read my guide here .
B. Selecting a PowerPoint theme
The next thing you can do is change the theme of your presentation to a pre-built one. For a detailed explanation of what a PowerPoint theme is, and how to best use it, read my article here .
In the beginning of this tutorial, we started with a blank presentation, which uses the default Office theme as you can see in the picture below.

That gives you the most flexibility because it has a blank background and quite simple layouts that work for most presentations. However, it also means that it’s your responsibility to enhance the design.
If you’re comfortable with this, you can stay with the default theme or create your own custom theme ( read my guide here ). But if you would rather not have to think about design, then you can choose a pre-designed theme.
Microsoft provides 46 other pre-built themes, which include slide layouts, color variants and palettes, and fonts. Each one varies quite significantly, so make sure you look through them carefully.
To select a different theme, go to the Design tab in the Ribbon, and click on the dropdown arrow in the Themes section .

For this tutorial, let’s select the Frame theme and then choose the third Variant in the theme. Doing so changes the layout, colors, and fonts of your presentation.

Note: The theme dropdown area is also where you can import or save custom themes. To see my favorite places to find professional PowerPoint templates and themes (and recommendations for why I like them), read my guide here .
C. How to change a slide background in PowerPoint
The next thing to decide is how you want your background to look for the entire presentation. In the Variants area, you can see four background options.

For this example, we want our presentation to have a dark background, so let’s select Style 3. When you do so, you’ll notice that:
- The background color automatically changes across all slides
- The color of the text on most of the slides automatically changes to white so that it’s visible on the dark background
- The colors of the objects on slides #6 and #7 also adjust, in a way we may not want (we’ll likely have to make some manual adjustments to these slides)

Note: If you want to change the slide background for just that one slide, don’t left-click the style. Instead, right-click it and select Apply to Selected Slides .
After you change the background for your entire presentation, you can easily adjust the background for an individual slide.

Inside the Format Background pane, you can see you have the following options:
- Gradient fill
- Picture or texture fill
- Pattern fill
- Hide background
You can explore these options to find the PowerPoint background that best fits your presentation.
D. How to change your color palette in PowerPoint
Another thing you may want to adjust in your presentation, is the color scheme. In the picture below you can see the Theme Colors we are currently using for this presentation.

Each PowerPoint theme comes with its own color palette. By default, the Office theme includes the Office color palette. This affects the colors you are presented with when you format any element within your presentation (text, shapes, SmartArt, etc.).

The good news is that the colors here are easy to change. To switch color palettes, simply:
- Go to the Design tab in the Ribbon
- In the Variants area, click on the dropdown arrow and select Colors
- Select the color palette (or theme colors) you want
You can choose among the pre-built color palettes from Office, or you can customize them to create your own.
As you build your presentation, make sure you use the colors from your theme to format objects. That way, changing the color palette adjusts all the colors in your presentation automatically.
E. How to change your fonts in PowerPoint
Just as we changed the color palette, you can do the same for the fonts.

Each PowerPoint theme comes with its own font combination. By default, the Office theme includes the Office font pairing. This affects the fonts that are automatically assigned to all text in your presentation.

The good news is that the font pairings are easy to change. To switch your Theme Fonts, simply:
- Go to the Design tab in the Ribbon
- Click on the dropdown arrow in the Variants area
- Select Fonts
- Select the font pairing you want
You can choose among the pre-built fonts from Office, or you can customize them to create your own.
If you are working with PowerPoint presentations on both Mac and PC computers, make sure you choose a safe PowerPoint font. To see a list of the safest PowerPoint fonts, read our guide here .
If you receive a PowerPoint presentation and the wrong fonts were used, you can use the Replace Fonts dialog box to change the fonts across your entire presentation. For details, read our guide here .
Adding Animations & Transitions (optional)
The final step to make a PowerPoint presentation compelling, is to consider using animations and transitions. These are by no means necessary to a good presentation, but they may be helpful in your situation.
A. Adding PowerPoint animations
PowerPoint has an incredibly robust animations engine designed to power your creativity. That being said, it’s also easy to get started with basic animations.
Animations are movements that you can apply to individual objects on your slide.

To add a PowerPoint animation to an element of your slide, simply:
- Select the element
- Go to the Animations tab in the Ribbon
- Click on the dropdown arrow to view your options
- Select the animation you want
You can add animations to multiple objects at one time by selecting them all first and then applying the animation.
B. How to preview a PowerPoint animation

There are three ways to preview a PowerPoint animation:
- Click on the Preview button in the Animations tab
- Click on the little star next to the slide
- Play the slide in Slide Show Mode
To learn other ways to run your slide show, see our guide on presenting a PowerPoint slide show with shortcuts .
To adjust the settings of your animations, explore the options in the Effect Options , Advanced Animation and the Timing areas of the Animation tab .

Note: To see how to make objects appear and disappear in your slides by clicking a button, read our guide here .
C. How to manage your animations in PowerPoint

The best way to manage lots of animations on your slide is with the Animation Pane . To open it, simply:
- Navigate to the Animations tab
- Select the Animation Pane
Inside the Animation Pane, you’ll see all of the different animations that have been applied to objects on your slide, with their numbers marked as pictured above.
Note: To see examples of PowerPoint animations that can use in PowerPoint, see our list of PowerPoint animation tutorials here .
D. How to add transitions to your PowerPoint presentation
PowerPoint has an incredibly robust transition engine so that you can dictate how your slides change from one to the other. It is also extremely easy to add transitions to your slides.
In PowerPoint, transitions are the movements (or effects) you see as you move between two slides.

To add a transition to a PowerPoint slide, simply:
- Select the slide
- Go to the Transitions tab in the Ribbon
- In the Transitions to This Slide area, click on the dropdown arrow to view your options
- Select the transition you want
To adjust the settings of the transition, explore the options in the Timing area of the Transitions tab.
You can also add the same transition to multiple slides. To do that, select them in the Slides Pane and apply the transition.
E. How to preview a transition in PowerPoint

There are three ways to preview your PowerPoint transitions (just like your animations):
- Click on the Preview button in the Transitions tab
- Click on the little star beneath the slide number in the thumbnail view
Note: In 2016, PowerPoint added a cool new transition, called Morph. It operates a bit differently from other transitions. For a detailed tutorial on how to use the cool Morph transition, see our step-by-step article here .
Save Your PowerPoint Presentation
After you’ve built your presentation and made all the adjustments to your slides, you’ll want to save your presentation. YOu can do this several different ways.

To save a PowerPoint presentation using your Ribbon, simply:
- Navigate to the File tab
- Select Save As on the left
- Choose where you want to save your presentation
- Name your presentation and/or adjust your file type settings
- Click Save
You can alternatively use the Ctrl+S keyboard shortcut to save your presentation. I recommend using this shortcut frequently as you build your presentation to make sure you don’t lose any of your work.

This is the standard way to save a presentation. However, there may be a situation where you want to save your presentation as a different file type.
To learn how to save your presentation as a PDF, see our guide on converting PowerPoint to a PDF .
How to save your PowerPoint presentation as a template
Once you’ve created a presentation that you like, you may want to turn it into a template. The easiest – but not technically correct – way, is to simply create a copy of your current presentation and then change the content.
But be careful! A PowerPoint template is a special type of document and it has its own parameters and behaviors.
If you’re interested in learning about how to create your own PowerPoint template from scratch, see our guide on how to create a PowerPoint template .
Printing Your PowerPoint Presentation
After finishing your PowerPoint presentation, you may want to print it out on paper. Printing your slides is relatively easy.

To open the Print dialog box, you can either:
- Hit Ctrl+P on your keyboard
- Or go to the Ribbon and click on File and then Print

Inside the Print dialog box, you can choose from the various printing settings:
- Printer: Select a printer to use (or print to PDF or OneNote)
- Slides: Choose which slides you want to print
- Layout: Determine how many slides you want per page (this is where you can print the notes, outline, and handouts)
- Collated or uncollated (learn what collated printing means here )
- Color: Choose to print in color, grayscale or black & white
There are many more options for printing your PowerPoint presentations. Here are links to more in-depth articles:
- How to print multiple slides per page
- How to print your speaker notes in PowerPoint
- How to save PowerPoint as a picture presentation
So that’s how to create a PowerPoint presentation if you are brand new to it. We’ve also included a ton of links to helpful resources to boost your PowerPoint skills further.
When you are creating your presentation, it is critical to first focus on the content (what you are trying to say) before getting lost inserting and playing with elements. The clearer you are on what you want to present, the easier it will be to build it out in PowerPoint.
If you enjoyed this article, you can learn more about our PowerPoint training courses and other presentation resources by visiting us here .
🔒 Unlock the PowerPoint Shortcuts Trusted by Industry Leaders KKR, American Express, HSBC, and More!
Join over 114,880 professionals from diverse fields including consulting, investment banking, advertising, marketing, sales, and business development who have supercharged their PowerPoint game with our proven methods.
✅ Customize compelling presentations effortlessly.
✅ Master time-saving techniques for faster deck creation.
✅ Boost your career prospects with top-notch PowerPoint skills.
Get FREE access to the Critical PowerPoint Shortcuts module of our premium training course by entering your name and email below.
DISCLAIMER: PC Users Only!
We respect your privacy and will keep your info safe and confidential.
About The Author

Popular Tutorials
- How to Strikethrough Text (l̶i̶k̶e̶ ̶t̶h̶i̶s̶) in Word, Excel & PowerPoint
- How to Make Animated Fireworks in PowerPoint (Step-by-Step)
- Strikethrough Shortcut (l̶i̶k̶e̶ ̶t̶h̶i̶s̶) for Word, Excel & PowerPoint
- How to Create a Flash Card Memory Game in PowerPoint (Like Jeopardy)
- Keyboard Shortcuts Not Working: Solved
PowerPoint Tutorial Categories
- Strategies & Opinions
- Shortcuts & Hacks
- Pictures, Icons, Videos, Etc.
- New Features
- Miscellaneous
- Charts & Data Viz
We help busy professionals save hours and gain peace of mind, with corporate workshops, self-paced courses and tutorials for PowerPoint and Word.
Work With Us
- Corporate Training
- Presentation & Template Design
- Courses & Downloads
- PowerPoint Articles
- Word Articles
- Productivity Resources
Find a Tutorial
- Free Training
- For Businesses
We help busy office workers save hours and gain peace of mind, with tips, training and tutorials for Microsoft PowerPoint and Word.
Master Critical PowerPoint Shortcuts – Secure Your FREE Training Module and Save Valuable Time!
⌛ Master time-saving expert techniques.
🔥 Create powerful presentations.
🚀 Propel your career to new heights.
We value your privacy – we keep your info safe.
Discover PowerPoint Hacks Loved by Industry Giants - KKR, AmEx, HSBC!
Over 114,880 professionals in finance, marketing and sales have revolutionized their PPT skills with our proven methods.
Gain FREE access to a full module of our premium PowerPoint training program – Get started today!
We hate spam too and promise to keep your information safe.
You are currently viewing a placeholder content from Facebook . To access the actual content, click the button below. Please note that doing so will share data with third-party providers.
- Skill Assessments
- AI Course Builder
- Free Courses
- PowerPoint 2019 Basic
How to Make a PowerPoint

Start Free Trial
Or log in with:

Creating a new presentation is one of the most basic commands you’ll need in PowerPoint. You can create a new, blank presentation, or create a new presentation based on a variety of pre-designed templates.
Create a Blank Presentation

- Select New .
Press Ctrl + N to create a new, blank presentation.

Create a Presentation from a Template
Using a template allows you to begin with a presentation that has already been designed and formatted so you can just insert the information. This saves you time and you will end up with a professionally designed presentation.

- Select a secondary template category to further narrow the search.

- Click Create .
The presentation template is downloaded, and a new presentation using it opens in PowerPoint. You can fill in the placeholders, and delete the elements of a template that you don’t need.

FREE Quick Reference
Free to distribute with our compliments; we hope you will consider our paid training.
- LinkedIn-ready certificate
- Skill assessments
- Bite-sized, interactive lessons
- Saved progress
Creating and Saving a New Presentation
Locked lesson.
- Lesson resources Resources
- Quick reference Reference
About this lesson
Let's create our first new presentation using a blank template. We'll learn how to save presentations locally and to the cloud, and understand how this determines how the presentation is saved going forward.
Exercise files
Download the ‘before’ and ‘after’ PowerPoint presentations from the video tutorial and try the lesson yourself.
Quick reference
A fundemental skill in PowerPoint is knowing how to create a new blank presentation and save it to a folder. Blank presentations by default contain one slide with no placeholders, text or other graphical elements. It provides a blank canvas from which to design a slide deck.
All presentations should be saved to a local folder, a network drive or into cloud storage. This ensures that any changes we make are saved and the liklihood of losing work is reduced. Presentations saved to the cloud automatically save and synchronize as you work. As a general rule, most presentations we create are saved with the default .pptx file extension.
When to use
We will need to create and save a new blank presentation when we want to design a slide deck from scratch.
Instructions
Create a new blank presentation.
New blank presentations can be created in a few ways: from the File menu, using a keyboard shortcut or from the Quick Access Toolbar.
From the File Menu
- Click the File tab.
- Click New .
- Choose Blank Presentation .
Using a Keyboard Shortcut
- Press CTRL+N .
From the Quick Access Toolbar (QAT)
- Click the New button on the Quick Access Toolbar.
Design Ideas
When we create a new presentation, the Design Ideas pane will show on the right-hand side. The Design Ideas feature examines the contents of the selected slide and offers a variety of design choices based on the layout and content.
To apply a design to a slide, simply select one from the list and click to apply.
Switch between Presentations
If you are working on more than one presentation at any time, its beneficial to know how to switch between them efficiently. PowerPoint will only display one presentation at a time in the window.
- Click the View tab.
- In the Window group, click Switch Windows .
- Choose the presentation to switch to from the list.
Save a Presentation
Presentations can be saved to a local folder on our PC, a network drive, an external storage device or in the cloud.
Save a Presentation to Cloud Storage
Presentations saved into a cloud storage application like OneDrive are automatically saved and synchronised as we work. This means we only need to save the presentation once at the beginning and any changes made from that point on are automatically saved.
- Click Save As .
- Click Browse and choose a folder.
- Choose a meaningful name for the presentation and type it into the File name field.
- Verify the Save as type is set to PowerPoint Presentation (*.pptx).
- Click Save .
Once saved, check the AutoSave slider is toggled on in the Quick Access Toolbar to ensure any changes made are automatically saved and synchronised to the cloud.
Save a Presentation to a local folder on our PC
Presentations saved to a local folder do not automatically save as we work. This means we need to ensure that we save at regular intervals.
- Click Save .
Remember to save your work at regular intervals. Click the Save icon on the Quick Access Toolbar, or select Save from the File menu. Alternatively, we can use the keyboard shortcut, CTRL+S .
Close a Presentation
A common mistake people make when working in PowerPoint is closing down the application when they meant to close down the current presentation. If we click the X in the top right-hand corner of the PowerPoint window, the application and all open presentations will close.
To close just the current presentation but leave PowerPoint open, click the File tab and Close .
Hints & tips
- To make saving into OneDrive easier from within PowerPoint, click the File tab, Save A s and then Add a place . Select your OneDrive account (if you have one).
- The Design Ideas pane will pop open automatically when we create a new presentation. We can suppress this through PowerPoint Options. Click the File tab, Options and select the General page. Scroll down to the PowerPoint Designer section and remove the tick from the Automatically show me design ideas box.
- 00:04 Now we're a bit more familiar with the PowerPoint interface.
- 00:07 It's time for us to delve into the subject of creating and saving presentations.
- 00:12 Now currently on the screen I have opened my first presentation.
- 00:16 If you recall, this was just a blank presentation that I saved into a folder.
- 00:21 And I want to start out just by reiterating a really important point when
- 00:25 it comes to closing down presentations.
- 00:28 Something I see people doing all the time is jumping up to the cross in the top
- 00:32 right-hand corner, and clicking it in order to close down the presentation.
- 00:38 But what you'll find is that if you do click on this cross,
- 00:41 it's going to close down all of PowerPoint.
- 00:43 So that is any presentations that you have open as well as the entire application.
- 00:49 No, it might be that that is exactly what you want to do.
- 00:51 And in that case, it's absolutely fine to click on that cross.
- 00:55 However, if you just want to close down the presentation that you currently have
- 01:00 on the screen, you need to go about this in a slightly different way.
- 01:04 So I'm going to close this down, I'm going to jump up to File, and
- 01:08 you'll see halfway down at the bottom here, I have a closed option.
- 01:13 When I click that, it's just going to close down that open presentation, but
- 01:17 it's still going to leave PowerPoint open.
- 01:19 So I can then go in, open up something else, or create a new presentation.
- 01:24 Which moves us nicely on to our next subject,
- 01:27 and that is creating a new presentation from scratch.
- 01:31 Now there are a few different ways that you can do this.
- 01:34 If we jump back into that file tab and go down to new,
- 01:38 this shows us all of the different ways that we can create new slide decks.
- 01:44 And the two options that you really have are you can create a new blank
- 01:48 presentation from scratch, or
- 01:50 you can create a new presentation based off of a template.
- 01:54 We're going to talk a lot more about what these templates are, how you access them,
- 01:58 and how they work in the next lesson.
- 02:01 For now, I simply want to focus on creating a new blank presentation.
- 02:06 So what I could do here is just click on Blank presentation.
- 02:11 It's going to open in PowerPoint, and
- 02:13 it's also going to pop open that design ideas pane.
- 02:17 As I mentioned previously, design ideas is there to allow
- 02:20 you to quickly add some pizzazz to your presentation.
- 02:24 So for example, if I scroll through these design ideas,
- 02:27 I might find one that I like and select it.
- 02:30 And with just one click, I've been able to style up that title page very effectively.
- 02:36 Now the design ideas that you see in here changed depending on the slide layout that
- 02:41 you're using.
- 02:42 Now, I know that terminology isn't too familiar to you at the moment, but
- 02:46 it will be when we get on to the topic of slide layouts.
- 02:49 But just be aware that what you see in the design ideas pane changes depending on
- 02:54 the layout of your slide.
- 02:56 Now I'm going to close down this pane simply by clicking on the cross.
- 02:59 Now that isn't the only way that I can create a new presentation in PowerPoint.
- 03:05 An even quicker way of doing this is to use the keyboard shortcut of Ctrl N.
- 03:11 And you'll see as soon as I do that it pops open another new blank presentation.
- 03:16 And again, I get that design ideas pane,
- 03:19 I can select something from that menu if I want to.
- 03:22 So currently, I have two blank presentations open that I haven't saved.
- 03:27 And because when PowerPoint opens presentations,
- 03:30 they open directly on top of each other.
- 03:32 If you want to quickly switch back to your previous presentation,
- 03:36 a good way of doing this is to jump up to the View tab,
- 03:39 and you'll see that you have a switch windows option.
- 03:43 That's going to list out all of the PowerPoint presentations that
- 03:46 you currently have open, and allow you to toggle or switch between them.
- 03:51 So super nice and simple.
- 03:54 So now I have these new presentations, I'm probably going to want to save them so
- 03:58 I don't lose anything.
- 03:59 So there are a few different ways that I can save.
- 04:02 However, if this is a new presentation you've created,
- 04:05 the first thing you are going to want to do is select Save As.
- 04:10 So let's jump up to File, I'm going to go down to Save As in the left-hand menu, and
- 04:14 then I need to choose a location where I want to save this file.
- 04:18 Now I could choose to browse my local drives and find a folder.
- 04:22 However, if it is a folder that I've accessed recently,
- 04:26 I'm more than likely going to find it in my recent files list.
- 04:30 And I can see here that earlier today,
- 04:32 I save something into the Course Files folder.
- 04:35 And this is the folder that I want to save this file into.
- 04:39 So I can simply click, and it jumps me to the correct folder.
- 04:43 Let's click in the title bar and add the name of this presentation.
- 04:50 I'm saving it as a regular PowerPoint file.
- 04:52 So the file extension is .pptx, and all I need to do is click on the Save button.
- 04:58 Now as soon as I do that, if you take a look at my quick access toolbar,
- 05:02 you can see I have an option that says AutoSave which is toggled to on.
- 05:07 And if you'red using PowerPoint for Microsoft 365,
- 05:10 you will find this option on your Quick Access Toolbar.
- 05:14 And I would recommend that you have this toggle to on because what it means is that
- 05:18 it's going to save automatically for you at regular intervals.
- 05:22 So this really negates the need for you having to keep clicking on the Save icon
- 05:27 in order to save any changes as you go along.
- 05:30 And this AutoSave option is set to save every time you do anything to your
- 05:34 PowerPoint presentation.
- 05:36 And the good thing about that is that if PowerPoint was to crash unexpectedly,
- 05:41 it means that when you reopen this file,
- 05:43 pretty much everything you've done to date is going to be saved.
- 05:47 Now, I will say that if you're not using PowerPoint for Microsoft 365,
- 05:52 you might not see this AutoSave toggle.
- 05:54 And in that instance,
- 05:55 I would recommend that you save your presentations on a regular basis.
- 06:00 And you can either do that by clicking on the Save button which you have by default
- 06:04 on your Quick Access Toolbar, or pressing the keyboard shortcut, Ctrl S.
- 06:09 So all that's left for me to do here, is close down this file, so file Close.
- 06:15 I'm also going to close down this presentation which I didn't actually save.
- 06:19 And I'm going to say don't save.
- 06:22 And now if I want to go back in and reopen that first presentation,
- 06:26 if I go down to open, you should see that sitting right at the top of my list.
- 06:31 Because it was the last presentation that I accessed.
- 06:34 So I think that is more than enough information for
- 06:37 you to wrap your head around.
- 06:38 It's time for you to grab a drink, and join me over in the next lesson.
Lesson notes are only available for subscribers.
Facebook Twitter LinkedIn WhatsApp Email
© 2024 GoSkills Ltd. Skills for career advancement

- Get started with computers
- Learn Microsoft Office
- Apply for a job
- Improve my work skills
- Design nice-looking docs
- Getting Started
- Smartphones & Tablets
- Typing Tutorial
- Online Learning
- Basic Internet Skills
- Online Safety
- Social Media
- Zoom Basics
- Google Docs
- Google Sheets
- Career Planning
- Resume Writing
- Cover Letters
- Job Search and Networking
- Business Communication
- Entrepreneurship 101
- Careers without College
- Job Hunt for Today
- 3D Printing
- Freelancing 101
- Personal Finance
- Sharing Economy
- Decision-Making
- Graphic Design
- Photography
- Image Editing
- Learning WordPress
- Language Learning
- Critical Thinking
- For Educators
- Translations
- Staff Picks
- English expand_more expand_less
PowerPoint 2003 - Creating a Blank Presentation
Powerpoint 2003 -, creating a blank presentation, powerpoint 2003 creating a blank presentation.

PowerPoint 2003: Creating a Blank Presentation
Lesson 2: creating a blank presentation.
/en/powerpoint2003/the-powerpoint-window/content/
Introduction
By the end of this lesson, you should be able to:.
- Choose and apply a slide layout
- Add text to a placeholder
- Save and close a presentation
- Exit PowerPoint
Creating a blank presentation
PowerPoint offers three ways to create a presentation: Blank presentation , From Design Template , or From AutoContent Wizard .
The Blank presentation option is one of the more commonly used methods. It offers several blank slides, with layouts for text and graphics.
To create a blank presentation:
- Open PowerPoint.
- A slide featuring a place for a title and subtitle appears by default. You can start your presentation with this slide or choose a different slide layout.
- The New Presentation Pane appears on the right side of the screen.
- Under New , click Blank Presentation .
- A list appears.
Choosing a slide layout
As you work on your presentation, think about the type of layout you want. Do you want a slide with text and lots of clip art, or one with text and a chart? PowerPoint offers several layout options.
To choose a slide layout:
- Move your arrow pointer over the layouts, or use the scroll bar in the Slide Layout pane .
- A gray bar appears to the right of each layout.
- When you find a layout you like, click the down-pointing arrow and choose Apply to Selected Slide.

Placeholders
Once you choose a layout for your slides, you can begin adding text, graphics, and other elements. This is done with placeholders —special places within a slide where you can add content.
To add text to a placeholder:
- Click on the placeholder.
- Start typing.
You'll learn about inserting clip art and other graphics into placeholders later in this course.
Saving a presentation
You can save, close, and exit presentations in PowerPoint just as you would with other Microsoft applications.
To save a presentation:
- Choose the location where you want to save your presentation. (My Documents is a good place).
- Type a name in the File Name box, or keep the one PowerPoint has provided.
Closing a presentation and exiting PowerPoint
Once you've finishing working on your presentation, you can quickly close it.
To close a presentation:
- Click the X in the PowerPoint presentation window (Ctrl+W).
- The PowerPoint application remains open, and you can start a new presentation. (See next page for details).
To exit PowerPoint:
- Click the X in the top-right corner.
Creating a new presentation using the traditional method
After you have closed one presentation, you can easily start a new one while PowerPoint is still open by using the traditional new file creation method.
To start a new presentation:
- In the New Presentation pane , under New , choose Blank Presentation .
- Choose the design layout you want.
In this series of challenges, you will prepare a presentation about where you learn . This presentation can contain facts about the city or town where you learn and the place you use GCFLearnFree.org (home, library, learning center, Internet cafe, etc.).
- Start PowerPoint.
- Choose a slide layout with a title and subtitle placeholder .
- Type Where I Learn in the title placeholder.
- Save the document as Where I Learn .
- Exit PowerPoint.
/en/powerpoint2003/inserting-copying-and-deleting-slides/content/
6.2 Designing a Presentation in Microsoft PowerPoint
Learning objectives.
By the end of this section, you will be able to:
- Create a new slideshow from a blank presentation
- Create a presentation from a theme or template
- Understand the functions of the Home tab
- Understand the functions of the Design tab
- Understand the functions of the View tab
At WorldCorp, Microsoft PowerPoint presentations are used company-wide for a variety of purposes, such as presenting quarterly sales data or providing training for new sales personnel. As part of the Microsoft 365 suite, PowerPoint has characteristics similar to those of other programs such as Microsoft Word and Microsoft Excel . PowerPoint is divided into various tabs, which appear across a ribbon that helps you organize your actions.
In general, creating a storyboard or outline of a presentation , as outlined in the previous section, is a great starting point, and this is the approach we will use to build My Life in a Snapshot . To get started, this section provides an overview of the PowerPoint program, with a review of several tabs within the ribbon that you will use to develop your first slideshow from scratch. As we start using the primary elements of PowerPoint, you will begin to develop an understanding of how the program works with examples to provide context.
The vast capabilities of PowerPoint enable WorldCorp employees to present complex ideas, facts, and figures in the form of easily digestible visuals. Allowing users to create visual representations of information on the blank canvas slides can allow viewers to interpret, engage with, and expound on what they’re seeing.
Let’s begin by using the blank canvas approach to crafting a presentation.
Getting Started
Open PowerPoint and choose a blank presentation (the first option). You should see a screen that looks like Figure 6.5 , with an arrow highlighting the desired choice. If you want to open an existing presentation, select Open from the left sidebar and search for the file. Another option is to start with a PowerPoint template —a predesigned set of slides that you can use as a starting point for creating a new PowerPoint presentation. Templates include a defined layout and color scheme, and they often include sample text and images that you can replace with your own content. Using template s is a way to save time and ensure consistency in the design of your presentation. Like many organizations, WorldCorp has a preset template that is often used for external communications, such as presentations for clients. However, for the My Life in a Snapshot presentation, you are not restricted to using the template, as this is an internal presentation and is more informal.
In this example, you will start with a blank presentation. After opening this blank document (by double-clicking on Blank Presentation ), you should save it to your computer or to the cloud using a file name that is identifiable to the content of the presentation. As seen in Figure 6.5 , select the Blank Presentation option on the Home screen indicated by the arrow.
In a blank presentation, the initial slide PowerPoint provides is blank except for two placeholders: one for the title and one for the subtitle. When you choose a blank presentation, none of the design elements are defined in advance. The Title Slide layout that is provided by PowerPoint can quickly be altered. Most presentations should have a title. Additionally, the program opens to the Home tab found within the ribbon, as seen in Figure 6.6 . Now, the blank canvas is ready for you to craft My Life in a Snapshot for your team at WorldCorp.
Creating a Presentation with Themes and Templates
Many companies tend to already have a theme developed for use with company presentations. A presentation’s theme refers to the overall design and layout of the slides, including elements such as color scheme, font choices, and graphic elements. Themes are useful because they give you an easy way to create a consistent presentation by using preset fonts and color schemes. If you had chosen a theme instead of a blank presentation, the initial slide would show the same elements, but with the design features of the theme applied. A theme can also include predesigned slide layouts, which can be used to create a cohesive and consistent look throughout the presentation.
Within the New tab, as seen in Figure 6.7 , selecting a theme allows the designer to set the tone and style of the presentation, which can help to engage the audience and convey the message more effectively. Themes can be either built-in or custom-made, depending on the software you are using. PowerPoint offers numerous themes that you can apply and search for in the search window.
Another option that users have is to select a template instead of just a theme. Unlike a theme, a template is a blueprint of a group of slides that can help meet the topic of a presentation. Templates can contain layouts, fonts, colors, and background styles much like a theme. Much like a résumé template in Word, for instance, a template in PowerPoint prompts the user, suggesting sections and topics to include. As an example, a classic conference presentation might have a specific cadence and style. Slides will be arranged to meet the needs of a conference with suggested slides and topics to include. Theme and template options are worth considering and searching for, especially if a theme matches the overall type of presentation you plan to create.
There are benefits to creating a PowerPoint presentation from a theme. First, this approach provides consistency . The program will offer multiple slides with various concepts, all using the same color pattern, style, and texture. A theme allows users to focus on the presentation message without distraction from differing designs, although it does not necessarily guarantee that they will understand the message. Additionally, starting with a theme ensures that all the slides in the presentation will have a professional aesthetic design and layout, making it look polished. Aesthetics is the study of how things look and how we perceive and respond to them. It can also refer to the overall look and feel of something—for example, the aesthetics of a website or a building.
PowerPoint themes often include a multitude of predesigned slide layouts, which can save time and effort in creating your presentation. You can click into the various text boxes or image boxes to provide the required content, copying the desired layouts that work best for you and deleting those that don’t.
Real-World Application
Marketing toolkits.
Most companies now offer their internal stakeholders Marketing Toolkits to use. Marketing Toolkits provide users with the logos, color schemes, outlines, photo depositories, and ideas on what the company is looking for when designing marketing materials. Digital presentation information is almost always included in the toolkit.
With advances in cell phone technology and social media’s growing presence in our lives, companies can now maximize their marketing reach by enlisting their entire workforce into marketing. By providing accessible content for creators and guidelines, any employee can now be a part of promoting their employer.
Not all employees will embrace a Marketing Toolkit. It is only as effective as leadership and the culture of the company allow. See if any companies you know have a Marketing Toolkit online. Does the company toolkit offer guidelines for PowerPoint presentations? Presentations to external stakeholders can be a valuable marketing opportunity.
The themes that PowerPoint provides can be customized to reinforce your company’s image and message by matching the company’s branding and style. The visual design and layout of themes can be chosen to convey the message or tone of the presentation in a more effective way, which can make it more engaging for the audience. These themes can also be easily modified to include different colors, fonts, and graphics, allowing you to personalize the presentation while still maintaining a consistent design.
Themes are helpful, but to learn PowerPoint more deeply, you will also need to learn how to create a presentation from scratch. Start by getting to know the Home tab . The tools found on the Home tab are used to create the general structure of the slideshow, as seen in Figure 6.8 . As an introduction to this group of tools, we will review five key commands, which are circled in the figure: New Slide , Layout tab , the tools in the Font command group, the tools in the Paragraph command group, and Design Ideas .
Using the outline laid out in Figure 6.9 , you can create a slideshow from a blank document to present to the team. From here, you can see how a well-planned presentation of ideas can be created in the form of a PowerPoint slideshow.
Following the outline in Figure 6.9 , the presentation requires five distinct groups of information arranged in numerical order with subtopics. In PowerPoint, you will want to add five slides, each of which will represent one of these groups. To do this, go to the New Slide command group and, with your mouse, select the green button on New Slide four times. (Reminder: PowerPoint provides the first slide by default.) Note that you can change the layout at any time after creating a slide. For this exercise, any layout will do to get started. The default layout provided is fine.
Once complete, there should be five slides listed in the thumbnail pane on the left side of the screen. ( Figure 6.10 shows the first two of five.) You can then use the thumbnail feature to click in and out of individual slides as we develop and edit content that meets the storyboard criteria.
Now that you have created five new slides, you can edit and format them. It’s a good idea to use the same steps to edit and format each. For example, you might create a step called “adding text,” ensuring that every slide that needs text will receive text. The first slide, which is similar to a cover page for the presentation, requires a standard title and subtitle, and these are provided by default.
The next command in the Home tab (see Figure 6.8 ) is Layout tab . When you open the drop-down menu in Layout, you will see that PowerPoint offers nine basic layout options, which are designed to provide variety, balance, and consistency to each presentation design. (One of the options is “blank.” This layout gives you a blank, white canvas to build from, enabling you to design an infinite number of layouts.) For your WorldCorp presentation example, use the default layout Title Slide for the first slide. A title slide is a slide layout that provides space for a title and a subtitle. (Note that you are not using a template here.)
To add your content, click into each text box provided (it says “Click to add title” and “Click to add subtitle”). Start by typing “My Life in a Snapshot” in the first text box. In the second text box, type your name, followed by your title at WorldCorp and your geographic location, as seen in Figure 6.11 .
Next, in the thumbnail panel, select each slide and change the layout for the rest of the slides. Depending on the content of your presentation, it can be helpful to have different layouts on different slides. This presentation will use three different layouts to accommodate different types of information. Follow along by selecting each slide from the thumbnails, then selecting the Home tab, followed by selecting the layout option from the ribbon. You can choose to have information on the slide presented in a different way by changing the slide layout. For example, you could have two groupings of text side by side, as is shown in Figure 6.12 , or have the content on the slide grouped all in one area. Make sure to change the layout setting so it accurately reflects the recommendations found in Figure 6.12 .
Font choice plays a big role in PowerPoint presentations. Each letter, number, or symbol on a slide can be adjusted to a specific design. Using these options allows you to make your text more visually appealing. The process for selecting or changing a font is similar to the way you change a font’s details in Word. In PowerPoint, however, you will often have much less text to manipulate than in a Word file, and the text is usually much larger so an audience can easily view the information from a distance.
When you change font characteristics, be sure to choose what will best meet the audience’s needs. There are a few easy rules of thumb to follow when you create text for a presentation to a large audience. One of them is what’s known as the seven-seven rule —that each slide should have no more than seven lines of text and each line of text should have no more than seven words. This will help prevent you from relying on punctuation or sentence structure to convey your message. When it’s necessary to communicate via paragraphs of text, Word may be a better tool to distribute those types of communication either as handouts along with the presentation or in lieu of the presentation altogether. But, remember, this is only a rule of thumb. It is acceptable to deviate by a few words or lines based on the message and content of the presentation. The point is to keep the slides clear and simple and not to distract from the presenters themselves. Best practices can be a great help in keeping the audience front and center in your mind and staying focused on the purpose of your presentation.
Fill in the required text as displayed in Figure 6.13 . As with changing the layouts, click on each thumbnail, select the required text box, change the font to meet your needs (including the type and color of the font), and adjust the font size as needed. Type the required information (this will be your chance to start explaining who you are to your team), and then make sure to review your work for any errors. Take your time. Word choice can be a challenging task. Make sure that every slide is accounted for. Then, you’re ready to move on to the next step of designing My Life in a Snapshot .
A variety of presentation styles are available, so be sure to take note of the things you like and dislike in the presentations you attend as you develop your own style preferences. Consider the contrast between the text and the background. How easy is it to read the text while listening to a presenter? Does the text work both compressed on a laptop screen (as in a Zoom call) and displayed on a 176-inch projector screen designed for a room full of people? You will notice that the font size and choice are large and easy to read in this project. Later, as you explore the many available options, you are likely to find that the text font needs to match the theme of the presentation.
Next, consider the text. Is this the appropriate content to display? As an example, in Figure 6.14 , you can compare the options for our closing slide choice. Is the use of a graphic image of a question mark the best option, or would a written question, as in the center image, be more effective? In some cases, a combination of pictures and text may work best. There is no perfect answer—PowerPoint gives you many options. But at some point, you will need to make decisions. No matter how creative the formatting of the text, a combination of content may be a better option when deciding what layout and kinds of content to use.
Both the font and the paragraph options have functionality only when a text box has been selected. As with the paragraph options, Office offers a helpful array of choices for line spacing, adding bullets, numbering, aligning text, and adding or removing columns. If the default bullet points or line spacing options provided in the text box layouts are incorrect or missing, this can be a place to add or change the required element. You can make changes within a text box either by selecting the entire text box or by selecting only the location you want to change.
Design Ideas/Designer
The latest option group Microsoft has built into the newest PowerPoint versions is the Design Ideas tab (also called the Designer tab in different versions of PowerPoint). (Refer again to Figure 6.8 .) This is an on/off button that provides advanced slide layouts and “smart” options when turned on. The Design Ideas feature increases the options available to you as the content creator of My Life in a Snapshot —or any presentation you may be called on to create.
Select the first slide in your presentation, which is typically the title slide , and type in the title of the presentation. As the title is added, you can see how quickly a few words can shape an entire slide. Turn on the Design Ideas option in the Home tab . You will notice several options to the right of the screen. These options are often unique to the words and layout you provide. In this step, select an option that fits your personality, and the transformation will occur. An example is provided in the comparison Figure 6.15 from an employee who started not too long ago in WorldCorp’s South Asian Marketing division. The image on the left was the general text the WorldCorp team member typed into the default Title Slide layout. The image on the right is the option they chose that best matched their personality, which was created and offered by the designer in PowerPoint. Keep in mind that the Design Ideas option is available for only one slide at a time.
Because the Design Ideas option was turned on, it reviewed the text within the text boxes and considered several complete design options that could apply. Starting with a very limited bit of information, the Design Ideas option could add multimedia content (3D models, pictures, background themes); alter the text alignment, color, size, and formatting; change the layout; and create an entire theme representing the keywords on the page. It could even add simple animations, such as a snowflake background with snowflakes gently falling. Having these action components is like having an entire production team on call to quickly merge your ideas with existing collaborative content to make exquisite slides.
Instead of using the Design Ideas feature, you may want to design your PowerPoint yourself. The wide range of design options in PowerPoint allows you to change the overall look and feel of your presentation, quickly and easily. By using the built-in template s, color schemes, and slide layouts, you can transform the roughed-out text that you added earlier to polished, professional-looking presentation slides without spending much time and effort on design. (You will learn more about this process in the chapter on Giving Presentations ). Rather than using the Design Ideas feature, which only formats a single slide at a time, the Design tab provides a collection of tools for altering color schemes and layout designs for all of the slides at once. For example, you could change your entire color palette with just a few clicks of the mouse, applying the design to all the slides according to their predefined layout. Additionally, the option to change the slide layout makes it easy to organize the information in a way that is easy for the audience to follow and understand.
In summary, the Design tab in PowerPoint will help to make the process of creating a presentation faster, easier, and more professional-looking, by allowing you to communicate your message in the best possible way for your audience. Building new content for presentations is like building anything else: To do a professional job, you need professional tools, and you need to know how to use them.
Now it’s time to select the design and variation recommended in Figure 6.16 . The first command group on the Design tab focuses on themes. Each theme is unique and modifiable. We have a particular theme we want you to use for the remainder of your slides. Hold down the Control key on your keyboard (Ctrl). With your mouse, select slides 2, 3, 4, and 5 from the thumbnails. Go to the top of the screen and choose the theme circled in Figure 6.16 . The theme will be applied to only the slides you selected. Your uniquely designed title slide will remain. Remember to save your work. You will quickly notice how themes and variations can elevate your design.
For more ideas, you can turn to the Design Ideas pane at the right of the slide area, as shown in Figure 6.16 . (Note that in this figure, the Design Ideas option is called Designer.) For even more ideas, click on See More Design Ideas at the bottom of the pane. This can be accomplished by selecting a particular slide. On the ribbon on the Design tab, the Designer/Design Ideas option will illuminate on the far-right side. Click on the icon and then scroll down, and you can click again on See More Design Ideas. If you have Microsoft 365, your app will be updated as designers add new themes.
The next command group on the Design tab is titled Variants. Variants are essentially modifications you can make within a single theme. These provide a way to add a different overall look. This group initially displays four different color schemes to use with your theme. It lets you change the color combinations, font, or background, or add special effects. For every theme you choose, you can alter the color scheme and font combination (title and regular text). Make sure in your slideshow for My Life in a Snapshot that you have selected both the theme and the corresponding variation of the theme.
Figure 6.17 displays other variant settings that you can customize, including fonts, effects, and background styles. These options can be accessed in the Design tab, within the Variants ribbon, using the down arrow option. Colors, Fonts, Effects, and Background Styles all become options with a multitude of choices.
Selecting the arrow to the right for Colors extends a drop-down list that displays many preset color scheme possibilities, plus a Customize Colors option that allows you to change all of the colors in a scheme. The Font variant lets you pick different fonts for title text and body text. The Effects variant, or Artistic Effects, applies a graphic effect or filter to your slides, such as making them look like a sketch or a painting. Effects can be applied to a single slide or to all slides within the presentation.
The last command group on the Design tab is Customize , which gives options to change the slide size and format the background appearance. You won’t need to use this option for your first presentation, but it is a helpful tool to learn for your future presentations. The slide size command offers two principal choices of aspect ratio , which is the relationship of the slide’s width to its height: standard (compatible with older screen sizes), with an aspect ratio of 4:3, and widescreen (for today’s HD environment), with an aspect ratio of 16:9 ( Figure 6.18 ).
Also found in the Customize group of commands is the Format Background command. Click on it and you will see the menu as shown in Figure 6.19 . This command lets you change the background of a slide by changing the fill to a solid color, gradient fill, pattern fill, and so on. Select fill and then hover over each of the circles to see the available color and background options.
Format Background contains all the options for changing the background: Solid fill, Gradient fill, Picture or texture fill, and Pattern fill. Each option has its own set of elements to adjust. Solid fill is just that—choose a solid color for your background. Gradient fill lets you choose the way the color is spread across the slide, the intensity or transparency of the color, and the shape the background effect follows as it moves across the slide. Finally, you can fill the background with a pattern or a photo.
There are many ways to customize a theme to meet your specific needs. Different color combinations, fonts, effects, and background styles are all elements you can use to customize your presentation. Even small changes may be transformative.
The next tab to review is the View tab. To have a basic understanding of PowerPoint , you will need to know the general purpose of several view options. Within the View ribbon, there are seven command groups. The first three are circled in Figure 6.20 , starting with Presentation Views .
When creating slides, you will typically work with the Normal View , the default view that PowerPoint opens within a new presentation ( Figure 6.21 ). The large window shows the current slide, and the other slides are shown as thumbnails down the left side of the window. The large window gives you plenty of room to focus on developing content and layout for each slide while you can also jump in and out of each slide through the thumbnails.
Outline View shows a list of the slides on the left, highlighting the text rather than the actual slides as pictures. In Outline View, you can scroll through the text of each slide rather than having to jump in and out of individual slides. This can be a great aid when reviewing or organizing text, as seen in Figure 6.22 . (You may have noticed that we changed our title slide to match the theme of the rest of the slides. Now the presentation has a more consistent design.)
Slide Sorter is an option that lays out slides in order, allowing you to move them around with a drag-and-drop of the mouse. This view is useful when you want to add or delete a slide or change their order.
For example, suppose a team member creates a photo album to introduce themselves, with each slide consisting of a single photo. If they select thirty photos, creating an album with thirty slides, Slide Sorter View can help them edit the album by adding or deleting a photo and by arranging the photos in the desired order. In My Life in a Snapshot, with only five slides to edit, this view would be overkill. But with a larger presentation with many more slides, a Slide Sorter View can be a helpful option.
Notes view (or Notes Page ) displays a single slide with the notes below the text or image. These notes are typically designed for the speaker. They may be reminders, citations, or any various notes that the presenter wants to have at their fingertips. This can be handy when a user wants to add or edit a large amount of text. If, for example, they have a lot of text on a slide but are not sure yet which words might be best to highlight for the audience, this area of notes can provide a collection place for content.
The Reading View displays slides one at a time, as they would appear in a slideshow. Utilizing the View option allows you to take any one of the five slides and adjust the size of text boxes and change alignments—all while seeing most of the screen.
The Master Views option group may be a bit advanced for this introductory review, but we will provide a brief example. Within this group, the Slide Master is simply a template of the slide, breaking apart the individual components of the slide layout. This is a time-saving method for creating professional and consistent presentations. You can start with one of the PowerPoint themes or a blank slide, add or change the colors, add borders, change the font, and change or create a layout of your own. You can insert text boxes and object placeholders. When you do this on a master slide, you create a template that unifies the slides in a slideshow. When you have completed a slide that you want to keep as a master slide, select File, Save As, choose a location, and, in file type, choose PowerPoint Template. This is now a Master Slide template that you can use repeatedly.
Handouts Master and Notes Master are specialized viewing modes for specific tasks. The Handouts Master options allow developers to create a template for the PowerPoint printed handout for audience members. Slides can be arranged; titles, dates, and notes can be laid out. Within the Notes Master option group, the view of the slides and printable notes can be arranged as you desire.
This book may not be used in the training of large language models or otherwise be ingested into large language models or generative AI offerings without OpenStax's permission.
Want to cite, share, or modify this book? This book uses the Creative Commons Attribution License and you must attribute OpenStax.
Access for free at https://openstax.org/books/workplace-software-skills/pages/1-chapter-scenario
- Authors: Tammie Bolling, Angela Mitchell, Tanya Scott, Nyrobi Wheeler
- Publisher/website: OpenStax
- Book title: Workplace Software and Skills
- Publication date: Nov 29, 2023
- Location: Houston, Texas
- Book URL: https://openstax.org/books/workplace-software-skills/pages/1-chapter-scenario
- Section URL: https://openstax.org/books/workplace-software-skills/pages/6-2-designing-a-presentation-in-microsoft-powerpoint
© Jan 3, 2024 OpenStax. Textbook content produced by OpenStax is licensed under a Creative Commons Attribution License . The OpenStax name, OpenStax logo, OpenStax book covers, OpenStax CNX name, and OpenStax CNX logo are not subject to the Creative Commons license and may not be reproduced without the prior and express written consent of Rice University.
Presentations and slideshows are PowerPoint's primary benefit, but if you've never worked with slideshows before, understanding the way presentations work is much different than Word or Excel documents. Presentations work much differently than other Office software. These files use images, labels, sounds and effects to create a slideshow used in meetings and conferences.
Creating a New Presentation
After you open PowerPoint, the opening window is shown where you can choose to create a new presentation or open an existing file already stored on your computer. New files can be created from a template, or you can create a new presentation with no pre-installed images or themes. For this course's examples, we'll use a blank presentation document, which is shown on the opening PowerPoint 2019 main window.

(Blank presentation file with no template theme)
Click the "Blank Presentation" icon and a new file opens in PowerPoint. When a new presentation is created, the first slide is created with two text boxes that can be used in your new file. You can also choose to delete these two text boxes and start with a completely blank slideshow.
(New slideshow presentation)
The left panel shows your slides. This panel lets you see a thumbnail of slides, so you can identify them and get a quick preview of the content contained in the slide. The center window is the current slide you're working on. When you click a slide in the left panel, it becomes the active slide. Since there is only one slide in a new file, it's the only slide active in the above window.
When the file opens, you have a presentation file created but it's not saved yet. Should you close the window now without saving, you lose any file changes.
Save a New File
As you create a presentation and make changes to your file, you must save it for new content to take effect permanently. The top section of a PowerPoint window has a few buttons to quickly save, undo and redo changes.

(Save, undo and redo change buttons)
In the image above, only the first icon is active because it's a new file with no changes to undo or redo. The "Save" icon is a diskette. All Office applications have this quickbar icons to make it easy to quickly save your files.
Make any changes to your file's content and the "Undo" and "Redo" buttons are enabled. The "Undo" button is the arrow icon that faces left (after the "Save" button), and the "Redo" button is the icon where the arrow circles around to the right (the last icon in the list). The "Undo" button deletes the last action that you made in the file. For instance, if you added text to your file, clicking the "Undo" button will remove this text. The "Redo" button is the opposite of the "Undo" button. Clicking the "Redo" button will re-apply your text.
Clicking the "Save" button will open a dialog window where you choose the file name and directory location where you want to save the file. After you save a file, it's now located on your drive, and you can re-open it should you close the file and want to return to it. It also saves your file should you have a power outage and have a computer failure where the machine reboots.
Create a New Slide
PowerPoint 2019 presentations represent the entire slideshow file. One slide is created when you open a new presentation, but you need to create new slides for each topic. The left panel displays a list of slides currently created, and you can create a new slide by right-clicking this panel and selecting "New Slide" from the context menu.
(Context menu to create a new slide or a new section)
After you select "New Slide," a new one displays in the panel. If you have any themes or templates configured, PowerPoint applies background colors and images when the new slide is created.
Large presentations could be dozens of slides, and as you present them to viewers you might want to separate topics into sections. The "Add Section" option will give you a way to link directly to sections of your presentation. By linking to sections, you can jump around your presentation without scrolling and searching for a specific slide.
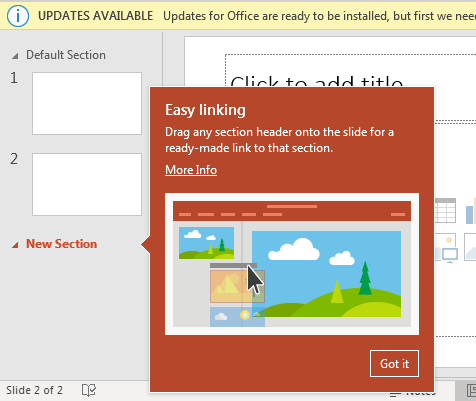
(New section created)
Like the popup tooltip says, you can drag and drop the section link into any slide. When you click the link, PowerPoint scrolls to the section. This tool is especially useful when you have dozens of slides and need to reference back to one during a presentation.
Quick Menu to Insert Objects
When you create a new slide, PowerPoint 2019 uses a template that has a title at the top of the slide where you can add text. The second control has a list of pre-made object insertion options.
(Insert an object into a slide)
When you hover your mouse over each object, PowerPoint tells you what will be inserted if you click it. In the image above, the mouse is hovering over the second icon in the top row. The tooltip indicates that should you click this button, you will be able to insert a chart. With PowerPoint 2019 slides, you can insert Excel spreadsheets, charts, videos, sounds, graphs, images from your local computer or ones that you've found online.
For this example, click the "Online Image" object. A window opens where you can search for an image online. The search feature uses Microsoft Bing to search for image. Type an image name in the search text box or choose a category. Drill down to the image that you want to use, and then double-click it to add the image to the slide. The image is then inserted into the square that's shown as a dotted line outline.

(Image inserted into a slide)
The image is automatically sized to fit the slide, but you can use the circles surrounding the image to resize it. The arrow at the top of the image can be used to rotate it. If you use the circles in the corners, the image will resize equally both horizontally and vertically. This should be your preferred way to resize the image, because if you resize using the side circles, your image will be skewed, and its quality will be poorly displayed.
Also notice that you can see the image in the left panel. The left preview images can be used to find slides as you scroll through dozens of them. With only two slides, it's easy to identify the right slide with the apple, but when you have dozens of them, it can be time-consuming to search for the right slide using your mouse. Using the panel, you can scroll through dozens of slides much more quickly.
Each new slide that you create is visible in the left panel. Click it and you can see the content in the middle section of the PowerPoint interface. Remember that you can add objects stored on your computer or ones that you find online such as images. By inserting objects, you can create highly effective marketing or sales presentations that can be shown to hundreds of views at a time.

- Course Catalog
- Group Discounts
- Gift Certificates
- For Libraries
- CEU Verification
- Medical Terminology
- Accounting Course
- Writing Basics
- QuickBooks Training
- Proofreading Class
- Sensitivity Training
- Excel Certificate
- Teach Online
- Terms of Service
- Privacy Policy

- All-Access Subscriptions
- Business Licensing
- Lightroom Classic
- Photoshop Elements
- Crystal Reports
- Interview Skills
- Resume Skills
- Excel for Lawyers
- Outlook for Lawyers
- QuickBooks for Lawyers
- Word for Lawyers
- Microsoft Office Suite
- Outlook on the Web
- Microsoft Project
- Microsoft Teams
- QuickBooks Online
- QuickBooks Pro
- Video Course Options
- SUBSCRIPTIONS
- Photoshop Elements 2024
- Photoshop Elements 2023
- Photoshop Elements 2022
- Photoshop Elements 2021
- Photoshop Elements 2020
- Photoshop Elements 2019
- Photoshop Elements 2018
- Photoshop Elements 15
- Google Classroom for Teachers
- Google Docs
- Google Drive
- Google Forms
- Google Sheets
- Google Slides
- Mac OS Keyboard Shortcuts
- Excel Formulas and Functions
- Excel Keyboard Shortcuts
- Excel Tables PivotTables and Charts
- Access for Microsoft 365
- Excel for Microsoft 365
- Microsoft Office 365
- Outlook for Microsoft 365
- PowerPoint for Microsoft 365
- Publisher for Microsoft 365
- Word for Microsoft 365
- Access 2021
- Microsoft Office 2021
- Outlook 2021
- PowerPoint 2021
- Publisher 2021
- Access 2019
- Microsoft Office 2019
- Outlook 2019
- PowerPoint 2019
- Publisher 2019
- Access 2016
- Microsoft Office 2016
- OneNote 2016
- Outlook 2016
- PowerPoint 2016
- Publisher 2016
- Microsoft Office 2013
- OneNote 2013
- Outlook 2013
- PowerPoint 2013
- Microsoft Office for iPad
- QuickBooks Pro 2024
- QuickBooks Pro 2023
- QuickBooks Pro 2022
- QuickBooks Pro 2021
- QuickBooks Pro 2020
- QuickBooks Pro 2019
- QuickBooks Pro 2018
- QuickBooks Pro 2017
- QuickBooks Pro 2016
- QuickBooks Pro 2015
- QuickBooks Pro 2014
- Sage 50 Accounting
- Windows 11 and 10 Keyboard Shortcuts
- Chrome OS for Chromebooks
- Word and Excel (Mac) 2022
- Word and Excel (PC/Windows) 2021-2016 and 365
- QuickBooks Desktop (PC/Windows) 2024
- QuickBooks Desktop (PC/Windows) 2023
- QuickBooks Desktop (PC/Windows) 2022-2015
- Windows 11 and 10
- Our History
- Customer Service
- Testimonials
- Lost Password
- Register a Product
- Manage My Account
- Member Login
Try the PowerPoint Course for Free!
Insert a new slide in powerpoint- instructions, how to insert a new slide in powerpoint: video.
This video lesson, titled “ Inserting New Slides ,” shows how to insert a new slide in PowerPoint. This video lesson on how to add a new slide in PowerPoint is from our complete PowerPoint tutorial , titled “ Mastering PowerPoint Made Easy v.2019 and 365 .”
Overview of How to Insert a New Slide in PowerPoint:
This tutorial shows you how to insert a new slide in PowerPoint. When you create a new blank presentation in PowerPoint, one default slide that contains a “Title Slide” layout appears. You can click into the placeholders shown in the title slide and type the text you want to have appear as the title and subtitle of your presentation.
To add another slide to your presentation, you must then insert a new slide and determine which placeholders appear in the slide. The slide layout you select for the inserted slide determines which placeholders appear within it. You can, however, also change the layout applied to a slide after you insert it to change its placeholders.
To insert a new slide in PowerPoint with a “Title and Content” slide layout, click the “Home” tab in the Ribbon. Then click the “New Slide” button in the “Slides” button group. Alternatively, to insert a new slide with a different slide layout, click the “Home” tab in the Ribbon. Then click the drop-down part of the “New Slide” button in the “Slides” button group. The drop-down menu that then appears shows the other available slide layouts. Click the name of the desired slide layout in the drop-down menu to insert a new slide with the selected layout.

A picture that shows how to insert a new slide in PowerPoint by selecting a slide layout to insert into the presentation.
Instructions on how to add a new slide in powerpoint:.
- To add a new slide with a “Title and Content” slide layout in PowerPoint , click the “Home” tab in the Ribbon.
- Then click the “New Slide” button in the “Slides” button group.
- Alternatively, to add a new slide with a different slide layout , click the “Home” tab in the Ribbon.
- Then click the drop-down part of the “New Slide” button in the “Slides” button group to show a drop-down menu that shows the other available slide layouts.
- Then click the name of the desired slide layout in the drop-down menu to insert a new slide with the selected layout.

About Joseph Brownell


From Blank Slide to Powerful Presentation: Your Ultimate Guide

The Importance of Presentations
In the modern world, presentations have become a fundamental tool in various fields, from education to business. They allow us to communicate complex ideas in a structured and visually appealing way, making it easier for the audience to understand and retain the information. Whether you’re pitching a new product, teaching a class, or sharing research findings, a well-crafted presentation can make all the difference.
Overview of the Article
This article aims to guide you through the process of creating an effective presentation. We will start by exploring PowerPoint, a popular presentation software, and discuss how to start a new project and choose between creating a blank presentation or using a prepared design.
Next, we will delve into the world of PowerPoint templates, discussing their importance and how to select and customize them to fit your needs. We will also cover the design aspects of your presentation, including how to decide on the design, add a title, and other content.
We will then move on to the theme of your presentation, discussing its importance and how to select and customize it. To ensure your presentation is engaging, we will provide tips on starting your presentation with a thought-provoking question or a shocking fact, among other strategies.
Additionally, we will guide you through the process of creating a presentation using Visme, an alternative to PowerPoint. This will include starting a project, selecting the right template, choosing a color scheme, developing a theme, finding the right images, and choosing legible fonts.
Finally, we will share some tips from the Harvard Business Review on how to give a killer presentation, focusing on engaging with your audience during the presentation.
By the end of this article, you will have a comprehensive understanding of how to create a presentation that is engaging, visually appealing, and effective in communicating your ideas. So, let’s get started!
Starting with PowerPoint
Opening powerpoint.
PowerPoint is a widely used presentation software developed by Microsoft. It’s part of the Microsoft Office suite, which means it’s readily available on most computers running Windows. To start creating a presentation, you first need to open PowerPoint. You can do this by clicking on the PowerPoint icon on your desktop or by searching for it in the Start menu.
Selecting a New Project
Once you have PowerPoint open, the next step is to start a new project. This can be done by clicking on the ‘File’ menu at the top left of the screen and then selecting ‘New’. This will open a new window where you can choose to create a blank presentation or use a prepared design.
Choosing Between a Blank Presentation or a Prepared Design
PowerPoint offers two main options when starting a new project: creating a blank presentation or using a prepared design.
- Blank Presentation : This option allows you to start from scratch. It’s a blank canvas where you can add your own text, images, shapes, and other elements. This is a good option if you have a specific design in mind or if you want to create something unique.
- Prepared Design : PowerPoint also offers a variety of prepared designs or templates. These are pre-designed presentations where you just need to replace the placeholder text and images with your own content. This is a great option if you want to save time or if you’re not confident in your design skills.
In the next section, we will delve deeper into the world of PowerPoint templates, discussing their importance and how to select and customize them to fit your needs.
Understanding PowerPoint Templates
The importance of templates.
PowerPoint templates are pre-designed slides that you can use as a starting point for your presentation. They come with a set of design elements, color schemes, and fonts that are consistent across all slides. Using a template can save you a lot of time and ensure that your presentation has a professional and cohesive look.
How to Select a Template
PowerPoint offers a wide variety of templates to choose from. To select a template, go to the ‘File’ menu, select ‘New’, and then browse through the available templates. You can preview each template by clicking on it. When you find a template that you like, click on it and then click ‘Create’ to start a new presentation with that template.
Customizing Templates
While templates provide a good starting point, you can and should customize them to fit your needs. You can change the color scheme, modify the fonts, add your own images, and rearrange the elements on the slides. To customize a template, simply click on the element you want to change and then use the options in the toolbar at the top of the screen.
Remember, the goal is to make the presentation your own. While templates provide a good foundation, your input and creativity are what will make your presentation stand out.
In the next section, we will discuss the design aspects of your presentation, including how to decide on the design, add a title, and other content.
Designing Your Presentation
Deciding on the design of your presentation.
The design of your presentation plays a crucial role in how your message is perceived. A well-designed presentation can make your content more engaging and easier to understand. When deciding on the design of your presentation, consider your audience, the purpose of your presentation, and the content you will be presenting.
For instance, a business presentation might require a more professional and clean design, while an educational presentation might benefit from a more colorful and interactive design.
Adding a Title to Your Presentation
The title is one of the first things your audience will see, so it’s important to make it impactful. It should be concise, clear, and give your audience an idea of what your presentation is about.
To add a title in PowerPoint, click on the first box that says ‘Click to add title’ and type in your title. Make sure to choose a font that is easy to read and large enough to be seen from a distance.
Adding Other Content to Your Presentation
Apart from the title, your presentation will likely include other types of content such as text, images, charts, and videos. Here are some tips for adding these elements:
- Text : Keep your text concise and to the point. Use bullet points or short sentences, and avoid large blocks of text. Remember to choose a font size that is easy to read.
- Images : Images can help to illustrate your points and make your presentation more engaging. Make sure to use high-quality images and to respect copyright laws.
- Charts : Charts are a great way to present data in a visual and easy-to-understand way. PowerPoint allows you to create various types of charts including bar charts, pie charts, and line charts.
- Videos : Videos can be a great addition to your presentation, but use them sparingly. Make sure they serve a purpose and contribute to your message.
Remember, the goal is to create a balanced and engaging presentation. Too much of any one element can be overwhelming, so strive for a good mix of text, images, and other media.
In the next section, we will discuss the theme of your presentation, its importance, and how to select and customize it.
Choosing a Theme for Your Presentation
The importance of a theme.
A theme in a presentation is a set of design elements, including colors, fonts, and effects, that provide a consistent look and feel across all your slides. A well-chosen theme can make your presentation look professional and visually appealing. It can also help guide your audience through your presentation, as they can associate different colors and styles with different types of content.
How to Select a Theme
PowerPoint comes with a variety of built-in themes that you can choose from. To select a theme, go to the ‘Design’ tab in the toolbar at the top of the screen. Here, you can browse through the available themes and preview how they look on your slides. When you find a theme that you like, simply click on it to apply it to your presentation.
Customizing Your Theme
While the built-in themes in PowerPoint provide a good starting point, you can also customize them to better fit your needs. You can change the colors, fonts, and effects used in the theme to match your brand or personal style.
To customize a theme, go to the ‘Design’ tab and click on the ‘Colors’, ‘Fonts’, or ‘Effects’ buttons in the ‘Variants’ group. This will open a dropdown menu where you can select a different color scheme, font set, or effect set. You can also create your own color scheme or font set by clicking on the ‘Customize Colors’ or ‘Customize Fonts’ options.
In the next section, we will discuss how to engage your audience and make your presentation more interactive and memorable.
Engaging Your Audience
Starting your presentation effectively.
The way you start your presentation can set the tone for the rest of your talk. One effective strategy is to begin with a thought-provoking question or a shocking fact. This can immediately grab your audience’s attention and make them curious to hear more. For instance, if you’re giving a presentation about climate change, you might start with a startling statistic about the rate of global warming.
Other Ways to Engage Your Audience
Engaging your audience is about more than just grabbing their attention at the start. It’s about keeping them interested and involved throughout your presentation. Here are a few strategies:
- Tell a story : Stories are inherently engaging and can help to illustrate your points in a memorable way. Try to incorporate a narrative into your presentation, or use case studies or personal anecdotes to bring your content to life.
- Use visuals : As the saying goes, a picture is worth a thousand words. Use images, diagrams, charts, and videos to illustrate your points and make your content more engaging.
- Interact with your audience : This could be as simple as asking rhetorical questions, or you could involve your audience more directly by asking for a show of hands, conducting a poll, or even inviting an audience member to come up on stage.
- Use humor : Humor can help to break the ice and make your presentation more enjoyable. Just make sure your jokes are appropriate for your audience and topic.
The Importance of Audience Engagement
Engaging your audience is crucial for a successful presentation. It can help to keep your audience’s attention, make your content more memorable, and even make your presentation more enjoyable. So, as you prepare your presentation, think about how you can incorporate these strategies to engage your audience.
In the next section, we will guide you through the process of creating a presentation using Canva, an alternative to PowerPoint. This will include starting a project, selecting the right template, choosing a color scheme, developing a theme, finding the right images, and choosing legible fonts.
Creating a Presentation with Canva
Starting a project in canva.
Canva is a popular online design tool that can be used to create presentations. To start a new project in Canva, you first need to create an account or log in if you already have one. Once you’re logged in, click on the ‘Create a design’ button on the right side of the screen and select ‘Presentation’.
Selecting the Right Template
Canva offers a wide variety of professionally designed templates that you can use as a starting point for your presentation. To select a template, browse through the available options and click on one that you like. This will open the template in the Canva editor, where you can start customizing it.
Choosing a Color Scheme
The color scheme of your presentation can have a big impact on how it is perceived. Canva makes it easy to choose a color scheme that fits your topic and audience. To change the color scheme of your template, click on the ‘Colors’ tab in the editor and select a new color scheme from the available options.
Developing a Theme
Just like in PowerPoint, a theme in Canva is a set of design elements that provide a consistent look and feel across all your slides. You can choose a theme from Canva’s library or create your own. To customize the theme of your template, click on the ‘Styles’ tab in the editor and select a new theme from the available options.
Finding the Right Images
Images can make your presentation more engaging and help to illustrate your points. Canva offers a library of millions of high-quality images that you can use in your presentation. To add an image, click on the ‘Elements’ tab in the editor, select ‘Photos’, and then search for an image that fits your content.
Choosing Legible Fonts
The fonts you choose for your presentation can affect how easy it is for your audience to read your content. Canva offers a wide variety of fonts to choose from. To change the font of your text, select the text box, click on the font dropdown menu in the editor, and select a new font from the available options.
In the next section, we will share some tips from the Harvard Business Review on how to give a killer presentation, focusing on engaging with your audience during the presentation.
Presenting Your Presentation
How to effectively present your presentation.
Creating the presentation is just the first step. The way you deliver it is equally important. Here are some tips on how to effectively present your presentation:
- Practice : The more familiar you are with your presentation, the more confident you will be when delivering it. Practice your presentation several times before the actual event. This will also help you identify any areas that might need improvement.
- Engage with your audience : Try to make your presentation interactive. Ask questions, encourage participation, and make eye contact. This will make your presentation more engaging and help keep your audience’s attention.
- Use clear and concise language : Avoid using jargon or complex language. Your goal is to communicate your message as clearly as possible.
- Use visuals effectively : Visuals can help reinforce your message and make your presentation more engaging. However, avoid overcrowding your slides with too many visuals or text.
- Manage your time : Keep track of time to ensure you cover all your points without rushing or exceeding your allotted time.
Tips for Making an Effective and Engaging Presentation
Creating an effective and engaging presentation involves more than just putting together slides. It requires careful planning, thoughtful design, and a clear understanding of your audience and your message. Here are some additional tips to help you create a presentation that stands out:
Understand Your Audience
Before you start creating your presentation, take some time to understand your audience. Who are they? What are their interests and needs? What do they already know about your topic, and what do they need to learn? The more you understand your audience, the better you can tailor your presentation to meet their needs.
Keep It Simple
When it comes to presentation design, less is often more. Avoid overcrowding your slides with too much text or too many images. Instead, focus on conveying one key idea per slide. This will make your presentation easier to follow and more memorable.
Use Visuals Wisely
Visuals can be a powerful tool in your presentation, but only if used wisely. Use visuals to support your message, not to distract from it. Make sure every visual you include serves a purpose and is easy to understand.
Tell a Story
Stories are inherently engaging and can help make your content more memorable. Try to weave a narrative throughout your presentation, or use anecdotes or case studies to illustrate your points.
Practice, Practice, Practice
The more familiar you are with your presentation, the more confidently you will deliver it. Practice your presentation several times, and consider rehearsing in front of a friend or colleague to get feedback.
Engage Your Audience
Try to make your presentation interactive. Ask questions, encourage discussion, or include activities that get your audience involved. This can help keep your audience engaged and make your presentation more memorable.
In the final section, we will wrap up the article with a conclusion that recaps the main points and offers some final thoughts and advice.
Recap of the Article
In this article, we’ve covered a comprehensive guide on how to create a presentation. We started with the basics of opening and starting a new project in PowerPoint, selecting and customizing templates, and deciding on the design of your presentation. We also discussed how to add a title and other content to your slides, and how to select and customize a theme for your presentation.
We then moved on to discuss how to engage your audience, starting your presentation effectively, and keeping your audience interested throughout your presentation. We also explored how to create a presentation using Canva, an alternative to PowerPoint, including how to start a project, select a template, choose a color scheme, develop a theme, find the right images, and choose legible fonts.
Adopting the Right Mindset for Presentations
The importance of mindset.
When it comes to creating and delivering a presentation, your mindset can play a crucial role. Having the right mindset can help you approach the task with confidence, creativity, and a focus on your audience’s needs. Conversely, a negative or anxious mindset can hinder your performance and make the process more stressful than it needs to be.
Growth Mindset
A growth mindset, a concept developed by psychologist Carol Dweck, is the belief that abilities and intelligence can be developed through dedication and hard work. When applied to presentations, this mindset can help you see challenges as opportunities for learning and growth. Instead of fearing mistakes or criticism, you embrace them as valuable feedback that can help you improve your future presentations.
Audience-Centric Mindset
An audience-centric mindset involves focusing on your audience’s needs, interests, and expectations. Instead of seeing your presentation as a performance where you’re the center of attention, you see it as an opportunity to deliver value to your audience. This mindset can help you create a presentation that is engaging, relevant, and impactful.
Positive Mindset
Maintaining a positive mindset can help you manage presentation-related stress and anxiety. This involves focusing on your strengths, visualizing a successful presentation, and using positive affirmations. A positive mindset can boost your confidence and help you deliver your presentation with enthusiasm and conviction.
Mindfulness
Mindfulness involves being fully present in the moment and accepting it without judgment. When creating a presentation, mindfulness can help you stay focused and avoid distractions. During the presentation, it can help you stay calm, manage your nerves, and connect with your audience.
Adopting the right mindset is a crucial yet often overlooked aspect of creating and delivering a successful presentation. By cultivating a growth mindset, an audience-centric mindset, a positive mindset, and mindfulness, you can approach your next presentation with confidence, creativity, and a genuine desire to deliver value to your audience.
Final Thoughts and Advice
Creating a presentation can seem like a daunting task, but with the right tools and guidance, it can be a rewarding and creative process. Remember that the most important aspect of any presentation is the message you’re trying to convey. Focus on delivering your content in a clear, engaging, and visually appealing way, and you’re sure to create a presentation that leaves a lasting impression.
Whether you’re using PowerPoint, Canva, or any other presentation tool, remember to keep your audience in mind at all times. Make sure your content is relevant and interesting to them, and strive to engage them throughout your presentation.
Finally, practice makes perfect. The more presentations you create, the better you’ll become at it. So don’t be afraid to experiment with different designs, templates, and techniques. Happy presenting!
Home Blog Design How to Create the Perfect Handouts for a Presentation
How to Create the Perfect Handouts for a Presentation

As we presenters know, aiming for a flawless presentation experience involves not only top-notch presentation skills but also graphics, a well-thought-out presentation structure, and articulating both how to start a presentation and how to conclude a presentation. Yet, very little is said about presentation handouts and their role in large-scale meetings, or their value when securing business deals.
Seasoned presenters acknowledge the impact of a presentation handout, and today we’ll guide you in the process of creating these printed-format assets to make your presentation more memorable.
Table of Contents
What is a Presentation Handout?
The role of presentation handouts, why create handouts for large scale presentations, examples of effective handouts for presentations, how to create presentation handouts in powerpoint, how to create presentation handouts in google slides, best practices for presentation handouts, final words.
A presentation handout is a supplementary document provided to the audience by the presenter or the event’s organization during or before a presentation. The core purpose is to enhance the understanding and retention rate of the information shared or to provide contact points with the presenter via email, LinkedIn, website, or social media profiles.

Handouts in presentations allow attendees to follow along more easily, take notes on specific parts, and have a further reference – ideal in large corporation events. The talk may not fully cover information, like detailed metrics, supplementary graphs, etc.; thus, they can be featured inside the handout to provide additional background on the presentation topic. In short, think of handouts as deliverable presentation aids .

Picture yourself attending a series of presentations at a large-scale event, like a medical conference. How many research presentations can you retain in your head? 3-4 top, whereas perhaps you attended over 12 in the past 8 hours. Handouts for presentations simplify attendees’ efforts, as they have a palpable reference about the presentations they attended, who delivered the talk, the conference presentation slides , etc.
Another interesting point of view for handouts is when we position ourselves in the shoes of an attendee with a physical impairment, like lessened hearing capacity. In this situation, we can picture a handout example, as the presenter integrates the audience, even those who cannot fully participate, by delivering information in a physical format.
When covering examples of handouts for presentations, we can position ourselves in generalistic situations as follows.
Helping people with physical impairments
Handouts don’t necessarily have to be printed in text format. Braille handouts can be used to assist people with low visual acuity to understand the missing gaps between the speech and the visuals shown in the slides. Electronic devices with screen readers can assist, as well as an audible format of the handout.
For people with hearing impairments, printed handouts summarizing the presentation’s key points are valid, but another creative method is to insert a QR code in PowerPoint and link to a PDF document with the transcript of the presentation, plus the slides.
Illustrations and Diagrams
Think about hard-to-understand topics involving a series of charts or graphs to comprehend the disclosed information. Those same graphics can be given to the audience in the format of handouts, with callouts or visual aids that remind the attendees of the importance of those concepts.
Summarize Key Information
Suppose you attended a chef conference, where new technologies, methodologies, or recipes are shared in presentations. You can refer to the handouts for detailed instructions and focus on the training presentation in real time rather than taking notes.
Contact Data
Finally, we can consider a handout format for people who want to get in touch for business partnerships, academic collaborations, etc. Rather than delivering a business card, provide additional information about your work and deliver a handout.
Follow these steps to create handouts in PowerPoint.
Open your presentation in PowerPoint. Go to the View tab and find Handout Master .

You can customize the appearance of your handout by adding a header, date, logo, contact details, etc. This works exactly the same as Slide Master in PowerPoint , so all changes will be reflected on all pages in your handout.

Now, go to File > Export and select Create Handouts .

Click on the Create Handouts button, and you will be prompted with a context menu with the following options:
- Notes next to slides
- Blank lines next to slides
- Notes below slides
- Blank lines below slides
- Outline only
Select the option you prefer. We highly recommend selecting Paste to add a tiny version of the slides to your new handouts document.

Once that’s done, a new Microsoft Word document will open with your presentation handouts, which can also be customized from Word.

For Google Slides, the instructions are much simpler. Select your desired presentation in Google Slides and go to File > Print Preview . All options for how to print slides in Google Slides are now available.

The option we’re interested in is the menu below the top bar that says 1 slide without notes .

Open that and select Handout , with the number of slides per page you prefer.

Then click on Print, and a new PDF document will be generated. Unlike PowerPoint, you have to edit everything beforehand or opt for a PDF editor like Adobe Acrobat.
Handouts should be concise. The idea is to summarize information, not to confuse the audience with an overwhelming amount of data. Although these recommendations are valid for all handouts created with PowerPoint templates and Google Slides, the same rules apply to handouts created in Graphic Design Software (Adobe Illustrator, Corel Draw, etc.), as it’s tempting to keep adding unnecessary data or complex illustration effects.
Sharing your handout before the presentation starts is advisable, as it’s the moment most attendees will gather and where the expectation about what the talk will be about is at its highest. In our experience, the audience tends to grow restless toward the last 5 minutes of your presentation, with some attendees leaving if they have to attend another conference with a very limited timeframe between both. Distributing a handout during the presentation is distracting and will negatively impact your presentation’s performance.
Finally, as you would do with poster presentations , focus on readability. Avoid using heavily contrasting colors or text that looks too small to read for the sake of adding more data. The handout is a tool to complement your presentation, not to summarize countless words.
Handouts for presentations are not an optional add-in. They are a vital element of effective academic and business presentations. By providing a clear structure to your handout or using digital mediums to help people with impairments, you are taking into account accessibility, one of the best practices you can engage early on in your path to becoming a professional presenter.

Like this article? Please share
Presentation Ideas, Presentation Tips Filed under Design
Related Articles

Filed under Google Slides Tutorials • April 29th, 2024
Best Google Slides Add-Ons
Optimize your Google Slides experience by installing the best Google Slides add-ons available in the market. Full list with photos.

Filed under Google Slides Tutorials • April 19th, 2024
How to Find Trash on Google Slides
Don’t worry if you accidently delete a presentation file. Learn how to find trash on Google Slides with this guide.

Filed under Business • April 10th, 2024
Discovering Coaching Presentation Tools
Discover the best PPT templates to use as coaching presentation tools with this article. Tools explained + examples.
Leave a Reply
How-To Geek
6 ways to create more interactive powerpoint presentations.
Engage your audience with cool, actionable features.
Quick Links
- Add a QR code
- Embed Microsoft Forms (Education or Business Only)
- Embed a Live Web Page
- Add Links and Menus
- Add Clickable Images to Give More Info
- Add a Countdown Timer
We've all been to a presentation where the speaker bores you to death with a mundane PowerPoint presentation. Actually, the speaker could have kept you much more engaged by adding some interactive features to their slideshow. Let's look into some of these options.
1. Add a QR code
Adding a QR code can be particularly useful if you want to direct your audience to an online form, website, or video.
Some websites have in-built ways to create a QR code. For example, on Microsoft Forms , when you click "Collect Responses," you'll see the QR code option via the icon highlighted in the screenshot below. You can either right-click the QR code to copy and paste it into your presentation, or click "Download" to add it to your device gallery to insert the QR code as a picture.
In fact, you can easily add a QR code to take your viewer to any website. On Microsoft Edge, right-click anywhere on a web page where there isn't already a link, and left-click "Create QR Code For This Page."
You can also create QR codes in other browsers, such as Chrome.
You can then copy or download the QR code to use wherever you like in your presentation.
2. Embed Microsoft Forms (Education or Business Only)
If you plan to send your PPT presentation to others—for example, if you're a trainer sending step-by-step instruction presentation, a teacher sending an independent learning task to your students, or a campaigner for your local councilor sending a persuasive PPT to constituents—you might want to embed a quiz, questionnaire, pole, or feedback survey in your presentation.
In PowerPoint, open the "Insert" tab on the ribbon, and in the Forms group, click "Forms". If you cannot see this option, you can add new buttons to the ribbon .
As at April 2024, this feature is only available for those using their work or school account. We're using a Microsoft 365 Personal account in the screenshot below, which is why the Forms icon is grayed out.
Then, a sidebar will appear on the right-hand side of your screen, where you can either choose a form you have already created or opt to craft a new form.
Now, you can share your PPT presentation with others , who can click the fields and submit their responses when they view the presentation.
3. Embed a Live Web Page
You could always screenshot a web page and paste that into your PPT, but that's not a very interactive addition to your presentation. Instead, you can embed a live web page into your PPT so that people with access to your presentation can interact actively with its contents.
To do this, we will need to add an add-in to our PPT account .
Add-ins are not always reliable or secure. Before installing an add-in to your Microsoft account, check that the author is a reputable company, and type the add-in's name into a search engine to read reviews and other users' experiences.
To embed a web page, add the Web Viewer add-in ( this is an add-in created by Microsoft ).
Go to the relevant slide and open the Web Viewer add-in. Then, copy and paste the secure URL into the field box, and remove https:// from the start of the address. In our example, we will add a selector wheel to our slide. Click "Preview" to see a sample of the web page's appearance in your presentation.
This is how ours will look.
When you or someone with access to your presentation views the slideshow, this web page will be live and interactive.
4. Add Links and Menus
As well as moving from one slide to the next through a keyboard action or mouse click, you can create links within your presentation to direct the audience to specific locations.
To create a link, right-click the outline of the clickable object, and click "Link."
In the Insert Hyperlink dialog box, click "Place In This Document," choose the landing destination, and click "OK."
What's more, to make it clear that an object is clickable, you can use action buttons. Open the "Insert" tab on the ribbon, click "Shape," and then choose an appropriate action button. Usefully, PPT will automatically prompt you to add a link to these shapes.
You might also want a menu that displays on every slide. Once you have created the menu, add the links using the method outlined above. Then, select all the items, press Ctrl+C (copy), and then use Ctrl+V to paste them in your other slides.
5. Add Clickable Images to Give More Info
Through PowerPoint's animations, you can give your viewer the power to choose what they see and when they see it. This works nicely whether you're planning to send your presentation to others to run through independently or whether you're presenting in front of a group and want your audience to decide which action they want to take.
Start by creating the objects that will be clickable (trigger) and the items that will appear (pop-up).
Then, select all the pop-ups together. When you click "Animations" on the ribbon and choose an appropriate animation for the effect you want to achieve, this will be applied to all objects you have selected.
The next step is to rename the triggers in your presentation. To do this, open the "Home" tab, and in the Editing group, click "Select", and then "Selection Pane."
With the Selection Pane open, select each trigger on your slide individually, and rename them in the Selection Pane, so that they can be easily linked to in the next step.
Finally, go back to the first pop-up. Open the "Animations" tab, and in the Advanced Animation group, click the "Trigger" drop-down arrow. Then, you can set the item to appear when a trigger is clicked in your presentation.
If you want your item to disappear when the trigger is clicked again, select the pop-up, click "Add Animation" in the Advanced Animation group, choose an Exit animation, and follow the same step to link that animation to the trigger button.
6. Add a Countdown Timer
A great way to get your audience to engage with your PPT presentation is to keep them on edge by adding a countdown timer. Whether you're leading a presentation and want to let your audience stop to discuss a topic, or running an online quiz with time-limit questions, having a countdown timer means your audience will keep their eye on your slide throughout.
To do this, you need to animate text boxes or shapes containing your countdown numbers. Choose and format a shape and type the highest number that your countdown clock will need. In our case, we're creating a 10-second timer.
Now, with your shape selected, open the "Animations" tab on the ribbon and click the animation drop-down arrow. Then, in the Exit menu, click "Disappear."
Open the Animation Pane, and click the drop-down arrow next to the animation you've just added. From there, choose "Timing."
Make sure "On Click" is selected in the Start menu, and change the Delay option to "1 second," before clicking "OK."
Then, with this shape still selected, press Ctrl+C (copy), and then Ctrl+V (paste). In the second box, type 9 . With the Animation Pane still open and this second shape selected, click the drop-down arrow and choose "Timing" again. Change the Start option to "After Previous," and make sure the Delay option is 1 second. Then, click "OK."
We can now use this second shape as our template, as when we copy and paste it again, the animations will also duplicate. With this second shape selected, press Ctrl+C and Ctrl+V, type 8 into the box, and continue to do the same until you get to 0 .
Next, remove the animations from the "0" box, as you don't want this to disappear. To do this, click the shape, and in the Animation Pane drop-down, click "Remove."
You now need to layer them in order. Right-click the box containing number 1, and click "Bring To Front." You will now see that box on the top. Do the same with the other numbers in ascending order.
Finally, you need to align the objects together. Click anywhere on your slide and press Ctrl+A. Then, in the Home tab on the ribbon, click "Arrange." First click "Align Center," and then bring the menu up again, so that you can click "Align Middle."
Press Ctrl+A again to select your timer, and you can then move your timer or copy and paste it elsewhere.
Press F5 to see the presentation in action, and when you get to the slide containing the timer, click anywhere on the slide to see your countdown timer in action!
Now that your PPT presentation is more interactive, make sure you've avoided these eight common presentational mistakes before you present your slides.
- Create and open Article
- Share and collaborate Article
- Add and format Article
- Design Article
- Give a presentation Article

Create and open
Create and open a powerpoint presentation.
Start collaborating with these quick instructions on how to create, share, and edit presentations on your own or with your team.
To convert your Google Slides to PowerPoint, go to File > Download > Microsoft PowerPoint (.pptx). Then open the file in PowerPoint. See more at Get started with Sheets .
Note: Features and information in this guide apply to PowerPoint as available through Microsoft 365.
Create a new presentation
Open PowerPoint.
Select Blank presentation , or select one of the themes.
Select More themes to view the gallery and search for more.

Add a slide
Select the slide you want your new slide to follow.
Select Home > New Slide .
Select Layout and the you type want from the drop-down.

When you save your files to the cloud, you can share and collaborate with others.
Select File > Save As .
Select a OneDrive folder and name the file.
After you save once to OneDrive, AutoSave is enabled that saves your file automatically, every few seconds, as you work.

Rename a presentation
Select the file name on the title bar.
In the menu that appears you can rename the file, select a new location to move it to, or see the version history for the file.

When you're online, AutoSave is always on and saves your changes as you work. If at any time you lose your Internet connection or turn it off, any pending changes will sync as soon as you’re back online.

At the top of your Microsoft Office apps on Windows you'll find the Search box. This powerful tool helps you look up PowerPoint commands, get Help, or search the Web.

Need more help?
Want more options.
Explore subscription benefits, browse training courses, learn how to secure your device, and more.

Microsoft 365 subscription benefits

Microsoft 365 training

Microsoft security

Accessibility center
Communities help you ask and answer questions, give feedback, and hear from experts with rich knowledge.

Ask the Microsoft Community

Microsoft Tech Community

Windows Insiders
Microsoft 365 Insiders
Was this information helpful?
Thank you for your feedback.
Combined Shape .st0{fill-rule:evenodd;clip-rule:evenodd;fill:#fff} .st0{fill-rule:evenodd;clip-rule:evenodd;fill:#fff} SMS Main navigation Things to Do Attractions & Tours Arts & Culture Outdoors & Wellness Shopping Budget Family Hidden Gems Luxury Pet-Friendly Eat & Drink Bars Clubs Dine LA Restaurant Week Restaurants Business Spotlight Find Events Itineraries Where to Stay Celebrate LA Heritage AAPI Heritage Black LA Latino Heritage LGBTQ+ Tourist Information Meetings About LA Tourism Travel Trade Membership Business Spotlight Media Research Careers Today's must read Hidden Gems of Los Angeles Log in Search Search Family May the 4th Celebration: Across the Galaxy Share Been There Login Register My Next Trip Login Register May 4, 2024 | 10:30AM - 4:30PM Academy Museum of Motion Pictures 6067 Wilshire Blvd, Los Angeles 90036 More Info Add to Calendar Go Metro Is The Force strong with you? Join the Academy Museum as we explore the galaxy for a Star Wars–inspired May the 4th Celebration!
Discover LA Newsletter
IMAGES
VIDEO
COMMENTS
Create a presentation. Open PowerPoint. In the left pane, select New. Select an option: To create a presentation from scratch, select Blank Presentation. To use a prepared design, select one of the templates. To see tips for using PowerPoint, select Take a Tour, and then select Create, . Add a slide.
Create a blank presentation. Open PowerPoint. Select one of the Blank Presentation and start typing. Note: Microsoft 365 subscribers will find Design Ideas based on the words you type. You can browse and select a new look. Create a presentation from a theme. Select File > New. Double-click a theme in the gallery to create a presentation in that ...
In this Clip, we will talk about ways to create a new blank presentation.
Create a new presentation. Open PowerPoint. Select Blank presentation, or select one of the themes. Select More themes to view the gallery and search for more. Add a slide. Select the slide you want your new slide to follow. Select Home > New Slide. Select Layout and the you type want from the drop-down.
A new presentation will appear. To create a new presentation from a template: A template is a predesigned presentation you can use to create a new slide show quickly.Templates often include custom formatting and designs, so they can save you a lot of time and effort when starting a new project.. Click the File tab to access Backstage view, then select New.
Create the presentation you want to use as the "blank" presentation. Add slides, customize slide masters, and change designs until you're satisfied that the basic arrangement is a good starting point for any new presentations you create. 2. Choose File, Save As. In the Save as Type box, choose Design Template.
PowerPoint 2019 For Dummies. The simplest way to create a new presentation is to start Microsoft PowerPoint 2019, click Blank Presentation on the opening screen, and then edit the blank presentation to your liking. After PowerPoint is started, you can also create a new presentation by clicking the File tab to switch to Backstage View and then ...
Creating a Blank Presentation. When you start PowerPoint, click on New. Click on the option to create a Blank Presentation. A blank presentation has a white background and black text without any ...
To do that, simply go up to the Home tab and click on New Slide. This inserts a new slide in your presentation right after the one you were on. You can alternatively hit Ctrl+M on your keyboard to insert a new blank slide in PowerPoint. To learn more about this shortcut, see my guide on using Ctrl+M in PowerPoint.
To create a blank presentation: Open PowerPoint. A slide featuring a place for a title and subtitle appears by default. You can begin your presentation with this slide or choose a different slide layout. The New Presentation Pane appears on the right side of the screen. Under New, click Blank Presentation.
Click the File tab. Select New. Type a category in the Search field or select one beneath it. Select a secondary template category to further narrow the search. Select a template. Click Create. The presentation template is downloaded, and a new presentation using it opens in PowerPoint. You can fill in the placeholders, and delete the elements ...
We will need to create and save a new blank presentation when we want to design a slide deck from scratch. Instructions Create a new blank presentation. New blank presentations can be created in a few ways: from the File menu, using a keyboard shortcut or from the Quick Access Toolbar. From the File Menu. Click the File tab. Click New.
How to get started with powerpoint by Creating a new blank presentation
Using templates. A template is a predesigned presentation you can use to create a new slide show quickly.Templates often include custom formatting and designs, so they can save you a lot of time and effort when starting a new project.. To create a new presentation from a template: Click the File tab to access Backstage view.; Select New.You can click a suggested search to find templates or use ...
To create a blank presentation: Open PowerPoint. A slide featuring a place for a title and subtitle appears by default. You can start your presentation with this slide or choose a different slide layout. The New Presentation Pane appears on the right side of the screen. Under New, click Blank Presentation. A list appears.
By the end of this section, you will be able to: Create a new slideshow from a blank presentation; Create a presentation from a theme or template; ... When you choose a blank presentation, none of the design elements are defined in advance. The Title Slide layout that is provided by PowerPoint can quickly be altered. Most presentations should ...
If you create a new blank presentation with only a title slide, what happens when you click the New Slide button on the Home tab? A new slide is created with the Title and Content layout applied. You can change the theme after you create a presentation. True. 1 multiple choice option.
Click the "Blank Presentation" icon and a new file opens in PowerPoint. When a new presentation is created, the first slide is created with two text boxes that can be used in your new file. You can also choose to delete these two text boxes and start with a completely blank slideshow. (New slideshow presentation) The left panel shows your slides.
This tutorial shows you how to insert a new slide in PowerPoint. When you create a new blank presentation in PowerPoint, one default slide that contains a "Title Slide" layout appears. You can click into the placeholders shown in the title slide and type the text you want to have appear as the title and subtitle of your presentation.
1) Start with a Blank Presentation. A blank presentation is a quick and easy way to start a new slide deck. A blank presentation contains very little formatting. You start with the default fonts ...
This will open a new window where you can choose to create a blank presentation or use a prepared design. Choosing Between a Blank Presentation or a Prepared Design. PowerPoint offers two main options when starting a new project: creating a blank presentation or using a prepared design. Blank Presentation: This option allows you to start from ...
Click the "Create" button. Next, head over to the "Design" tab and select the "More" arrow in the "Themes" group. A list of themes will appear. Right-click your custom theme and then select "Set as Default Theme" from the drop-down menu. Now, the next time you open PowerPoint, it will automatically begin with this theme.
Once that's done, a new Microsoft Word document will open with your presentation handouts, which can also be customized from Word. Appearance of handouts with blank lines in Word How to Create Presentation Handouts in Google Slides. For Google Slides, the instructions are much simpler.
false. a worksheet is made up of placeholders. false. a title identifies the data series or bars in a column chart. false. you can move between cells in a table by pressing the Ctrl key. true. you can apply a table style to format the table elements at once. Study with Quizlet and memorize flashcards containing terms like true, true, false and ...
2. Embed Microsoft Forms (Education or Business Only) If you plan to send your PPT presentation to others—for example, if you're a trainer sending step-by-step instruction presentation, a teacher sending an independent learning task to your students, or a campaigner for your local councilor sending a persuasive PPT to constituents—you might want to embed a quiz, questionnaire, pole, or ...
Create a new presentation. Open PowerPoint. Select Blank presentation, or select one of the themes. Select More themes to view the gallery and search for more. Add a slide. Select the slide you want your new slide to follow. Select Home > New Slide. Select Layout and the you type want from the drop-down.
Is The Force strong with you? Join the Academy Museum as we explore the galaxy for a Star Wars-inspired May the 4th Celebration! Whether you're a Padawan, Jedi, or Sith, all forces will unite for a themed, fun-filled day, including a Droid meet and greet, all-ages workshop, community mural, screenings, and more in a galaxy far, far away! Programming will also feature a special presentation ...