30 Amazing Adobe Photoshop Tutorials for Beginners [2022]
- Share on Facebook
- Share on Twitter
By Nikolay Kaloyanov
in How-To Tutorials
2 years ago
Viewed 16,235 times
Spread the word about this article:

Adobe Photoshop is among the market leaders in the creative world. Well, according to Adobe themselves ,
Over 90% of the world’s creative professionals use Adobe Photoshop.
And this shouldn’t surprise us in any way. While Adobe has developed many great products over the years – like Adobe Illustrator , Premiere Pro, Acrobat, InDesign, After Effects, and others, Photoshop continues to be a massive name in the design industry and it won’t change soon.
Photoshop is the most versatile app that is offered by Adobe because it can serve different needs – you can do so many things with it: basic photography edits, photo manipulations, drawing, graphic design, social media design, and even web and app design.
But if you’re reading this, you have probably made up your mind, so there’s no need to convince you why you should go for this app. In this article, we’ve selected the best beginner tutorials for Photoshop, as well as specialized tutorials for photo editing, drawing, design, etc.
Article overview: Getting started with Adobe Photoshop Photography Tutorials Drawing Tutorials Graphic Design Tutorials Social Media Design Tutorials Web and App Design

Getting Started with Adobe Photoshop
1. beginner tutorial – 2022 edition.
In this Adobe Photoshop tutorial, you will learn some of the most basic things about the program – how to work with basic Layers, brushes, RAW camera files, etc.
While this guide cannot provide you with in-depth information on how to complete big tasks, it’s very helpful to make you understand what you can achieve with Photoshop, once you get better.
2. How to use the Object Selection Tool in Photoshop?
Selection tools are used by photo editors to isolate areas of an image for cropping, editing, or elimination. There are several kinds of selection tools in Photoshop, each performing a different function.
In this tutorial, you will learn how to optimize them better to improve your image editing skills. The guide is very detailed and everything is explained slowly so that you can catch up with the narrator.
3. How to Add Shapes in Adobe Photoshop?
While working with shapes is more critical in Adobe Illustrator, that doesn’t change the fact you cannot do it in Photoshop.
In this guide, Julieanne Kost shares 10 quick tips for working with shapes in Adobe Photoshop. All of them are useful in many different scenarios. And the best of all is that the video is only 2 minutes long.
4. New Adobe Photoshop Features in 2022
Whether you are a newbie or an expert, Adobe Photoshop’s update is one of the most awaited events for design professionals every year (Adobe MAX). Version 23.0 was released in October 2021 and it came with some very good additions.
Object Finder, a couple of new Neural Filters, as well as Illustrator to PDF layer export (including retention!) are only some of the new features you will find in Photoshop V23.
5. Photoshop New Features for iPad – 2022
Photoshop for iPad has always looked a little bit stripped. And while we could justify the performance (and it is indeed slower than what we could see on Macs, for example), we can’t justify the lack of features.
However, Martin from “Yes, I’m a Designer” reviews two of the tools that finally appeared on iPads – Smart Objects and Camera RAW editing. If you have an iPad, it’s definitely worth checking this video.
Photography Tutorials
6. how to retouch skin in photoshop.
Photoshop is the go-to option for professional portrait photographers, as it has plenty of capabilities to work with the skin tone. However, there’s a very thin line between smooth editing and photo overkill.
In this tutorial, Kayleigh June shows how to make a natural retouch to the skin, without making the photograph look processed.
7. How to Change The Sky in Photoshop
Adobe Photoshop now lets you change the skies in the photographs, making them look more dramatic and “Instagrammy”.
Unmesh Dinda explains in more detail how to add custom “skies” and correct other image details to make the background match everything else in the frame.
8. Editing an image in Photoshop
It’s amazing to see how professional photographers can utilize Photoshop and Lightroom to create stunning images even with entry-level cameras.
In this Photoshop tutorial, one guru in the photography world – Peter McKinnon, explains in a very quirky way how to drastically improve an image with some basic techniques and a little bit of the “McKinnon Factor”.
9. How to Add a Vintage Look to an Image
Over the last few years, vintage photos have become trendy again, thanks to Instagram filters. But how to create one?
In this tutorial, you will learn how to create a vintage photo by artificially adding image noise and using another image to blend the artifacts, plus some additional techniques like playing with shadows.
10. How to Fix Underexposed Photos in Photoshop?
Overexposed and underexposed images are a nightmare for photographers. While newbies often struggle to find balance, even professionals have to make a hard dilemma when their camera can’t capture the right photo.
Luckily, Adobe Photoshop can recover a lot from the shadows if the image is underexposed. You’d have to sacrifice much more in case of an overexposed photo, as the highlights may appear blown out.
In this tutorial, you’ll learn how to make adjustments in just 2 minutes, so that you bring those colors back and make your images jaw-dropping.
Drawing Tutorials
11. how to create a basic drawing in photoshop.
Adobe Photoshop is a great tool for creating all kinds of drawings – from basic ones to advanced 3D forms and designs.
In the video below you will learn how to work with brushes and strokes. The best thing about Photoshop is that you can use many free brushes .
12. How to Make a Digital Painting in Photoshop?
Adobe Photoshop is preferred for many artists who want to draw in digital form. Because you can draw on computers and on an iPad, there is a lot you can achieve here.
In this tutorial, you will learn how to use some techniques, like working with layers, highlights, and clipping masks.
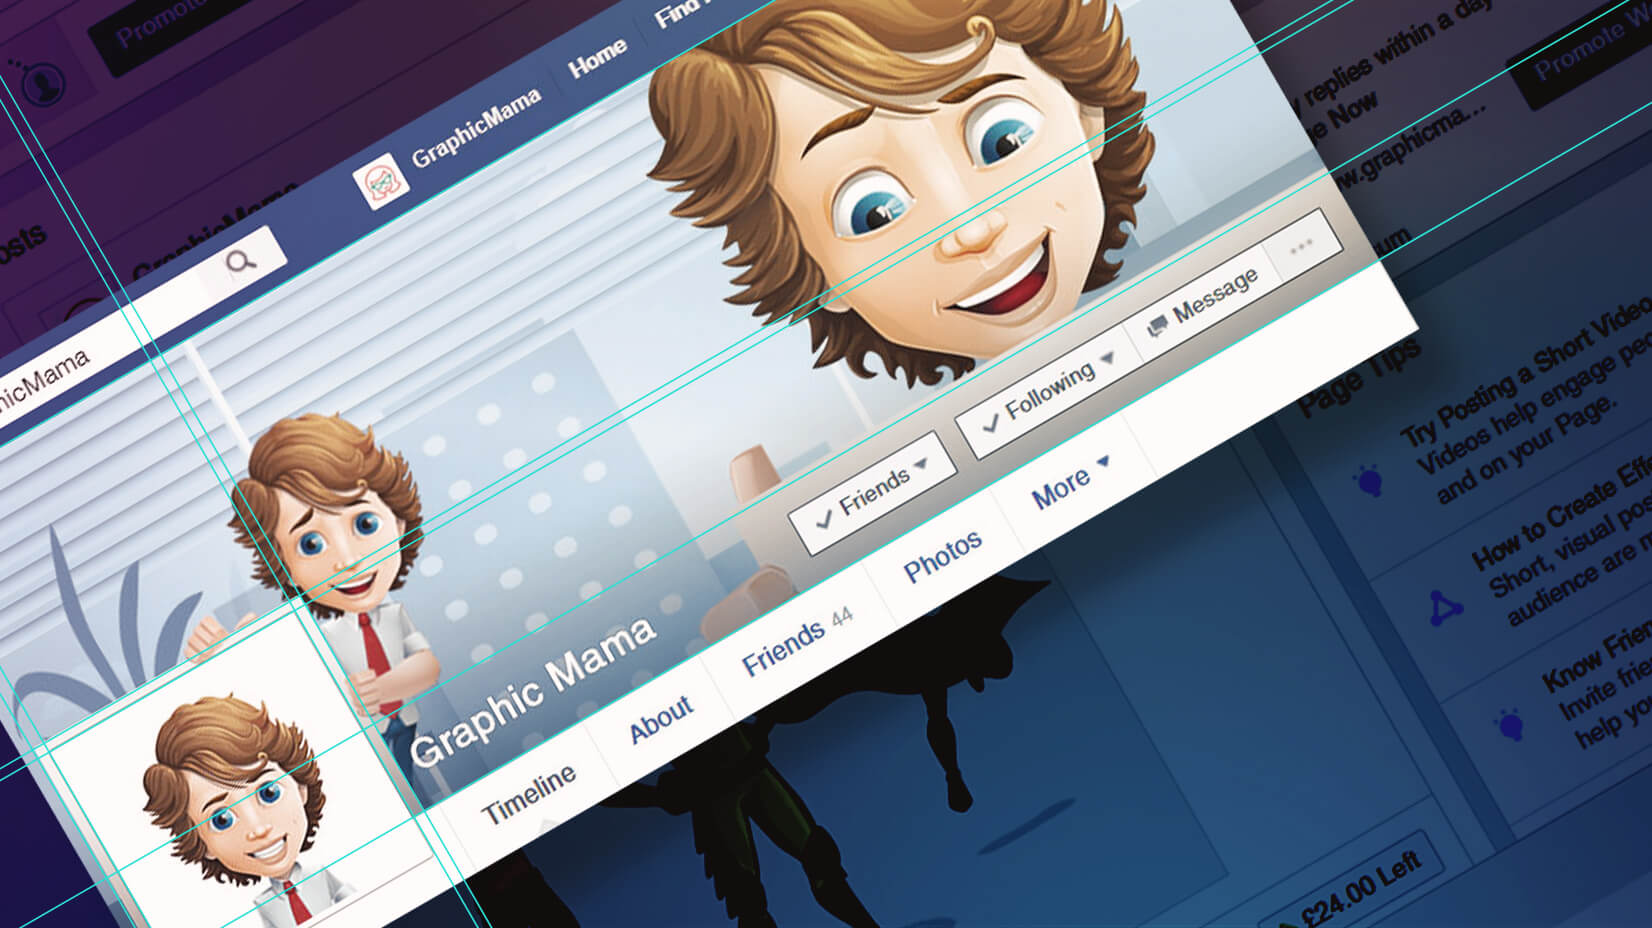
13. How to Cartoon Yourself in Photoshop?
One very trendy movement is to create cartoons out of images. Of course, Adobe Photoshop is also capable of creating amazing cartoons.
In this tutorial, you learn how to better use the pen tool and color picker. You don’t really need many different techniques, however, you need to become more precise with the ones that you are using.
14. How to Create a 3D Character?
You can create a 3D character in Photoshop. You can use it together with Adobe Ch(Character Animation) to create gorgeous 3D animations.
This tutorial is not that easy to execute, however, you can learn some amazing advanced techniques that will help you improve your skills dramatically.
15. How to Draw on iPad?
Apple’s iPad is one of the best devices to simulate a digital canvas. While working on a computer has its perks, drawing by hand cannot be replaced.
In this tutorial, you’ll learn how to use the most important features of Adobe Photoshop for the iPad. You have to pay more attention to gestures and navigation, as this is probably the biggest difference between working on a tablet and a computer.
Graphic Design Tutorials
16. how to remove a background in photoshop.
Designers work with elements. And one of the most important tasks on a daily basis that designers do is fixing backgrounds.
This Adobe Photoshop tutorial is very explanatory and will walk you through all the stages you need to complete in order to achieve your goal – to remove the background of your image.
17. How to Create a Poster in Photoshop?
Posters are an amazing way to express how well you work with graphic design, as they combine multiple tools which could complement each other.
In this guide, you’ll see how to combine images, play with text, and change color settings. Bear in mind you should know how to remove background (our 16th tutorial) beforehand.
18. How to Create Package Design with Photoshop?
While Photoshop isn’t the best software to create package design, you might use vector file formats .
However, just because it’s the most suitable platform, doesn’t mean it’s capable. In this guide, you’ll see how to create a package design from scratch – from picking the right images to optimizing the colors and using the right forms.
19. How to Convert a 2D Logo Into 3D in Photoshop?
Logo Design is an area where Adobe Illustrator shines the brightest. However, nothing beats Photoshop in terms of creativity.
In this tutorial, you will learn how to transform a simple 2D logo into an amazing 3D form that will grab much more attention.
20. How to Create a Professional Portfolio?
Adobe Photoshop is often used for professional portfolios. This way, designers showcase their work in front of employers.
In this tutorial, Phaw Htoo shows you how to create a portfolio profile design step by step. The guide demonstrates how to position your works on the canvas.
Social Media Design Tutorials
21. how to create an instagram story in photoshop.
As you know, Instagram stories are just as popular as posts on the platform. They’re made in 9:16 format (or 1080 x 1920 pixels).
In this tutorial, you’ll quickly learn how to make amazing food stories. Although there is no commentary, all the steps are explained as subtitles. You will see how to combine plenty of skills – like working with shadows, colors, as well as text positioning, and curves.
22. How to Create a Facebook Post Design?
The Facebook post design is similar to Instagram, however, it is done in a different format.
In this tutorial, you will see how to create a Facebook post with all of its key elements – a good background, great fonts, and a CTA button.
23. How to Create a YouTube Banner in Photoshop?
YouTube doesn’t fall under the category “Social Media” but is certainly a good way to increase your exposure as a professional or a brand.
In the video below, you will see how to make a great YouTube banner with some very easy steps. You will better learn how to use image blends, fonts, and gradients.
24. Creating a Banner in Photoshop
Creating an Esports banner is not very common, so you won’t really need it unless you work in the gaming industry. But we really liked the variety of tools used.
In this tutorial, you can see how to use the Object Selection tool, and Clipping Mask tool, utilize shapes, as well as add highlights, and use brushes.
25. How to Create a Business Facebook Cover Photo using Photoshop?
Real estate agents and other business representatives often use social media channels to engage with potential customers for their business.
In this tutorial, you see how to make your cover image stand out with some very easy techniques – like creating shapes and utilizing space.
Web and App Design
26. how to create a landing page in photoshop.
Today, Adobe Photoshop is very commonly seen as a perfect tool for web design mockups, as well as app mockups, since it can create similar to real-life designs.
Let’s see in this tutorial how to create a landing page from scratch with the program. Cosmin Serban shows the essential elements of each landing page – well-made CTA buttons, transparent shapes, and in our case – a minimalistic design.
27. How to Design a Business Website Template in Photoshop?
Creating a business website template is one of the great features of Photoshop. Although Adobe XD and Figma are preferred options for it, but Photoshop still holds its ground.
In this tutorial, you will see how to create every step of the website template and most importantly – align elements on the canvas to make them look properly positioned.
You may also be interested in these 25 tutorials to master Adobe XD in 2022 .
28. How to Design an App Template in Photoshop?
Mobile app templates are quite popular, too. While Photoshop isn’t great for creating responsive app designs (because it works with raster files mainly), it works extremely well with adaptive designs. On top of that, Adobe’s 2022 Photoshop saw it dramatically improve compatibility with Illustrator.
In this tutorial, you will see how to create an app design (a “Sign Up” page) in Photoshop. You will see how to align elements, add social media icons, create a navigation menu and add buttons.
29. How to Create a Professional Newsletter in Photoshop?
Newsletters play a big role today. Since email marketing has the best ROI, designers pay a big attention to how they create their newsletters. Another fact to mention is that people are spammed with emails, so one should really craft something exceptional to grab the end user.
This guide will show you some of the best practices of email newsletter design – such as social media hooks, adding an action button, a rule of thirds, and a grabbing number (60% Discount).
30. How to Convert Photoshop to HTML?
Writing code is a slow process and we can all agree that exporting (or converting) design into code is going to save much time. Adobe Photoshop excels here, too.
In this tutorial, you will learn how to use the Slice Tool properly and export your Photoshop design in HTML. The second part of the tutorial requires you to have Dreamweaver, and there you will see the final design version.
Adobe Photoshop is a very powerful program. As you could see, there are so many things you can do with it – it is a versatile app that can fit many needs. All you need to know is to learn the features and master them. The results will come sooner than you think.
If you find our Photoshop tutorials practical, you can also check some of our other Photoshop-related articles:
- The Best Free Photoshop Plugins & Actions to Get Now
- How to Create a Poster: The Best Beginner Tutorials + Useful Tips
- The Best Free Photoshop Brushes, Textures, and Patterns on the Web

Add some character to your visuals
Cartoon Characters, Design Bundles, Illustrations, Backgrounds and more...
Like us on Facebook
Subscribe to our newsletter
Be the first to know what’s new in the world of graphic design and illustrations.
- [email protected]
Browse High Quality Vector Graphics
E.g.: businessman, lion, girl…
Related Articles
How to turn yourself into animated cartoon in zoom.us, how to use adobe character animator for free in 2022, how to design graphics for social media like a guru: tutorials & tips, character animator tutorials part 3: basic puppet in photoshop, brief guide to choose right logo for your brand, enjoyed this article.
Don’t forget to share!
- Comments (0)
Nikolay Kaloyanov
Nikolay is a copywriter with vast experience in Technology, Marketing, and Design. When he isn't playing with words and crafting texts, he watches sports and asks questions. He is a funny person...until you put him on a diet.

Thousands of vector graphics for your projects.
Hey! You made it all the way to the bottom!
Here are some other articles we think you may like:

How-To Tutorials
How to add audio to google slides and make your presentation awesome.
by Nikolay Kaloyanov
How to Craft a Cartoon Facebook Cover in Photoshop
by Momchil Karamitev

20 Sketch Tutorials To Master the UX Design Software
Looking for design bundles or cartoon characters.
A source of high-quality vector graphics offering a huge variety of premade character designs, graphic design bundles, Adobe Character Animator puppets, and more.
74 of the best Photoshop tutorials to boost your skills and learn what's new
Top Adobe Photoshop tutorials, from the basics to advanced effects and AI Generative Fill.

Photoshop tutorials for beginners
- Intermediate Photoshop tutorials
- Photoshop tutorials: Advanced
There are so many Photoshop tutorials online that you should be able to find a guide to show you how to create whatever you want in Adobe 's industry-leading image editing software. For newcomers to the software, the best Photoshop tutorials are a great way to quickly get up to speed but they can be useful for old hands too, including to get a quick overview of the latest Photoshop beta, version 25.1.
Adobe adds new features to Photoshop on a regular basis, including the new Adobe Firefly Generative Fill capability, and Photoshop tutorials are the ideal way to quickly see how such new features work and whether they might have a place in your workflow. In the roundup below, we've collected a range of Photoshop tutorials, including some from Adobe itself but many more from working creatives and enthusiasts who have made their own videos showing their own tips based on how they use the program's features.
We've divided the best Photoshop tutorials we've seen into sections for beginners, intermediates and pros. They cover everything from the basics to overviews of new features and deeper dives into specific tools for designing logos, editing photos or creating comic art. Check the quick links to skip to your skill level or read on for the full guide.
What's new in Photoshop? Beginners Photoshop tutorials Intermediate Photoshop tutorials Advanced Photoshop tutorials
If you're still considering whether to subscribe to Photoshop, see our Photoshop 25 review and see the best current prices below. You might also want to check out our picks of the best free Photoshop brushes , Photoshop plugins and the best free fonts available. The hardware you use can also make the difference, so take a look at our roundup of the best laptops for Photoshop and the best monitors for photo editing .
The best Photoshop tutorials on new features
Discover the new features introduced into Photoshop 2023 and the latest beta version, 25.1, in these quick overviews. These include tutorials on Photoshop Generative Fill and Generative Expand powered by Adobe Firefly.
01. What's new in Adobe Photoshop beta 25.1?
If you're already familiar with Photoshop and you're just wondering what's new in the latest beta version, beta 25.1, this succinct YouTube video from Studio Shephrd provides a neat overview. Released in September 2023, the latest beta edition expands Adobe Firefly integration in Generative Fill with a new Generative Expand tool, which makes it quicker to extend images to a new canvas size, and support for more languages in Generative Fill text prompts.
02. Photoshop parametric filters tutorial
The other addition in Photoshop beta 25.1 are new parametric filters. The short demonstration above shows how they can be used to create the impression of glass over the subject in an image.
Get the Creative Bloq Newsletter
Daily design news, reviews, how-tos and more, as picked by the editors.
03. Photoshop Generative Fill selections powered by Adobe Firefly AI
Now available in the full version of Photoshop (version 25), Generative Fill is a powerful generative AI tool that allows users to generate new imagery or remove or modify existing elements using text prompts. Powered by the text-to-image tech from Adobe Firefly, it generates new elements in layers so they can be individually manipulated without destroying your original image, and the AI tech automatically adds details like reflections and shadows to match the existing image. The Photoshop tutorial above shows how Generative Fill can be used to transform a subject's look and costume in an image, highlighting the importance of how the selection is made.
If you prefer a written tutorial, Adobe has a good explanation of Generative Fill on its website .
04. Layer stacking with Photoshop Generative Fill
Another thing that's important with the new Photoshop Generative Fill feature is the organisation of layers. This short Generative Fill tutorial from Adobe quickly shows how to stack layers of Generative Fill to achieve the best results and how to regenerate layers with Generative Fill so that they blend together smoothly. Also see our roundup of the best AI art tutorials for more on how to use AI text-to-image generators.
05. Adobe Photoshop 2024 new features
Every year Adobe updates Photoshop with new tools and functions, which often help to speed up workflows in the software. If you're already familiar with Photoshop and simply want to know what's new, here's a quick overview from Unmesh Dinda of PiXimperfect .
He succinctly rounds up new features such as Photoshop parametric filters, the remove tool, Generative Fill and AI Content Credentials tags, all in under 12 minutes. For some of the new features, you'll need Photoshop beta – for that you'll need Photoshop itself: see our guide to how to download Photoshop .
The beginners' section in our roundup focuses on Photoshop tutorials that introduce key tools and essential skills as well as overviews of how Photoshop works.
01. Photoshop for beginners tutorial
Adobe-certified instructor Dan Scott offers a comprehensive tutorial fit for complete beginners with no Photoshop, photography or design knowledge at all. In a three-hour video, Scott, who works for Envato Tuts+, walks through all the basics. Don't have that level of patience? No problem. If you don't fancy consuming three hours of Photoshop knowledge all at once (and we don't blame you), the video has a handy timing list in the description box so you can jump to the section in the Photoshop for beginners tutorial that you want and work your way through it in stages.
02. Learn Photoshop in 5 minutes: beginner tutorial
Pushed for time? There are many short and sweet Photoshop tutorials for beginners out there, and here's one of our favourites, Photoshop in five minutes . In just five minutes, Julian Ball of Flow Graphics walks you through the basic tools and interface, and gives you a good idea of what the software is all about.
03. Get to know Photoshop tutorial

Part of a series of Photoshop tutorials produced by Adobe itself, Get to know Photoshop teaches you the basic tools and techniques of the software. You'll be introduced to the work area and will learn how to open and save your images, zoom in and out, and undo mistakes.
04. Photoshop on iPad tutorial for beginners
It's been a few years since Photoshop made the leap to the iPad, and like the desktop version of Adobe's flagship app, the software is constantly evolving. This tutorial from YouTube channel Art and Design gives a great primer, with a step-by-step demonstration of how to use PS on an Apple tablet. In just half an hour you'll learn how to move layers, utilise paint tools, create clipping masks and more with your Apple pencil (see our guide to the best iPad stylus for a review of all the best stylus options for your tablet.)
05. How to resize an image

Image resizing is probably one of the most essential basic tasks you'll want to do as a beginner, and here's one of the best Photoshop tutorials to explain the process. How to resize an image on Photoshop teaches you how to change the canvas size, use trim and more, all without compromising too much on image quality.
06. How to work with layers

Layers are one of those fundamental concepts you'll need to get your head around, and here's another of Adobe's own Photoshop tutorials to walk you through the basics. How to work with layers teaches you what layers are and how to use the Layers panel, how to resize the contents of a layer, and how to add images to a layered file.
07. How to adjust image quality

Discover how to adjust image quality with this most succinct of Photoshop tutorials. This series of four videos will teach you to enhance brightness and colour, and improve the quality of your images in Photoshop.
08. How to make selections

Some Photoshop tutorials help you master vital skills quickly and easily, and here's a great example. How to make selections reveals how to create a selection, work with selection tools, and fine-tune the edges of a selection.
09. How to retouch images

How to retouch images is a trio of Photoshop tutorials in video form. They walk you through how to remove unwanted objects, add objects by cloning, and fix other imperfections in your images with retouching tools in Photoshop.
10. How to add text and shapes in Photoshop

This collection of four Photoshop tutorials demonstrates how to add text and shapes . When you do so, they remain editable, and you can customise them down to the smallest detail.
11. How to use the Photoshop Pen tool

This is one of Creative Bloq's very own Photoshop tutorials. Here, Mark White explains how to use the Photoshop Pen tool , a simple selection feature that enables you to fill, stroke or make selections from whatever you draw.
12. How to use the Photoshop Brush tool

In another of our Photoshop tutorials from Mark White, you'll discover how to use the Brush tool in Photoshop . This step-by-step guide includes helpful guides to what each of the icons in the Brush palette mean.
13. How to make a photo collage

Learn how to combine images to make a simple photo collage in Photoshop with this tutorial from Matt Smith. You can use this technique to create your own collages from photographs, and perhaps eventually build on your compositions to create more intricate design collages from your own creations.
14. Photoshop tutorial on applying filters

Learn how to apply filters , allowing you add quick effects to an image. Filters can also be combined to create unique results, as these two related Photoshop tutorials demonstrate nicely.
15. Edit your first photo in Photoshop

Photoshop tutorials for beginners can be found on a range of subjects, and this one teaches you how to edit your first photo . Bring out the best in your images with the useful techniques outlined here.
16. How to use Photoshop layer masks

One of Creative Bloq's own Photoshop tutorials, How to use Photoshop layer masks will help you streamline your digital art workflow. As any beginner will quickly learn, layer masks are one of the most fundamental parts of the software: without them your work will look flat. Follow these tips and shortcuts to work more quickly and easily.
17. How to remove a background in Photoshop

Another of our own Photoshops tutorials takes you through several different ways to remove a background in Photoshop . Jo Gulliver starts off by taking you through how to use the Magic Wand tool and Quick Selection tools to remove a background, before moving on to more advanced techniques.
18. Create your first design

Create your first design is a series of Photoshop tutorials that introduces how to work with layers, combine images, use layer masks, and add creative graphics, text, and effects. You can then use these skills to combine design assets into a simple, unique composite for print or online use.
19. How to create a meme in Photoshop

Social media’s all about memes these days, and making them is a nice skill to have. In one of our most popular Photoshop tutorials, How to make a meme in Photoshop , Matt Smith explains how to make multiple memes in moments. Have fun!
20. How to use Photoshop layers: 6 top tips

This tutorial, How to use Photoshop layers: 6 top tips , will teach you to use Photoshop's layer system; the key to unlocking the software's versatility. Here, you’ll find out how to create layers, lock them, group them and adjust opacity.
21. Digital painting with Photoshop CC for beginners

Digital painting with Photoshop for beginners breaks down the process of creating a simple digital painting, from start to finish. If you can work on a canvas with paints, then many of the same painting techniques you use will transfer directly over to digitally painting in Photoshop.
Next page: Intermediate Photoshop tutorials
Thank you for reading 5 articles this month* Join now for unlimited access
Enjoy your first month for just £1 / $1 / €1
*Read 5 free articles per month without a subscription
Join now for unlimited access
Try first month for just £1 / $1 / €1
Current page: Photoshop tutorials for beginners
Daniel John is Senior News Editor at Creative Bloq. He reports on the worlds of art, design, branding and lifestyle tech (which often translates to tech made by Apple). He joined in 2020 after working in copywriting and digital marketing with brands including ITV, NBC, Channel 4 and more.
Related articles

- 2 The best drawing tablets
- 3 I can't get enough of these hilarious Photoshop retouching jobs
- 4 The best drawing apps for iPad
- 5 Adobe forces video game emulator to immediately change its logo
- 2 I can't get enough of these hilarious Photoshop retouching jobs
- 3 Apple owes users answers over that controversial Photos bug
- 4 New tri-fold smartphone puts an 8-inch tablet in your pocket
- 5 How to make a HueForge 3D print in 7 steps
- Skip to main content
- Skip to primary sidebar
- Skip to footer
43 Best Photoshop Tutorials (From Basic to Advanced)
Last updated on November 20, 2022 by Bunty Pundir 30 Comments

Stay home, level up Photoshop skill! Learn Photoshop with these step by step free tutorials. Improve Light & Color. Composite and Retouch Images. Add Creative Effects & Remove Unwanted Content.
Needless to say that Photoshop is one of the best design software and used by all design enthusiasts around the world. It lets you create amazing art and design but understanding how Photoshop work or how you can use it, can be difficult if you just getting started. If you’ve already got some skills, then you should be looking to improve it.
Photoshop Tutorials Categories:
- Basic Photoshop Tutorials
- Advanced Photoshop Tutorials
Note: You can follow these tutorials with any Photoshop version, but I recommend at least use CS5 or higher (if you desire to learn about 3D features). Let’s dive into the post!
Photoshop Basics
Basic tutorials are for beginners who are just exploring the way how Photoshop work. The section starts with Photoshop workspace and it will make you comfortable with Photoshop interface and panels like tools, layers, menus, adjustment layers, layer mask, colors and much more. Then you’ll learn about each of them with a comprehensive guide. Often beginners found making selection is difficult, that is why we added some selection tutorials as well. Apart from the adding basic tutorials, we’ve also included tutorials for the latest Photoshop CC.
1. Getting Started in Photoshop
What it Covers:
- 1. Get familiar with the work area
- 2. Complete Overview of Tools & Panels
- 3. Tools Options
2. Opening, Editing & Saving in Photoshop
- 1. Open and Close Images
- 2. Editing Images
- 3. Save & Export Your Work
3. Photoshop Keyboard Shortcuts
- 1. Essential Keyboards Shortcuts
- 2. Improve Photoshop Workflow
- 3. How do Things Faster in Photoshop
Chapter 2 – Common Tools
4. how to use the crop tool in photoshop.
- 1. Use Crop Tool Crop Images
- 2. Get the Perfect Size & Aspect Ratio
- 3. Customize Crop Tool

5. How to use the Spot Healing & Healing Brush Tool in Photoshop
- 1. All the Basics of Spot Healing & Headling Brush Tool
- 2. Basic Photoshop Retouching
- 3. Blemishes & Spots Removal
6. How to use the Clone Stamp Tool in Photoshop
- 1. Use of Clone Stamp Tool
- 2. Difference Between Spot Healing & Clone Stamp Tool
- 3. Use Clone Stamp with Clipping Mask
7. How to use the Brush Tool in Photoshop
- 1. Brush Presets
- 2. Selecting the Brushes
- 3. Brush Opacity and Flow
- 4. Advance Brush Settings
8. How to use the Dodge and Burn Tool in Photoshop
- 1. Dodge and Burn Techniques
- 2. Ligten and Darken Areas of an Image
- 3. Non-destructive Editing
9. How to use the Text Tool in Photoshop
- 1. Using the Text Tool
- 2. Text Tool Settings
- 3. Options for your Text
- 4. Transforming the Text
10. How to Master the Pen Tool in Minutes
- 1. Using the Pen Tool
- 2. Working with Paths and Curves
- 3. Working with Anchor Points
- 4. Making Precise Selections
Chapter 3 – Layers & Masks
11. how to use layers in photoshop.
- 1. Understand how Layers Work
- 2. Using Layers with Tools
- 3. Blending Modes
12. How to Use Layer Mask in Photoshop
- 1. How Layer Mask Works
- 2. Add Layer Mask
- 3. Non-Destructive Editnig
- 4. Adjustment Layers Mask
13. Non-Destructive Editing with Smart Object
- 1. Use Filter Non-Destructively
- 2. Get to know About Smart Objects
- 3. Edit Filter At Any Time
14. How to Use Clipping Mask in Photoshop
- 1. Fill a Shape with Photo
- 2. Harness the Power of Clipping Mask
- 3. Draw Shapes
15. How to Use Blending Modes in Photoshop
- 1. Use Blend Modes Precisely
- 2. Composites Images in No Time
- 3. A Trick to Use Each Blending Modes
Chapter 4 – Photoshop Adjustment Layers
16. commonly used photoshop adjustment layers.
- 1. Work with Most Commonly Used Adjustment Layers
- 2. Add Effect to a Particular Area
- 3. The basics of Applying Adjustment Layers
17. 19 Photoshop Adjustments Layers Explained
- 1. All Adjustment Layers Explained
- 2. Explanation with Photos
- 3. Depicts a Bunch of Photo Effects
Chapter 5 – Selections
18. how to create selections in photoshop.
- 1. Wide Variety of Selections Tools
- 2. Make Selection of a Person
- 3. Extract a Person from Background
19. Use Select & Mask to Make Selection in Photoshop
- 1. Select & Mask Workspace
- 3. Global Refinements
- 4. Save the Masking Results
20. How to Mask Hair in Photoshop
- 1. Mask Hair from Difficult Background
- 2. Masking with Select & Mask
- 3. Creating & Using Hair Brushes
- 4. Using Filters for Final Adjustments
21. Blend If and Calculation Techniques for Difficult Selections
- 1. Using Blend If
- 2. Use of Channels
- 3. Making Perfect Selections
- 4. Concept of Black/White Selection
22. Removing Background using Background Eraser Tool
- 1. Explanation on Background Eraser Tool
- 2. Removing Complicated Background
- 3. Non-destructive Extraction of Background
23. How to Change a Background in Photoshop
- 1. Extract the Subject
- 2. Replace the Background
- 3. Blend them in a Cohesive Scene
Final Chapter 6 – Basic Photo Editing
24. how to replace a sky in photoshop.
- 1. Remove Sky in Just Minutes
- 2. Tips to Easily Remove a Blue sky
25. How to Correct Color in Photoshop
- 1. How to Remove a Color Cast from Photoshop
- 2. 3 Points Color Corrections Technique
26. High End Photo Retouching in Photoshop
- 1. Retouch Skin Professionally
- 2. Create Smooth Skin
- 3. Preserve Skin Details
Photo Effects & Advanced Tutorials
Below you can find photo effects & advanced tutorials the reason why I added these is because effects tutorials are really fun to create and it is not challenging.
In just few steps you can replicate many effects like vintage, retro, lomo, double exposure, dispersion and much more. Apart from just adding effects to your photos, these tutorials will help you how to level up your advanced skills in Photoshop as well.
Since this section is the final section of this post but don’t worry there are a lot of tutorials to follow if you are an advanced Photoshop user, you can check out our website homepage on a weekly basis for new advanced tutorials.
27. Create a Double Exposure Effect in Photoshop

- 1. Multi-Exposure Effect
- 2. Blend Images
- 3. Surreal Effect
28. Impossible Sea Tutorial

29. Create a Pop Art Inspired by Roy Lichtenstein

30. How to Remove Background in Photoshop (3 Examples)

31. How to Change Background Color in Photoshop

32. How to Simulate a Sketch Effect in Photoshop

33. How to Create a Trendy Glitch Effect in Photoshop (+ Photoshop Action)

34. The Best Way to Create Watercolor Effects in Photoshop

35. How to Retouch Eyes in Photoshop

36. How to Remove Acne in Photoshop

37. Best Methods of Sharpening Images
- 1. Explains a Bunch of ways of Sharpening Images
- 2. Use Filters
38. Dispersion Effect
- 1. Disintergation Effect
- 2. Use of Liquify Tool
- 2. Use of Debris Brushes
39. How to Blur Background in Photoshop
- 1. Blur Background
- 2. Use of Lens Correction Filter
- 3. Depth of Field Effect
40. Portal Photo Manipulation
- 1. Compositing Techniques
- 2. Lighting
- 3. Extraction
41. Rail Inside Illusion Tutorial
- 1. Soft Lighting Effect
- 2. Miniature Look
- 3. Color Matching
42. Water Splash in Bulb
- 1. Surreal Compositing Look
- 2. Conceptual Style
- 3. Blending Techniques
43. How to Creatively Blend Two images in Photoshop
- 1. Surreal Compositing
- 2. Advanced Masking
- 3. Lighting
Thanks for reading the post and if you like it, then do spread it into the world. If you have any suggestion, then do let me know through comments. I would love to hear your thoughts.
Reader Interactions
January 28, 2018 at 9:08 am
Nice tutorials list and especially the way you put them. Thanks!
January 28, 2018 at 9:34 am
You are than welcome!
February 1, 2018 at 1:10 am
Thank you, Bunty. The list is very well done, it’s easy to find the tutorial you want. Thanks also for your personal tutorials you share. I am French.
February 1, 2018 at 9:03 am
You are more than Welcome Midolu!
February 1, 2018 at 3:31 am
Well organized and interesting. A must check for beginners and pros. Cheers
Thanks William, It really helps!
February 10, 2018 at 5:15 pm
All tutorials are looking spanking here . I appreciate your tutorials .. Well-done for shared .
February 10, 2018 at 7:40 pm
Thanks Solaiman! I appreciate your feedback!
March 22, 2018 at 11:54 pm
Efficient and intriguing. An absolute necessity check for amateurs and masters. Here’s to you.
March 23, 2018 at 8:33 am
Thanks Mark!
May 14, 2018 at 8:12 pm
Where’s the tutorial for the 3d triangle optical illusion with sea scene overlain?
May 15, 2018 at 7:59 am
That wasn’t the tutorial. It’s just a featured image that I used it for this post. But if you want to know how the Jack Usephot made it, here is the link https://www.behance.net/gallery/28815455/Impossible-Sea-Adobe-Photoshop-CC-2016 to follow.
Thanks, Bunty
July 28, 2018 at 11:19 pm
Simply great and I’m really thankful.
August 31, 2018 at 10:24 am
So amazing photoshop tutorial. So help me.
May 14, 2019 at 5:24 pm
Very useful collection of Photoshop tutorials!
May 14, 2019 at 7:44 pm
July 4, 2019 at 5:45 am
It extremely great..
April 9, 2020 at 9:39 pm
Please any links to download CS5 software
April 10, 2020 at 9:24 am
Sorry, I don’t have any links to download CS5.
October 24, 2020 at 10:06 pm
Its great resources that you have shared here details, I have to learn more, if you will share an update I learn more, its better place to learn, thanks
May 19, 2021 at 5:20 am
If someone really want to develop their current skills, this only blog post is enough for him or her. Thanks for sharing great article.
June 3, 2021 at 8:33 pm
Nice tutorial list
June 27, 2021 at 4:56 am
Please ! Give me Lesson files that used in this tutorial
June 27, 2021 at 5:41 am
Can you tell me which tutorial files you are talking about?
August 21, 2021 at 4:21 am
Thanks for sharing this. I am glad to find this and good list of tutorials.
February 19, 2022 at 4:19 am
It is very helpful tutorial collection Thank you!
November 15, 2021 at 8:52 am
Very useful collection of Photoshop tutorials! am glad to find this and good list of tutorials.
December 17, 2021 at 11:44 pm
I don’t believe I stumbled on this. This is sooo helpful. So informative. So genuine and thoughtful.
You are a genius, smart and kind at the same time. I am so blown away by this. Weldone sir
October 27, 2022 at 8:36 am
March 27, 2023 at 9:29 am
Great full tutorial. I think it is very easier to understand the basics to advance according to use the of Photoshop tools while image editing with the most practical video guidance.
Leave a Reply Cancel reply
Your email address will not be published. Required fields are marked *
Don't subscribe All new comments Replies to my comments Notify me of follow up comments via e-mail. You can also subscribe without commenting.
Get in Touch!
- Privacy Policy
- Refund Policy
- Terms & Condition
More on PSD Stack
PSD Stack is dedicated to Photography, Photoshop & Lightroom where we provide free tutorials, presets, actions & resources.
- Free Tutorials
Home > Photoshop Basics
Photoshop Basics Tutorials
Learn the basics of Adobe Photoshop! These tutorials are perfect for Photoshop beginners or anyone who just needs to refresh their skills, covering the essentials topics you need to know to get up to speed with Photoshop quickly! Use the links below to jump to lesson chapters and other popular topics, or scroll down for our latest Photoshop Basics tutorials!
Lesson chapters
- 01. Getting started with Photoshop (8 lessons)
- 02. Getting your images into Photoshop (9 lessons)
- 03. Learning the Photoshop interface (10 lessons)
- 04. Zooming and navigating images (7 lessons)
- 05. How to resize images with Photoshop (8 lessons)
- 06. How to crop images in Photoshop (8 lessons)
- 07. Using layers in Photoshop (10 lessons)
- 08. How to make selections in Photoshop (17 lessons)
Popular links:
- Understanding layer masks
- How to use clipping masks in Photoshop
- Drawing and editing gradients
- Scale and resize images with smart objects
- Photoshop brushes
All of our Photoshop tutorials are now available to download as PDFs!
Latest Photoshop Basics tutorials
The easy way to open or add images in photoshop.
Learn how to open an image as a new document, or import images as layers in your document, just by dragging and dropping them into Photoshop.
How to Hide the Home Screen in Photoshop
Learn how (and why) to stop Photoshop’s Home Screen from displaying automatically, and how to show the Home Screen when you need it.
Hide Photoshop with Screen Modes and Interface Tricks
Learn how to use Photoshop’s screen modes and other tricks to hide the Photoshop interface and see more of your image as you work.
How to Use Live Gradients in Photoshop 2023
Live Gradients in Photoshop 2023 make drawing and editing gradients easier than ever. This step-by-step tutorial shows you how to use them!
How to Crop Images in a Circle Shape with Photoshop
Tired of cropping your images as rectangles and squares? Learn how to easily crop an image into a circle with Photoshop!
Using Layer Effects with Layer Masks in Photoshop
Using layer effects and a layer mask on the same layer can give you unexpected results. Learn the tricks to getting your effects and masks working perfectly together!
How to Paste an Image into a Layer Mask in Photoshop
Learn the simple trick that lets you paste an image or a texture directly into a layer mask!
Photoshop’s Brush Tool Fixed in Latest Update
Photoshop’s Brush Tool is finally fixed in the latest Photoshop update and no longer gets lost in the background as you paint!
How to Crop a Single Layer in Photoshop
Here are two ways to crop a single layer in Photoshop so you can crop an image on one layer without cropping every layer at once.
How to Download the Photoshop Beta and Preview Upcoming Features
Try out upcoming Photoshop features before their official release by downloading the Photoshop beta. This tutorial shows you how.
Remove Distractions with Neutral Color Mode in Photoshop
Remove distracting colors from Photoshop’s interface with the new Neutral Color Mode option in Photoshop 2022.
Select Subject’s New Cloud Option in Photoshop 2022
Get better 1-click selections in Photoshop 2022 with Select Subject’s new Cloud option that processes your image on Adobe’s servers.
How to Keep An Image Centered After Cropping in Photoshop
Is Photoshop not centering your image on the screen after you crop it? Here’s why it happens and how to fix it!
How to Resize a Selection in Photoshop with Transform Selection
Learn how to resize a selection outline, not the pixels inside it, using Photoshop’s Transform Selection command.
Drawing Selections with the Marquee Selection Tools in Photoshop
New to Photoshop’s selection tools? Start here! Learn how to make basic selections using the Rectangular Marquee Tool and the Elliptical Marquee Tool, and how to combine basic selections into more complex shapes!
How to Draw Custom Shapes in Photoshop
Learn how to draw custom shapes in Photoshop using the Custom Shape Tool and the Shapes panel. Plus how to load hundreds of missing shapes, how to merge shapes, and how to save your own custom shape presets!
Photoshop Tools and Toolbar Overview
Learn all about Photoshop’s tools and the toolbar, including a complete summary of the nearly 70 tools available as of Photoshop 2022.
How to Draw Shapes with the Shape Tools in Photoshop
Learn the basics of drawing shapes using the shape tools in Photoshop 2022!
Navigate Images Fast with Birds Eye View in Photoshop
Learn how to navigate images using Birds Eye View, one of Photoshop’s best hidden features and the fastest way to zoom in and out to inspect different parts of your image!
Zoom And Pan All Images At Once In Photoshop
Learn the trick to zooming and panning all open images in Photoshop at the same time, and how to instantly match the zoom level or location for all images!
How to Zoom in Photoshop Like a Pro
Learn how to zoom, scroll and navigate images in Photoshop like a pro with this step-by-step tutorial for Photoshop beginners.
How to Add Copyright and Contact Info to Images with Photoshop
Before sharing your photos online, learn how to protect and promote your work by adding copyright and contact information to your images with Photoshop!
Using the Object Selection Tool in Photoshop 2022
Learn how to use the improved Object Selection Tool in Photoshop 2022, along with its brand new Object Finder, to quickly select people, animals and other objects in your image just by hovering your mouse cursor over them!
Make Photoshop Your Default Image Editor in Windows 11
Learn how to set Photoshop as your default app for opening JPEG images, PNG files and more in Microsoft’s new Windows 11.
How to Draw a Perfect 5 Point Star in Photoshop
Learn how easy it is to draw a perfect 5 point star, or 5 sided star, in Photoshop. And how to save the star as a custom shape so you won’t need to draw it again.
Open Image vs Place Image in Photoshop
Learn the difference between opening an image and placing an image in Photoshop, and why one is perfect for blending two images together!
How to Make Photoshop Your Default Image Editor
Want to open images into Photoshop just by double-clicking on them? Here’s how to make Photoshop your default image editor in Windows 10 and macOS!
Find the Missing Gradients, Patterns and Shapes in Photoshop
Photoshop’s classic gradients, patterns and shapes from previous versions, and most of the new patterns and shapes, are hidden by default. Here’s where to find them in Photoshop 2021!
How to Crop Images in Photoshop with the Crop Tool
Learn how to crop images, how to straighten images, and how to crop an image non-destructively using the Crop Tool in Photoshop!
How to Keep Photoshop Always Up to Date
Not sure if you’re running the latest version of Photoshop? Learn how easy it is to keep Photoshop up to date using the Adobe Creative Cloud app!
Using the Enhanced Properties Panel in Photoshop
Learn about all the new features added to the enhanced Properties panel in Photoshop CC 2020, and why it’s quickly becoming a one-stop shop for the options you need the most!
Select Subject vs Remove Background in Photoshop
Learn the difference between the Select Subject and Remove Background commands in Photoshop and how to use them to remove backgrounds from your photos!
How to use Select Subject in Photoshop for One-Click Selections
Learn how the powerful and improved Select Subject command in Photoshop CC 2020 lets you instantly select people, animals and more with a single click!
Open Multiple Images As Layers In Photoshop
Learn how to quickly open multiple images into the same Photoshop document and have each image appear on its own separate layer!
How to Create a Rainbow Gradient in Photoshop
Learn how to create your own rainbow gradient in Photoshop, how to save it as a rainbow gradient preset, and how to quickly add your rainbow colors to images and text!
Free Transform in Photoshop – New Features and Changes
Get up to speed with the latest features, updates and changes to Free Transform in Photoshop. Now updated for Photoshop CC 2020.
How to use Free Transform in Photoshop
Learn how to scale, rotate, flip, skew and distort images using Free Transform in Photoshop CC 2020!
How to use Content-Aware Fill in Photoshop CC 2020
Learn how to remove unwanted objects or repair missing detail in your images with the powerful and improved Content-Aware Fill workspace in Photoshop CC 2020!
Drawing Custom Shapes with the Shapes Panel in Photoshop CC 2020
Learn how the new Shapes panel in Photoshop CC 2020 makes drawing custom shapes easier than ever, and where to find hundreds of new shapes now included with Photoshop!
New Ways to Add Gradients in Photoshop
Adding gradients to images, shapes and type is now faster and easier than ever with the new Gradients panel in Photoshop CC 2020.
The New Gradients and Gradients Panel in Photoshop CC 2020
Learn all about the new Gradients panel in Photoshop CC 2020, the amazing new gradient presets now included with Photoshop, and how to create, edit and save your own gradients and gradient sets!
Create Color Swatches from Images in Photoshop 2020
Learn how to turn photos into color swatches by sampling colors directly from images, and how to save your colors as custom swatch sets, in the latest version of Photoshop CC!
Drag and Drop Color Swatches in Photoshop
Learn how the improved Swatches panel in Photoshop CC 2020 makes it easy to drag and drop colors directly into your document.
Work Anywhere with Cloud Documents in Photoshop
Learn how to save your work as a cloud document in Photoshop CC 2020 so you can keep working on any PC, Mac or iPad where you’re logged in to the Creative Cloud!
Warp Images with the Enhanced Warp Tool in Photoshop
Learn how to warp images like never before with the improved and enhanced Warp Tool in Photoshop CC 2020!
How to Turn Your Photoshop Brush into an Eraser
Want to erase with the same Photoshop brush you’re painting with? Learn two easy ways to instantly turn your brush into an eraser, including a brand new way in Photoshop CC 2020!
How to use the Object Selection Tool in Photoshop CC 2020
Learn how to use Photoshop’s newest selection tool that lets you quickly select people, animals or other objects in your photos just by dragging around them!
Using Layer Effects and Layer Styles in Photoshop CC 2020 – Complete Guide
Everything you need to know to add and edit layer effects and layer styles in Photoshop CC 2020, including a look at CC 2020’s new layer style presets, gradients, patterns and more!
Photoshop’s Brush Tool Hidden Tips and Tricks
Learn secret, pro-level tips and tricks to use with Photoshop’s brushes and the Brush Tool, including the best ways to change your brush size, choose brush colors, switch between brush blend modes, and more!
How to Open Images in Photoshop
Learn all the ways to open images in Photoshop, including how to use the new Home Screen and the difference between opening JPEG and raw files!
- Photoshop Tutorials
In this section, you will find step-by-step beginner-friendly Photoshop tutorials with screenshots. Our tutorials are designed easy to follow and provide multiple solutions for each problem. Theories are easy to learn, it’s all about practice. You’ll also find some extra bonus tips that’ll help you solve problems faster in your creative process. Note: all the tutorials here are free to use and are based on the latest version of Adobe Photoshop CC.

How to Create a Favicon in Photoshop

How to Anti Alias in Photoshop
How to Cut Out a Shape in Photoshop

How to Resize an Object in Photoshop

How to Duplicate a Shape in Photoshop

How to Cut Out an Object in Photoshop

How to Rotate Shapes/Objects in Photoshop

How to Fill a Shape With an Image in Photoshop
How to Center an Object in Photoshop

How to Edit a Smart Object in Photoshop
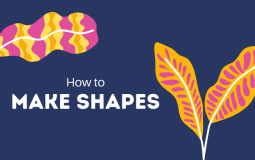
How to Make Shapes in Photoshop

How to Fill a Shape With Color in Photoshop

How to Change the Color of an Object in Photoshop
How to Remove an Object in Photoshop

How to Paint in Photoshop

How to Draw a Circle in Photoshop

How to Draw a Line in Photoshop
How to Draw Curved Lines in Photoshop

How to Draw a Dotted/Dashed Line in Photoshop
How to Draw Arrows in Photoshop (3 Methods)

How to Make a Photo Look Like a Drawing in Photoshop
How to Create Watercolor Effect in Photoshop

How to Find Pantone Colors in Photoshop
How to Adjust White Balance in Photoshop
Photoshop is a design software made by Adobe Inc. This site is not supported or associated with Adobe in any way.
- Photoshop Freebies
- Privacy Policy
PHOTOSHOP FEATURES
How to use Adobe Photoshop.
You don’t need to be a graphic design pro to use the leading image editing software. Explore this beginners’ guide for everything you need to start using Photoshop.
Free trial {{buy-now}}

https://main--cc--adobecom.hlx.page/cc-shared/fragments/merch/products/photoshop/sticky-banner/default
Get started with Photoshop basics.

Begin your first project.
After you download and open the app, create a new file in the Photoshop Document (PSD) format. As the native file format for Photoshop, a PSD file can store a large amount of data, including high-quality images.
Start from scratch or a template.
You can get a head start on flyers, postcards, and posters with a Photoshop template , or you can work from a document that’s entirely your own.

Choose a document size.
To create a new document, click the blue New File button. Then select the canvas size and resolution that fits your project. For example, a postcard is usually 4 x 6 inches.
Choose your resolution.
Choose 300 pixels per inch (ppi) to make sure you don’t lose any detail if you print it.

Discover how to work with layers.
Layers are like clear sheets you can lay over background layers or images. Working in layers allows you to add and adjust different elements like portions of photos or text. If your layer is transparent or semi-transparent, you can see through it to the layers below it.
You can add images, textures, colors, and text to one layer without affecting the content in the layers below it, so you can undo or adjust any moves you make that you’re not happy with. Create a new layer from scratch or create one from an existing image.
Create a new layer from scratch.
Create a layer from an existing file..
Add a piece of artwork or an image to your project as a new layer.
- Import the file. Let’s say you’re creating a postcard from a perfect beach photo you captured. To add the photo, drag and drop a JPEG or PNG photo file from your desktop into your Photoshop project. It will become a new layer over the background layer.
- Reposition and resize it. Click and drag the corners or edges of your photo to make it larger or smaller. (Make sure the Show Transform Controls box is checked in the options bar at the top of Photoshop.) Use the Move tool to reposition your photo to fit your layout.
- Press Enter or Return. Photoshop will automatically turn the layer into a Smart Object layer. This is simply an object you can change as you like without reducing the resolution.

Adjust certain areas of your image with layer masks.
How to add a mask to a layer..
Let’s say you want to add someone who wasn’t there to your beach postcard photo. You can do this in the Select and Mask workspace.
- Set up the photo. Drag and drop a photo of the person (or pet) you want to add. Line up your subject in a layer above your photo backdrop.
- Make your selection. Click the layer with your subject — the layer you want to mask — in the Layers panel. In the top menu, click Select › Select and Mask
- Select your subject. Click Select Subject in the options bar. Photoshop will automatically select the most prominent subjects in the image. Note that the layer mask thumbnail will appear next to the image thumbnail in the Layers panel. The selection will appear white against a black background. The white part is the part that will be revealed while the rest will be hidden.
- Refine your selection. Use the Add or Subtract buttons to add or take away pixels from your selection. You can also click Refine Hair and Photoshop will automatically find and refine difficult hair selections. Or try the Refine Edge Brush tool, the Lasso tool, or the Quick Selection tool in the upper left of the toolbar to refine with even more control.
Remove an object or spot from an image.

How to clean up your image.
Follow these steps to take out what you don’t want.
- Select the layer. In the Layers panel, choose the layer with the spots or objects you want to remove.
- Select the Spot Healing Brush tool. Click the Spot Healing Brush tool in the Tools panel or just press the J key. In the options bar, you can adjust the size and hardness of the brush edge (harder creates more clearly defined edges). Keep the type setting at Content-Aware, which means the tool will sample pixels and match the texture, lighting, transparency, and shading of the sampled pixels to the pixels being healed.Ch
- Click or drag. Click on a spot or drag the brush over the object you want to remove.
Write on your layers.

Add text in a variety of styles.
Insert and resize text. Choose a font from the thousands of free fonts that come with an Adobe Creative Cloud subscription.
Move, warp, and shape your words.
After adding text to an image , adjust its color, placement, and look — perhaps add a bit of bending or warping to the letters with the Warp tool.

How to add text.
Write what you want and then experiment with different fonts and styles.
- Select the Type tool. Click the tool in the toolbar or just press the T key.
- Pick your spot. Click on the image where you want to place the type. In the options bar at the top of Photoshop, you can choose whether you want the type to be horizontal or vertical, as well as the font, size, color, alignment, and any warp effects you want to add.
- Type. Add your own text over the “Lorem ipsum” sample text, and edit.
- Edit. Highlight the text to make style changes. Use the Move tool to move text exactly where you want it.
Create gorgeous images, rich graphics, and incredible art.
View product details
Draw on your layers.
Add shapes to your design..
Use the Rectangle and Ellipse tools to draw those shapes, or use Pen tools to create more complicated shapes with anchor points and handles.
Choose from a thousand brushes.
Paint or draw whatever you want on your image. Select a preset brush , brush tip, and shape, or create a unique brush tip from part of an image.

How to paint in Photoshop.
Whether you want to add shapes or draw freehand with the Brush tool, the steps are basically the same.
- Select the tool from the toolbar. Click the tool in the toolbar (or press the B key for the Brush or the M key for the Rectangular Marquee tool).
- Customize the tool in the options bar. Choose your brush size and how fast you want the paint to flow, or the color that will fill your rectangle or ellipse.
- Make your mark. Paint, draw, or play with shapes. Try out different settings to see how they look.
Save your file.
Make big changes in an instant with neural filters..
Neural Filters are smart filters that use the power of Adobe Sensei AI technology to make quick, automatic edits to images. Now you can make the kinds of edits that used to take hours for professional graphic designers in seconds.
To select a filter, click Choose Filter › Neural Filters from the top menu in Photoshop. Download the filter of your choice if it’s not already installed, then adjust its settings as you like. The following are just a few of the filters available.

Colorize black-and-white photos.
Turn black-and-white images into full color in a few clicks with the Colorize filter. Choose the colors you want and fine-tune the saturation with focus points.
Zoom in while staying sharp.
With Super Zoom, you can get close and personal without losing detail. Enhance facial features and fix fuzziness so your close-up stays clear.

Smooth skin.
Remove blemishes, tattoos, scars, and more with the Skin Smoothing filter. As you’re retouching, use the Smoothness and Blur sliders to get just the right look.
Clean up your photos.
If you’ve converted a JPEG to PSD, you may notice fuzzy or pixelated areas. You can remove these artifacts of compression with the JPEG Artifacts Removal filter. Fine-tune with either a high, medium, or low level of blur.

https://main--cc--adobecom.hlx.page/cc-shared/fragments/products/photoshop/do-more-with-adobe-photoshop
Try these step-by-step Photoshop tutorials.
Familiarize yourself with more tools and learn how to take your photo editing to the next level.

Take your photos places.
Separate your subjects from their original backgrounds with the Quick Selection tool and place them somewhere completely different.
Add a new background to a photo

Go deeper with color.
Adjust the colors in your photos to add vibrance, mute a distracting tone, or just make one element pop.
Change the colors in an image

Stylize a photo.
Achieve a painted or airbrushed look by limiting the number of colors that appear across a photo or just a specific selection.
Posterize your pic

Combine images.
Combine two different photos to create a composite that is a work of art in its own right.
Create a composite

Add blur to an image.
Learn how to add a blur effect to a photo to focus attention or amplify a sense of motion.
Learn to blur

Create a duotone effect.
Give any high-contrast, black-and-white image a bold new look by adding a Gradient Map Adjustment Layer.
Set the tone
https://main--cc--adobecom.hlx.page/cc-shared/fragments/merch/products/photoshop/merch-card/segment-blade
- Adobe Creative Cloud
- Adobe Photoshop
- How to use Photoshop
- Inspiration
- Photo Accessories
- Film Photography
- Photo Printing
- Stock Photography
- Tech Troubleshooting
44 Free Photoshop Practice Images (from my photos!)
If you want to practice editing pictures in Photoshop, it helps to have access to PSD images for Photoshop.
These Photoshop practice photos should contain all of the layers of the edit, so that you can see the steps that the photographer has taken, and try these out for yourself.
In this post, you can download free images for Photoshop in PSD form that contain these layers, so you can see the exact steps that went into creating a photo.
Using these photos as Photoshop practice exercises, you can easily learn photo editing without any stress or hassle – these are the perfect Photoshop practice images for beginners.
You can also download free RAW photos for editing and free Lightroom presets to complement your learning, and even add these as Camera RAW presets if you prefer.
All of these images are free for personal use, but cannot be used commercially or re-sold. Please link back to www.lapseoftheshutter.com if you do post any of your own versions of these images online.
Practice Photos for Photoshop
These practice images for Photoshop contain a background layer, plus a variable number of layers that contain the existing edit. These have been added non-destructively, so can be removed in Photoshop.
1. Lofoten Islands, Norway

Both the original image and the edit are included in the download, with the edit contained in non-destructive layers within the PSD file.
2. Stockholm Subway, Sweden

3. Madrid, Spain

4. Kyoto, Japan

5. Lofoten Islands, Norway

7. Cairngorms, Scotland

8. Bangkok, Thailand

9. Kuala Lumpur, Malaysia

10. Rome, Italy

11. Tokyo, Japan

12. Venice, Italy

13. Beijing, China

14. Santorini, Greece

15. Lake District, England

16. Venice, Italy

17. Kuala Lumpur, Malaysia

18. Tokyo, Japan

19. Kyoto, Japan

20. Osaka, Japan

21. Santorini, Greece

22. Hong Kong, China

23. Valletta, Malta

24. Santorini, Greece

25. Longji Rice Terraces, China

26. Souter Lighthouse, England

27. Matera, Italy

28. Paris, France

29. Prague, Czech Republic

30. Paris, France

31. Prague, Czech Republic

32. Paris, France

33. Cairngorms, Scotland

34. Budapest, Hungary

35. Li River, China

36. Stockholm Subway, Sweden

37. Hong Kong, China

38. Tokyo, Japan

39. Kuala Lumpur, Malaysia

40. Li River, China

41. Yokohama, Japan

42. Meteora, Greece

43. Pisa, Italy

44. Paris, France

Photoshop Practice Exercises
The best Photoshop Practice Exercises are to simply follow the edits contained in the layers in the practice pictures for Photoshop that you can download above.
First, look at the end result in Photoshop, then hide the layers and try to replicate it yourself. You can use the existing layers to check your work.
If you want specific tutorials on Photoshop, then take a look at my workflow tutorial to edit landscape photos , or my complete set of Photoshop tutorials , many of which also contain pics for Photoshop practice.

Top Free Photoshop Tutorials

The Digital Blending Workflow Tutorial
The landscapes masterclass: no hdr, no plugins.

Lightroom Tutorial - Adding Color Depth with White Balance

Photoshop Tutorial - Blend Any Two Photos

Color Control in Your Photography Tutorial

Northern Lights Photography Tutorial
- About Author
- Latest Posts

Tim Daniels
Hi, I'm Tim Daniels, photographer and photo trainer, founder of Lapse of the Shutter and creator of the totally free Lightroom Develop System . I've travelled to (probably) 30 countries over the last few years, taking photos and licensing them around the world, and creating lots of free photography learning resources. Read More ...
Latest posts from Tim Daniels
- XGIMI Horizon Ultra vs Pro (Hands-On Comparison) - February 5, 2024
- XGIMI Horizon Ultra Review + Why I Liked It - February 5, 2024
- Adobe Stock Pricing (2024) Explained! - January 2, 2024
Similar Posts

Photoshop Replace Color Not Working? 4 Reasons WHY
If your Photoshop Replace Color Tool is not working, then this tutorial will help you... Read More

TIFF vs RAW: Differences Explained
See the differences between TIFF vs RAW in this article exploring the ins and outs... Read More

100% Free 35mm Film Presets for Lightroom!
Get 9 free film presets for Lightroom, covering popular 35mm films including a Kodak Portra... Read More

Grayscale vs Black and White vs Monochrome: The REAL Difference
What are the differences between grayscale vs black and white vs monochrome? This article gives you... Read More

100% Free Travel Blogger Lightroom Presets!
Get a preset pack containing 10 free Lightroom presets for travel photography, suitable for all... Read More

5 Ways to Blend Multiple Exposures to Create Incredible Landscape Photos
Learn how to blend photos taken shooting into the sun, taken at different times of... Read More
Leave a Reply Cancel reply
Save my name, email, and website in this browser for the next time I comment.
Last Updated on 13th November 2023 by Tim Daniels
10 Must-Know Photoshop Skills for Beginner Photographers
Here are the most useful photo-editing features in Adobe Photoshop, even if you have no previous photo editing experience.
Photoshop is one of the most essential tools for photographers of all levels of ability. However, it can be pretty overwhelming when you first start using it.
Photoshop is so crammed with buttons, sliders, and other assorted tools, that it's hard to know where to begin.
So, in this guide, we'll walk you through some of the most useful photo-editing features in Photoshop. You'll be able to use them right away, even if you're a beginner who's new to the app.
1. Non-Destructive Editing in Photoshop
Where possible, you should always edit your photos non-destructively. This means that you can edit your image as much as you like, like when you're adding someone into an image , but can always undo any change you make.
Programs like Lightroom and Google Photos are non-destructive editors. Photoshop isn't.
The way to do non-destructive editing in Photoshop is to use layers. Layers are like a series of transparent sheets stacked on top of your image, and you edit each one separately without touching the original picture.
Using Layers
Ideally, you should make every single edit---or group of similar edits---on a separate layer. This enables you to adjust the edits later, make them more or less visible, or remove them entirely by hiding or deleting the layer.
Things like text, or objects pasted from another image, will go on their own layer automatically. If you're using something like the paint brush tool you'll need to create a new layer manually (click the New Layer button in the Layers panel to do that).
For a couple of other common tools you need a few tricks to use them with layers:
- Spot Healing Brush: To use the Spot Healing Brush (which we'll look at in detail later), along with a few other tools including the Magic Wand and the Blur tool, you must manually create a new layer. Pick your tool from the toolbar and make sure you've ticked Sample All Layers in the options bar. Now make your edits on the new empty layer.
- Healing Brush or Clone Stamp: To use the healing brush or clone stamp on their own layer, create a new layer manually. Pick the tool, and in the options bar at the top of the screen set Sample to Current & Below . Make your edits in the empty layer.
- Dodge and burn with layers: The dodge and burn tools are used to add local contrast to parts of your image. To use them on their own layer go to Layer > New > Layer , then in the dialog box that opens set Mode to Overlay . Tick the box labeled Fill with Overlay-neutral color . Now use dodge and burn on that layer.
You can also make adjustments to things like contrast, saturation, and exposure on a separate layer. Photoshop has its own special tool for this, which we'll deal with next.
2. Discover Adjustment Layers
Adjustment Layers allow you to make changes to your image's tone and color in a non-destructive way. You can stack as many adjustment layers onto your image as you need.
To get started, click the Adjustment Layers icon in the Layers panel and choose the type of edit you want to make.
A Properties box will open corresponding to the tool you've selected, and you just need to move the sliders to make your changes.
The benefits to adjustment layers are that they can be edited at any time. Just double-click the layer to do this. You can also use the Opacity slider to fine-tune the effect of the layer---lower the opacity to reduce the impact of the changes---or hide or delete any if you don't need them.
3. Instant Automatic Photo Fixes
Photoshop offers various automatic options for simple tweaks like removing shadows from your photos .
The most basic can be found in the Image menu: Auto Tone , Auto Contrast , and Auto Color .
After you've applied one you can fine-tune it a little by going to the Edit menu, where you'll see a Fade option (such as Fade Auto Tone ). It's set to 100 percent by default, so reduce it if you want to lessen the effect of the color or tonal change.
Many of the other adjustment options have Auto settings as well. Create an adjustment layer for Levels, for example, then click the Auto button. You can use this as a starting point, before manually tweaking the sliders yourself. To fade the effect use the Opacity slider in the Layers panel.
4. Make Your Photos Pop With Levels
It's quite common for your photos to look a bit flat when you open them in Photoshop. In most cases simply adding some contrast will help them to pop.
The Brightness/Contrast feature might seem the obvious way to do this. But you can get better results by using either the Levels or Curves tools.
Curves is a little more advanced, whereas you can dive straight into Levels and get great results. To open the Levels tool hit Cmd+L on Mac, or Ctrl+L on Windows.
Or, better still, open it on an adjustment layer by clicking the adjustment layers icon in the Layers panel and selecting Levels .
The Histogram
What you'll see now is a histogram. The histogram is a graph that shows the tonal range of your image. The X-axis indicates brightness, from 100 percent black on the left edge to 100 percent white on the right, and all the shades of gray in between. The Y-axis shows the number of pixels for each of the tones.
You can use the histogram to judge the exposure of your image. If the pixels are weighted to the left of the graph then the image may be underexposed. If they're weighted to the right it may be overexposed.
When the pixels are clumped together in the middle, it shows the image lacks contrast, which is why it looks flat.
As a rule of thumb, you want your photos to cover the entire tonal range, from black to white. You can do this by dragging the tabs below the histogram.
The left tab adjusts the shadows in the image, and the right tab the highlights. Grab both in turn and drag them inwards until they're in line with the first clump of pixels in the histogram.
You'll see the shadows get darker and the highlights get lighter respectively, and then you can adjust it to taste. The middle tab adjusts the midtones---drag it to the left to brighten your image.
Dealing with a set of blurry pictures? No problem---you can sharpen photos using Photoshop .
5. Clean Up Shots With the Spot Healing Brush
No matter how much care you take over your photography, there's always likely to be something in the shot that you wish wasn't there. It might be a speck of dust on your camera's sensor, a skin blemish, or a power line blighting a beautiful landscape.
Fortunately, you can remove simple things like this very easily in Photoshop using the Spot Healing Brush.
Select the Spot Healing Brush from the toolbar, or press J on your keyboard. Adjust the size of the brush using the square brackets keys---set it to about the same size as the object you're removing.
Check that the Content-aware is selected in the options bar at the top. Now click on the spot you're removing, or draw over it if it's a larger object. It should now disappear. If any edges are left behind from the removed object, run the brush over those edges to get rid of them.
The Spot Healing Brush works best on small areas. It can be used to fix larger problems, but there are other tools for those areas.
6. Remove Unwanted Objects From Your Photos
How easy it is to remove an object from an image depends on the image itself. Removing something from a plain or non-uniform textured background is something that all Photoshop beginners can do. You have a choice of tools with which to do it.
Spot Healing Brush Tool
This brush paints over an object using texture and tone automatically sampled from the surrounding pixels. As we've already seen, it's best used for smaller fixes, like dust and other specs.
Healing Brush Tool
The Healing Brush tool paints over an object with a texture sampled from a different part of the same image, while blending the color and tone with its new surrounding.
Hold the Alt key then click to select the part of the image you want to sample from. Next, paint over the object you want to remove. The brush gives you a preview of what you will be painting, enabling you to match any patterns easily.
This replaces an object by copying a texture selected from another part of the image, and blends the color and tone.
To try it out, select the object you want to remove by drawing round it, then click and hold in the selected area and drag your mouse to the part of the image you want to sample. The selected area shows a realtime preview of what the final result will look like.
Clone Stamp Tool
This works just like the Healing Brush Tool, but it copies the color as well as texture. Users often apply it for more advanced edits, like when they need to recreate parts of a photo that are missing. Discover more ways to use the Photoshop clone stamp tool .
You might need to experiment with each tool to see which is best for the job you're doing. Sometimes you might need more than one tool.
7. Make Your Shots Black and White
There are many ways to convert color photos to black and white in Photoshop. Some are very advanced, but there's at least one simple method that can produce great results for newcomers.
We'll use an adjustment layer again, so click the icon in the Layers panel and select Black & White .
Straight away you get a grayscale version of your photo. But it needn't stop there. You can experiment with the Presets , which replicate the effect of using colored filters on your camera.
Next, you can play around with the sliders. Each slider corresponds to a color in the original image. Reducing it makes areas containing that color darker, and increasing it makes them lighter. So, if you wanted a striking dark sky, you might reduce the Blue and Cyan sliders, for example.
Additionally, try out the Tint option. Tick the box and Photoshop will place a colored overlay on your image. By default, Photoshop makes it sepia, but you can click through and create colors of your own.
8. Crop Your Photos
There are numerous reasons why you might need to crop your photos . To prepare it for printing, tighten up the composition, or even to straighten the horizon. The crop tool in Photoshop is fairly self-explanatory. To crop freely, grab one of the handlebars at the corners or edges of the image and drag inwards.
To crop to a specific format, click Ratio in the options bar. Choose Original Ratio, Square etc. to keep a fixed ratio, or choose W x H x Resolution to specify your own.
Whenever you're cropping, make sure the Delete Cropped Pixels box is not checked. This enables you to crop non-destructively. You'll only see the image as you've cropped it, but the extra pixels will not be discarded. If you want to change the crop later, you can.
The crop tool also enables you to straighten up the horizon in your shots. Click the Straighten button in the options bar and draw a straight line along the horizon in your image. Straighten works by rotating the image and cropping out the corners, so make sure Delete Cropped Pixels isn't checked if you think you might ever need to undo it.
For more interesting effects, you can also crop images using shapes in Photoshop .
9. Add a Photo Frame in Photoshop
One popular way to put the finishing touch to an image is to add a frame. This is very simple to do in Photoshop.
Go to Image > Canvas Size . Under Canvas Extension Color select White (or whatever color you want---this will be the color of your frame). Then in the New Size section change the units to Pixels and enter the amount a size for how thick you want the frame to be. Enter the same value in both the Width and Height boxes.
You'll need to experiment until you find a result you're happy with. A good starting point is around 2-3 percent of the width of your image.
10. Save Your Photos in the Right File Format
Finally, what's the best way to save your photos?
Standard image file types like JPEG, TIFF, or PNG do not support Photoshop layers. As soon as you save a file in any of these formats, the app will flatten your image into a single layer.
To preserve the layers, and to enable you to continue editing the layers, either now or in future, you must save your image in the PSD format.
However, if you want to use your edited image on the web, or to print it, then you will need to save another copy in a standard image format such as JPEG or TIFF.
In short, the PSD file is the working copy, and the JPEG is the finished version.
Your Photoshop Journey Has Begun!
For all of its complexities, it's pretty easy to get impressive results from Photoshop as soon as you start using it. Then, as you become more confident and more ambitious, you'll find that Photoshop opens up a whole load of new features to help you along the way.
Your Photoshop journey has now begun, and your next step should be to learn how to change the background of a photo in Photoshop .
Image Credit: structuresxx/Shutterstock
50 Easy Photoshop Tutorials for Beginners [Photoshop Ideas]

We have a great roundup of photoshop tutorials for beginners. If you are wondering where to start these will give you a great set of ideas. When it comes to photo editing, Adobe Photoshop is the primary tool to consider. Probably, lots of jobs regarding picture enhancement would be incomplete without Photoshop. In the world of high technologies and beautiful images of the web, it’s totally important to have at least a basic knowledge of Photoshop. Every one of us has started somewhere and most with Photoshop tutorials for beginners.
If you don’t have the latest version of Photoshop, you can get a free trial here .
The demand for Photoshop tutorials is quite high these days. Finding the best suitable Photoshop tutorial for beginners in the stock of thousands of them all over the Internet is not a simple task to perform.
Below you’ll find more than 50 easy as ABC Photoshop tutorials for beginners. Hopefully, these tutorials will help you to learn ins and outs of this useful graphic editor. In this bundle you’ll find tutorials to suit any purchaser: photo effects, text effects, making filters, photo manipulations, creating posters and many more.
1. Instagram Your Images Using Photoshop
View tutorial
2. How to Slim a Face in Photoshop in just a few easy steps
3. create cool watercolor effects in photoshop, 4. create light leaks and lomo effects using actions in photoshop, 5. how to make instagram filters in photoshop: earlybird, 6. create a distressed vector typographic poster design, 7. dramatic wrinkles, 8. abstract photo manipulation in photoshop cs6, 9. dynamic recessed watercolor typography in photoshop, 10. create a realistic broken glass effect in photoshop, 11. create a lomo effect in 3 simple steps, 12. how to create a beautiful abstract artwork using light effects in photoshop cs5, 13. ultra glossy text effect, 14. fantastic digital painting image in photoshop and corel painter, 15. create a realistic grunge peeling stickers in photoshop, 16. creating depth of field using the lens blur filter, 17. faking depth of field in photoshop, 18. super cool watercolor effect in 10 steps in photoshop, 19. cool colorization tutorial, 20. creating grunge brushes, 21. create a trendy retro photo effect in 3 easy steps, 22. how to create a movie style photo effect in photoshop, 23. create a candy flavored text effect in photoshop, 24. cloudy text, 25. how to intensify your landscape photos in photoshop, 26. easy chalk ornament typography in photoshop, 27. add quick effects to your personal photos, 28. instagram quick effect in photoshop, 29. amazing photo manipulation “world on the tissue” in photoshop, 30. enhancing photos with high pass filter, 31. how to create a chocolaty valentine’s day card for your girlfriend, 32. roses bouquet splash effect, 33. how to blur the background in photoshop, 34. mix cool retro curves into your photographs, 35. craft a vintage fifties letter, 36. creating a fantastic fantasy night sky in photoshop, 37. create a dark and grungy poster in photoshop, 38. awesome colorful poster tutorial, 39. create a simple web badge in adobe photoshop, 40. create a realistic space landscape photo manipulation, 41. basic photo reflections, 42. creating an abstract watercolor wallpaper, 43. design vintage artwork with old newspaper and watercolor brush in photoshop, 44. the creation of “the storm is approaching” artwork in photoshop, 45. create a graffiti in inkscape, 46. create a wicked-worn vintage pop art design, 47. creating custom patterns, 48. orange porsche. fruit skin, 49. vintage photo effect photoshop tutorial, 50. create an amazing ad in photoshop, additional reading.
If you enjoyed these photoshop tutorials for beginners you should take a look at some of our more advanced Photoshop CS6 tutorials . We also have a collection of Photoshop CS5 tutorials here .
Found Something Useful?
The showcase of tutorials is over and now it is your time for action. Choose the most suitable one and try it out! If you have any ideas, thoughts or want to share your results, don’t hesitate to use the comment section below.
beginners lessons photoshop psd tips tricks tutorials

Written by Nancy Young
Nancy Young is an ambitious and extraordinary writer. She is a part of PhotoDoto Team . Get a new eBook about landscape photography for free - one useful gift just for visiting!
Leave a Reply

Your email address will not be published. Required fields are marked *
By using this form you agree with the storage and handling of your data by this website. *
This site uses Akismet to reduce spam. Learn how your comment data is processed .
Loading…
25+ High-Quality Free PSD Button Files [best performing]
18 best elephant logo design ideas and inspiration, ad blocker detected.

- Get started with computers
- Learn Microsoft Office
- Apply for a job
- Improve my work skills
- Design nice-looking docs
- Getting Started
- Smartphones & Tablets
- Typing Tutorial
- Online Learning
- Basic Internet Skills
- Online Safety
- Social Media
- Zoom Basics
- Google Docs
- Google Sheets
- Career Planning
- Resume Writing
- Cover Letters
- Job Search and Networking
- Business Communication
- Entrepreneurship 101
- Careers without College
- Job Hunt for Today
- 3D Printing
- Freelancing 101
- Personal Finance
- Sharing Economy
- Decision-Making
- Graphic Design
- Photography
- Image Editing
- Learning WordPress
- Language Learning
- Critical Thinking
- For Educators
- Translations
- Staff Picks
- English expand_more expand_less
Photoshop Basics - Basic Tasks in Photoshop
Photoshop basics -, basic tasks in photoshop, photoshop basics basic tasks in photoshop.

Photoshop Basics: Basic Tasks in Photoshop
Lesson 5: basic tasks in photoshop.
/en/photoshopbasics/getting-to-know-the-photoshop-interface/content/
Basic tasks in Photoshop
There's almost no limit to what you can do in Photoshop, but first you'll need to learn the fundamentals. We'll cover some of the most basic image adjustments you can make in Photoshop, including:
- Cropping : If you want to remove parts of an image, you can crop it. You can think of cropping like using a pair of scissors to cut out the parts you no longer want.
- Resizing : If you want to make an image smaller or larger, you can resize it. However, keep in mind that making an image larger than its original size generally does not make the image look good.
- Rotating : If you want to change the orientation of an image, you can rotate it to the left or right.
If you're new to image editing, you may want to review our lesson on making basic adjustments from our Image Editing 101 tutorial to learn more about common problems that can occur when making these changes.
If you'd like to follow along, you can download our example file (right-click the link to save it). We're planning to place this image into an online newsletter, but it's much larger than we actually need so we're going to crop the image and then resize to it be 800px by 600px.
There are two main ways to crop an image in Photoshop. You can either use the Crop tool or make a selection with the Rectangular Marquee tool. These methods work a bit differently, and you may find that you prefer using one method over the other.

Select Image > Crop . The image will be cropped.

You can also move the entire selection box while making a selection. To do this, click and drag to select the area you want to select, but do not release the mouse. Next, press and hold the space bar on your keyboard and move the mouse to move the selection box to a new location. When you're done, release the spacebar.
Use Method 2 to crop the example file as in the example above. Choose a Fixed Ratio from the Control panel with a width of 4 and a height of 3 before making the selection.
Resizing and rotating
You should avoid making images larger than their original size. When you do this, the image simply won't have enough detail to look good at the larger size. You can review Image Editing 101 to learn more.

- A dialog box will appear. Make sure Pixels are the currently selected unit size and that the Resample box is checked. The Lock icon next to the Width and Height should also be turned on, which will ensure that the aspect ratio stays the same to avoid distorting the image.

- Click OK . The image will be resized.
If there is no Automatic option available from the Resample menu, we recommend choosing one of the bicubic resizing modes, which will give the best results in most situations.

Resize the example file to be 800px wide . The height should adjust automatically to 600px . Note that you must have already cropped the image using Method 2 as described on the previous page for this to work correctly.
It's easy to rotate an image in Photoshop. You can rotate images clockwise (CW) or counter-clockwise (CCW), flip the image horizontally or vertically, and even rotate by an arbitrary amount to choose a specific rotation. However, most modern digital cameras will adjust the rotation of images automatically, so you may not need to use this feature very often.

- The image will be rotated.
Undoing changes
If you make a mistake, press Ctrl+Z (or Command+Z on a Mac) to undo your most recent change. To redo a change, just press Ctrl+Shift+Z (or Command+Shift+Z on a Mac).
In older versions of Photoshop, undoing works a bit differently. You can press Ctrl+Z (or Command+Z on a Mac) to undo your most recent change. However, if you press Ctrl+Z again, the change will be redone. If you want to undo several changes in a row, you'll need to select Edit > Step Backward or press Ctrl+Alt+Z (or Command+Option+Z on a Mac).

After you've made a few changes to the example file, try using the Step Backward and Step Forward commands to see the effect.
After you've edited an image, you'll want to save a new version of the edited file to preserve the changes. This will also prevent you from accidentally overwriting your original image file. There are several ways to save files in Photoshop, which we'll discuss in detail in the next lesson .
/en/photoshopbasics/saving-images/content/
Make selections in your composites
- Photoshop User Guide
- Dream it. Make it.
- What's new in Photoshop
- Edit your first photo
- Create documents
- Photoshop | Common Questions
- Photoshop system requirements
- Get to know Photoshop
- Work with Illustrator artwork in Photoshop
- Work with Photoshop files in InDesign
- Substance 3D Materials for Photoshop
- Use the Capture in-app extension in Photoshop
- Photoshop on the iPad | Common questions
- Get to know the workspace
- System requirements | Photoshop on the iPad
- Create, open, and export documents
- Work with layers
- Draw and paint with brushes
- Make selections and add masks
- Retouch your composites
- Work with adjustment layers
- Adjust the tonality of your composite with Curves
- Apply transform operations
- Crop and rotate your composites
- Rotate, pan, zoom, and reset the canvas
- Work with Type layers
- Work with Photoshop and Lightroom
- Get missing fonts in Photoshop on the iPad
- Japanese Text in Photoshop on the iPad
- Manage app settings
- Touch shortcuts and gestures
- Keyboard shortcuts
- Edit your image size
- Livestream as you create in Photoshop on the iPad
- Correct imperfections with the Healing Brush
- Create brushes in Capture and use them in Photoshop on the iPad
- Work with Camera Raw files
- Create and work with Smart Objects
- Adjust exposure in your images with Dodge and Burn
- Auto adjustment commands in Photoshop on the iPad
- Smudge areas in your images with Photoshop on the iPad
- Saturate or desaturate your images using Sponge tool
- Content aware fill for iPad
- Common questions
- System requirements
- Supported file types
- Introduction to the workspace
- Open and work with cloud documents
- Generative AI features
- Basic concepts of editing
- Quick Actions
- Retouch images and remove imperfections
- Make quick selections
- Image improvements with Adjustment Layers
- Move, transform, and crop images
- Draw and paint
- Work with anyone on the web
- Generate Image
- Generate Background
- Reference Image
- Get started with Creative Cloud Beta apps
- Photoshop (beta) on the desktop
- Generate image with descriptive text prompts
- Generate background with descriptive text prompts
- Common questions on generative AI in Photoshop
- Generative Fill in Photoshop on the desktop
- Generative Expand in Photoshop on the desktop
- Generative Fill in Photoshop on the iPad
- Generative Expand in Photoshop on the iPad
- Generative AI features in Photoshop on the web
- Content credentials in Photoshop
- Identity and provenance for NFTs
- Connect accounts for creative attribution
- Photoshop cloud documents | Common questions
- Photoshop cloud documents | Workflow questions
- Manage and work with cloud documents in Photoshop
- Upgrade cloud storage for Photoshop
- Unable to create or save a cloud document
- Solve Photoshop cloud document errors
- Collect cloud document sync logs
- Invite others to edit your cloud documents
- Share files and comment in-app
- Workspace basics
- Preferences
- Learn faster with the Photoshop Discover Panel
- Place files
- Default keyboard shortcuts
- Customize keyboard shortcuts
- Tool galleries
- Performance preferences
- Grid and guides
- Touch gestures
- Use the Touch Bar with Photoshop
- Touch capabilities and customizable workspaces
- Technology previews
- Metadata and notes
- Place Photoshop images in other applications
- Show or hide non-printing Extras
- Specify columns for an image
- Undo and history
- Panels and menus
- Position elements with snapping
- Position with the Ruler tool
- Photoshop for design
- Device Preview
- Copy CSS from layers
- Slice web pages
- HTML options for slices
- Modify slice layout
- Work with web graphics
- Create web photo galleries
- How to resize images
- Work with raster and vector images
- Image size and resolution
- Acquire images from cameras and scanners
- Create, open, and import images
- View images
- Invalid JPEG Marker error | Opening images
- Viewing multiple images
- Customize color pickers and swatches
- High dynamic range images
- Match colors in your image
- Convert between color modes
- Color modes
- Erase parts of an image
- Blending modes
- Choose colors
- Customize indexed color tables
- Image information
- Distort filters are unavailable
- About color
- Color and monochrome adjustments using channels
- Choose colors in the Color and Swatches panels
- Color mode or Image mode
- Add a conditional mode change to an action
- Add swatches from HTML CSS and SVG
- Bit depth and preferences
- Layer basics
- Nondestructive editing
- Create and manage layers and groups
- Select, group, and link layers
- Place images into frames
- Layer opacity and blending
- Mask layers
- Apply Smart Filters
- Layer comps
- Move, stack, and lock layers
- Mask layers with vector masks
- Manage layers and groups
- Layer effects and styles
- Edit layer masks
- Extract assets
- Reveal layers with clipping masks
- Generate image assets from layers
- Work with Smart Objects
- Combine multiple images into a group portrait
- Combine images with Auto-Blend Layers
- Align and distribute layers
- Load selections from a layer or layer mask's boundaries
- Knockout to reveal content from other layers
- Get started with selections
- Make selections in your composite
- Select and Mask workspace
- Select with the marquee tools
- Select with the lasso tools
- Adjust pixel selections
- Move, copy, and delete selected pixels
- Create a temporary quick mask
- Select a color range in an image
- Convert between paths and selection borders
- Channel basics
- Save selections and alpha channel masks
- Select the image areas in focus
- Duplicate, split, and merge channels
- Channel calculations
- Replace object colors
- Perspective warp
- Reduce camera shake blurring
- Healing brush examples
- Export color lookup tables
- Adjust image sharpness and blur
- Understand color adjustments
- Apply a Brightness/Contrast adjustment
- Adjust shadow and highlight detail
- Levels adjustment
- Adjust hue and saturation
- Adjust vibrance
- Adjust color saturation in image areas
- Make quick tonal adjustments
- Apply special color effects to images
- Enhance your image with color balance adjustments
- View histograms and pixel values
- Crop and straighten photos
- Convert a color image to black and white
- Adjustment and fill layers
- Curves adjustment
- Target images for press
- Adjust color and tone with Levels and Curves eyedroppers
- Adjust HDR exposure and toning
- Dodge or burn image areas
- Make selective color adjustments
- Camera Raw system requirements
- What's new in Camera Raw
- Introduction to Camera Raw
- Create panoramas
- Supported lenses
- Vignette, grain, and dehaze effects in Camera Raw
- Automatic perspective correction in Camera Raw
- Radial Filter in Camera Raw
- Manage Camera Raw settings
- Open, process, and save images in Camera Raw
- Repair images with the Enhanced Spot Removal tool in Camera Raw
- Rotate, crop, and adjust images
- Adjust color rendering in Camera Raw
- Process versions in Camera Raw
- Make local adjustments in Camera Raw
- Remove objects from your photos with Content-Aware Fill
- Content-Aware Patch and Move
- Retouch and repair photos
- Correct image distortion and noise
- Basic troubleshooting steps to fix most issues
- Replace sky in your images
- Transform objects
- Adjust crop, rotation, and canvas size
- How to crop and straighten photos
- Create and edit panoramic images
- Warp images, shapes, and paths
- Vanishing Point
- Content-aware scaling
- Transform images, shapes, and paths
- Paint symmetrical patterns
- Draw rectangles and modify stroke options
- About drawing
- Draw and edit shapes
- Painting tools
- Create and modify brushes
- Add color to paths
- Paint with the Mixer Brush
- Brush presets
- Gradient interpolation
- Fill and stroke selections, layers, and paths
- Draw with the Pen tools
- Create patterns
- Generate a pattern using the Pattern Maker
- Manage paths
- Manage pattern libraries and presets
- Draw or paint with a graphics tablet
- Create textured brushes
- Add dynamic elements to brushes
- Paint stylized strokes with the Art History Brush
- Paint with a pattern
- Sync presets on multiple devices
- Migrate presets, actions, and settings
- Add and edit the text
- Unified Text Engine
- Work with OpenType SVG fonts
- Format characters
- Format paragraphs
- How to create type effects
- Line and character spacing
- Arabic and Hebrew type
- Troubleshoot fonts
- Create type
- Use the Blur Gallery
- Filter basics
- Filter effects reference
- Add Lighting Effects
- Use the Adaptive Wide Angle filter
- Use the Oil Paint filter
- Use the Liquify filter
- Apply specific filters
- Smudge image areas
- Save your files in Photoshop
- Export your files in Photoshop
- Supported file formats
- Save files in graphics formats
- Move designs between Photoshop and Illustrator
- Save and export video and animations
- Save PDF files
- Digimarc copyright protection
- Understanding color management
- Keeping colors consistent
- Color settings
- Work with color profiles
- Color-managing documents for online viewing
- Color-managing documents when printing
- Color-managing imported images
- Proofing colors
- Video editing in Photoshop
- Edit video and animation layers
- Video and animation overview
- Preview video and animations
- Paint frames in video layers
- Import video files and image sequences
- Create frame animations
- Creative Cloud 3D Animation (Preview)
- Create timeline animations
- Create images for video
- Print 3D objects
- Print from Photoshop
- Print with color management
- Contact Sheets and PDF Presentations
- Print photos in a picture package layout
- Print spot colors
- Print images to a commercial printing press
- Improve color prints from Photoshop
- Troubleshoot printing problems | Photoshop
- Creating actions
- Create data-driven graphics
- Process a batch of files
- Play and manage actions
- Add conditional actions
- About actions and the Actions panel
- Record tools in actions
- Photoshop UI toolkit for plug-ins and scripts
- Fixed issues
- Known issues
- Optimize Photoshop performance
- Basic troubleshooting
- Troubleshoot crash or freeze
- Troubleshoot program errors
- Troubleshoot scratch disk full errors
- Troubleshoot GPU and graphics driver issues
- Find missing tools
- Photoshop 3D | Common questions around discontinued features
Use the Object Selection tool, Select Subject, Quick Selection, or Magic Wand tools to make selections in Photoshop.

Try it in the app Follow along with a sample file to learn how to make quick selections using the Select and Mask workspace.
Topics in this article:
Object Selection tool
- Select Subject action
Quick Selection tool
Magic wand tool.
With selections , define an area that you can further edit to enhance your images and composites. You can easily use any of the various selection tools in Photoshop to quickly make a selection.

Updated in Photoshop 24.0 (October 2022 release)
The Object Selection tool simplifies the process of selecting an object or region in your image — people, cars, pets, sky, water, buildings, mountains, and more . You can simply draw a rectangle or lasso around an object or region or let the Object Selection tool automatically detect and select an object or region within the image. Selections made with the Object Selection tool are now more precise and preserve details on the edges of the selection, which means you spend less time getting those perfect selections.

You can access the Object Selection ( ) tool at the following locations:
- From the main application toolbar in Photoshop
- From the toolbar in the Select And Mask workspace
Watch the short video below to learn how to use the Object Selection tool in Photoshop.
Read the full article to understand the step details.
To select objects or regions in an image using the Object Selection tool, follow these steps:
Access the Object Selection tool
Select the Object Selection tool from the toolbar.
Not seeing the Object Selection tool in your toolbar? See Tools missing from the toolbar .
Make a selection with the Object Selection tool
In the Object Selections Options bar, ensure the Object Finder is enabled. Once enabled, you'll see a spinning refresh icon beside the Object Finder option. Hover over and select the desired object or region in your image. By default, the Object Finder is turned on.
If you don't want to use the automatic selection, turn off the Object Finder in the Options bar, choose a selection Mode : Rectangle or Lasso, and drag along to make your selection.

- Rectangle : Drag the pointer to define a rectangular region around the object or region.
- Lasso : Draw a rough lasso outside the object's boundary or region.
Subtract from or add to the selection
In the options bar, click one of the selection options: New, Add To, Subtract From, or Intersect With the selection. New is the default option if nothing is selected. After making the initial selection, the option changes automatically to Add To
Add to the selection: Hold the Shift key or select Add To Selection in the options bar, then hover over/draw a new rectangle or a lasso around the missing region. Repeat this process for all the missing regions you want to add to the selection.
Subtract from the selection: There are two options to subtract from the selection:
- Use the Subtract From Selection option in the Options bar: Hold the Option (Mac)/ Alt (Win) key or select Subtract From Selection in the options bar, then hover over/draw a rectangle or a lasso around the boundary of the region you want to subtract from the selection.
- Enable Object Subtract from the additional options (gear icon in the options bar) : Object Subtract is especially useful when removing the background regions inside the current object selection. You can think of the Object Subtract option as equivalent to Object Selection inverted.
Object selection options
Sample All Layers : Creates a selection based on all layers instead of just the currently selected layer.
Hard Edge : Enables hard edges on the selection boundary.
Further refine the selection edge in the Select And Mask workspace

To further adjust the selection boundary or view the selection against different backgrounds or as a mask, click Select And Mask in the options bar.
Also, make use of the Selection Feedback dialog to share details about the selection achieved using the Object Selection tool and help us improve.
Selection improvements
Introduced in Photoshop 24.0 (October 2022 release)
Select elements like the sky, water, natural ground, plants, or architecture in one click using the powerful Object Selection Tool .
Refine your selection in the Select and Mask workspace or use the improved auto-detection feature to perform other specific adjustments.
Use Object Selection Tool in the existing object detection/selection tool in the left panel and then the Select and Mask workspace to make better and faster selections.

Follow these steps if you want to select, say, the sky with a single click:
Select the Object Selection tool in the Tools panel.
Select the Object Finder checkbox. Change the overlay color to a color different from the sky color. Make your color selection from the Overlay Options .
Hover over the sky in your image to see the overlay. This is possible when the Object Selection tool and Object Finder are enabled. You can now make additional refinements to your sky selection.
Create Color Fill adjustment layers using the Object Selection Tool sky selection.
Update graphics driver on Windows
If you encounter crashes or other instability when using the Object Selection tool on Windows and you have an NVIDIA graphics card, you may need to update your NVidia Windows Display drivers. Windows update won't always give you the latest drivers. You must go directly to your card manufacturer’s website to check for driver updates:
- NVIDIA drivers
- AMD drivers
- Intel drivers
Be aware that notebook drivers sometimes have a different name than similar desktop drivers. Some video adapter manufacturers have other software that requires updating in addition to the video driver. Read the update instructions carefully, and contact the video adapter manufacturer directly if you don't understand the instructions.
To learn how to manually update or reinstall your graphics driver for Windows 10, see Update drivers in Windows 10 .
Change Photoshop preference to improve selection stability
You can use a new preference setting to improve the stability of the Object Selection tool , Select Subject , and Sky Replacement for Windows users with an NVidia GPU.
Some Photoshop desktop users on Windows were experiencing slow performance, crashing, or unexpected selections due to NVidia Windows Display drivers. We have made changes to improve the app performance for Windows users who were facing such issues. Additionally, we have introduced a preference to help improve selection stability.

One-click Delete and Fill
Use the one-click Delete and Fill Selection feature to remove unwanted objects from your images or to retouch images with complex backgrounds.
Simply use the Object Selection Tool to make your selection and use the following keyboard shortcut to remove it:
- macOS : Shift + Delete
- Windows : Shift + Backspace
But if you're working with the Lasso Tool or any other Photoshop tool, right-click the mouse to access the contextual menu and select Delete and Fill Selection to delete unwanted objects from your image.

Make improved hair selections
With Photoshop 23.4 (June 2022) release, the Object Selection tool has been enhanced for making better hair selections in human portrait images. Object Selection tool can now recognize portraits and apply hair refinement to get a mask as good as that delivered by Select Subject.
Simply open your portrait image and select the Object Selection tool from the toolbar and make your selection by either clicking on the portrait or by creating a lasso or marquee around the person and obtain the mask with all the hair details captured.

After your selection is done using the Object Selection tool, you can further improve the mask results with the Refine Hair option in the Select And Mask workspace in the options bar for images other than human portraits like pets/animals/fur more naturally.
Mask all objects in a layer in a single click
Use this huge timesaver that leverages the power of Adobe Sensei to generate masks for all objects in the desired layer in a single click.
Choose Layer > Mask All Objects and watch Photoshop easily generate masks for all the objects detected within your layer with just a single click.

Select Subject
Optimized for better portrait selections in Photoshop 21.2 (June 2020 release)
Beginning with Photoshop 21.2 (June 2020 release), Select Subject is now content-aware and applies new custom algorithms when it detects a person is in the image. When creating a selection of portrait images, treatment around the hair area has been vastly improved to create a detailed selection of hair. To temporarily turn off the content awareness, you can press and hold the Shift key while performing Select Subject.
The Select Subject ( ) command lets you select the most prominent subject in an image in a single click. Powered by advanced machine learning technology, Select Subject is trained to identify a variety of objects in an image—people, animals, vehicles, toys, and more.
Select subjects automatically
Select Subject automatically selects the prominent subjects in your image. To access Select Subject, do one of the following:
- While editing an image, choose Select > Subject .
- While using the Object Selection , Quick Selection , or Magic Wand tools, click Select Subject in the options bar.
- While using the Object Selection or Quick Selection tools in the Select & Mask workspace , click Select Subject in the options bar.
Add to or subtract from the selection
Use any of the Selection tools with their Add to selection and Subtract from selection options to clean up the initial selection, if necessary. See Adjust selections manually .
Fine-tune the selection in the Select and Mask workspace
Choose Select > Select and Mask to open the image in the Select and Mask workspace. Use the tools and sliders in the workspace to clean up the selection further.
See Select and Mask workspace .
Select subject cloud service
Make improved selections and get high-quality images with cloud processing in Select Subject .
Simply navigate to the Image Processing section in the Preferences dialog box and toggle between the Cloud mode or Device mode to get your desired results.

You can also make your selection from within the Select & Mask workspace.
How is the Object Selection tool different from the Select Subject command?
The Object Selection tool is useful when you only need to select one of the objects or part of an object within an image that contains multiple objects. While the Select Subject command is designed to select all the main subjects in the image.
To learn more about the Select Subject command, read the next topic described in this article below.
In the options bar, click one of the selection options: New, Add To, or Subtract From.
New is the default option if nothing is selected. After making the initial selection, the option changes automatically to Add To.
When creating a selection, press the right bracket (]) to increase the Quick Selection tool brush tip size; press the left bracket ([) to decrease the brush tip size.
Choose Quick Selection options:
Sample All Layers: Creates a selection based on all layers instead of just the currently selected layer.
Enhance Edge: Reduces roughness and blockiness in the selection boundary. Enhance Edge automatically flows the selection further toward image edges and applies some of the edge refinement you can apply manually in the Select and Mask workspace .
Paint inside the part of the image you want to select. The selection grows as you paint. If updating is slow, continue to drag to allow time to complete work on the selection. As you paint near the edges of a shape, the selection area extends to follow the contours of the shape edge.

- To subtract from a selection, click the Subtract From option in the options bar, then drag over the existing selection.
- To temporarily switch between add and subtract modes, hold down the Alt (Win) or Option (Mac) key.
- To change the tool cursor, choose Edit > Preferences > Cursors > Painting Cursors (Win) or Photoshop > Preferences > Cursors > Painting Cursors (Mac). Normal Brush Tip displays the standard Quick Selection cursor with a plus or minus sign to show the selection mode.
If you stop dragging and then click or drag in a nearby area, the selection will grow to include the new area.
Click Select and Mask to further adjust the selection boundary.
The Magic Wand tool lets you select a consistently colored area (for example, a red flower) without having to trace its outline. You specify the selected color range, or tolerance , relative to the original color you click.
You cannot use the Magic Wand tool on an image in Bitmap mode or on 32‑bits-per-channel images.

A. New B. Add To C. Subtract From D. Intersect With
In the options bar, specify any of the following:
Tolerance : Determines the color range of selected pixels. Enter a value in pixels, ranging from 0 to 255. A low value selects the few colors very similar to the pixel you click. A higher value selects a broader range of colors.
Anti-aliased : Creates a smoother-edged selection.
Contiguous : Selects only adjacent areas using the same colors. Otherwise, all pixels in the entire image using the same colors are selected.
Sample All Layers : Selects colors using data from all the visible layers. Otherwise, the Magic Wand tool selects colors from the active layer only.
- In the image, click the color you want to select. If Contiguous is selected, all adjacent pixels within the tolerance range are selected. Otherwise, all pixels in the tolerance range are selected.
Click Select and Mask to further adjust the selection boundary or view the selection against different backgrounds or as a mask.
More like this
- Quick Tips: How to select objects in Photoshop the easy way
- Make selections
- Selection tools gallery
- Troubleshoot crash or freeze | Photoshop
Get help faster and easier
Quick links
Legal Notices | Online Privacy Policy
Share this page
Language Navigation

- all Vis.Lit. lessons
- all classes
- art teacher resource
- art vocabulary
by JuliannaKunstler.com

Learning objectives:
Students learn to use Selection tools:
- Marquee tools
- Lasso tools
- Magic Wand tool
- Quick Selection tool

Download the work file and open it in Photoshop.
These are the pieces you are going to put together to create a face.
Focus of this assignment is to practice the use of selection tools.
Selection tools are grouped together.
We are going to use many of them in this project.
Some of them will be much easier than the others. But it is really important to try them all.

The first group of selection tools is called "Marquee Tools".
Rectangular and elliptical marquee tools will let you make rectangular or circular selections.
Single row and Single column tools will let you select a row that is 1 pixel high or a column that is 1 pixel wide.

Select the Elliptical Marquee tool.
We are going to make a circular selection to select a blueberry for an eye.

To make a round selection you just click and drag the cursor over the area that you want to select.
If you want to select a perfect circle (or a perfect square) - hold SHIFT while dragging.
If you want to start your selection from the center - hold Option (Alt) button.
If you want both of these options (perfect circle/square drawing from the center) hold both keys (Shift + Option (Alt)) while dragging.
Now zoom in the area with the blueberry. Select it.
The next step is to move the blueberry over the avocado.
Move tool is for moving!
Select the Move tool.

Place the cursor inside your selection. Do you see the cursor changed to scissors? By using this tool right now you are cutting the blueberry out of the background in order to reposition it.
Drag the selection over the avocado.
While your blueberry is still selected, you can adjust its position (with a mouse or using the arrow keys on the keyboard)
Once you deselect it - it it permanently embedded into the image.
Deselect: Select > Deselect on the menu bar or Command D (Ctrl D)

Use Magnetic Lasso tool to select the green shape..
Magnetic Lasso will snap to the edges of the objects that you draw. Actually, it snaps to the biggest contrast between the colors (values). Usually, the biggest contrast is the edge of an object vs. the background.

Double-click the Hand Tool.
It will zoom out the image so you are able to see it all.

Use the Move tool to drag the avocado over the mango.
See? It looks like an eye....
DO NOT DESELECT YET!!!!!!

Let's add the second eye.
It is important that the first eye is still selected.
There is a way in Photoshop to duplicate selections and move them at the same time.
Choose the Move tool.
Place the cursor inside the eye selection.
Hold Option (Alt) key. See a small plus sign? Keep holding it down.
Now drag your eye selection to create another eye.
Position the second slice.

To flip the second eye:
Edit > Transform > Flip Horizontally
Now you can deselect.

You can add to or subtract from a selection.
We will practice that by creating a mouth out of an orange slice.
Drag a circular selection using Elliptical Marquee tool.

Switch to the Rectangular Marquee tool.
Hold Alt (Option) key.
Drag an area that you want to subtract from the orange slice.

With the Move Tool:
Drag the mouth over the mango face.

Magic Wand selects pixels that are of similar color.
It works better to select objects and areas that are of a uniform color. We are lucky to have a solid blue background here.
We will extract the potato in just two clicks.

Let's define the area that we are going to work with:
Use Rectangular Marquee tool and select the area inside the blue rectangle.
Choose Magic Wand tool.
Then look at the Option bar.
Set Tolerance to 50.
That means that the Magic Wand will select all pixels within the range of 50 shades darker than the initial color and 50 shades lighter than the initial color.
Check Contiguous option to select only pixels that are connected to each other.

Alt (Option) click on the blue background within the rectangular selection.
This will subtract from the selection all blue pixels - leaving only the potato selected.

Choose Move Tool.
Drag the potato over the mango.
Looks like a nose?

To resize it:
Edit > Free Transform (or Ctrl/Command T)
Hold Shift to constrain proportions as you are resizing.
Hit Enter to apply transformation when you are done.

We are using a cucumber slice for an ear.
Choose Lasso tool. Lasso is a freehand selection tool. It selects pixels as you drag it.
To select a shape - draw the selection around it. Try to stay close to the shape. But if you don't - not a big deal. We'll fix it.
Remember - drawing your own selection - you need to return to your start point. Selection is a closed shape. So you need to end at your start point. Once you stop and release the mouse - it connects the start and the end points with a straight line. This happens because selection can be only an enclosed shape, not an open end line.

For this particular purpose - we are selecting only a part of the shape.
So do your best to draw the selection line around the left side of the shape.
Start at the top, follow the outline, stop at the bottom and release the mouse.

To fix the mistakes, use Shift (to add to selection) or Alt/Option (to subtract from selection).

Zoom in the area with the mushroom.

Drag the ear.

To curve the right edge - Edit > Transform > Warp

Push the straight edge to create a smooth curve.

Hit Enter to apply transformation.

Duplicate the ear with Alt/Option dragging the selection.

Flip Horizontally.

To select the basil bunch - use Rectangular marquee tool and select the area.
Switch to Magic Wand tool.
Set tolerance to 12.

Click on white background inside the selection.
This will leave only basil selected.

Use Move tool.
Drag the herbs as shown.

Duplicate the bunch.

Duplicate it again.

To rotate the selection:
Free Transform (Ctrl/Option T)

To select a contrasted area (does not need to be a solid or similar colors) use Quick Selection tool.
Draw a quick stroke across the mushroom.

Once it is selected, drag it over the head.

Now let's get rid of the left side of the image!
Choose Crop Tool
Draw a box around the mango person.. :)
You can adjust the size of it (and even rotate)
Press RETURN (ENTER)
File > Save

Your project is done.

Add your name before you print.
Choose Type tool.

Select font, font size, and font color.

Click on the image and start typing.
(Do not drag with Type tool)
Switch from the Type tool.
IMAGES
VIDEO
COMMENTS
Learn From Anywhere. Take classes on the go with the Skillshare app. Stream or download to watch on the plane, the subway, or wherever you learn best. 47 Graphic Design Projects for Photoshop Beginners Yes, you'll learn Photoshop and graphic design by doing. This Photoshop course will teach you how to use Ad. ..
Add-Ons Adobe Photoshop. Before you can start your Photoshop projects and ideas, you need to learn the basics. Even the most complex digital artworks are built on a foundation of simple actions. These 100+ free Adobe Photoshop tutorials are aimed at the clever beginner who wants to master Photoshop from the roots.
In this Simple Photoshop Project instructor and Adobe Education Leader Sean Glumace get you started with Photoshop by building a simple 4 layer document using objects, type, and layer effects. Sean Glumace Last Updated May 9, 2022. Project See all 2 pieces included View all 2 pieces included ...
Adobe Photoshop is a great tool for creating all kinds of drawings - from basic ones to advanced 3D forms and designs. In the video below you will learn how to work with brushes and strokes. The best thing about Photoshop is that you can use many free brushes. 12.
In this Simple Photoshop Project instructor and Adobe Education Leader Sean Glumace get you started with Photoshop by building a simple 4 layer document using objects, type, and layer effects. Learning Objectives Tools Helpful resources. Learn more about Adobe Photoshop. From photo editing and compositing to digital painting, animation, and ...
The Photoshop tutorial above shows how Generative Fill can be used to transform a subject's look and costume in an image, highlighting the importance of how the selection is made. If you prefer a written tutorial, Adobe has a good explanation of Generative Fill on its website. 04. Layer stacking with Photoshop Generative Fill.
Basic tutorials are for beginners who are just exploring the way how Photoshop work. The section starts with Photoshop workspace and it will make you comfortable with Photoshop interface and panels like tools, layers, menus, adjustment layers, layer mask, colors and much more. Then you'll learn about each of them with a comprehensive guide.
Welcome to Photoshop Essentials, where everyone can learn Photoshop! We offer fun, exclusive, step-by-step tutorials for all skill levels, and all written with beginners in mind. From Photoshop Basics to Photo Editing and Retouching, Photo Effects, Text Effects and more! Check out our latest Photoshop tutorials below.
In summary, here are 10 of our most popular photoshop courses. Design Online Course Printables using Canva: Coursera Project Network. How to create a high-quality flyer in Adobe Photoshop: Coursera Project Network. Adobe Photoshop Para Principiantes: Efectos y técnicas: Coursera Project Network. Como usar la herramienta de marcos en Photoshop ...
Photoshop Basics Tutorials. Learn the basics of Adobe Photoshop! These tutorials are perfect for Photoshop beginners or anyone who just needs to refresh their skills, covering the essentials topics you need to know to get up to speed with Photoshop quickly! Use the links below to jump to lesson chapters and other popular topics, or scroll down ...
Category. Photoshop Tutorials. In this section, you will find step-by-step beginner-friendly Photoshop tutorials with screenshots. Our tutorials are designed easy to follow and provide multiple solutions for each problem. Theories are easy to learn, it's all about practice. You'll also find some extra bonus tips that'll help you solve ...
Create 12 Different Real World Practical Projects That Can Be Used To Help Your Brand Or Business. Practical Real-Life Lessons That Are Essential for Everyone. Create Social Media Post Graphics. Create Social Media Channel Art/Cover Photo. Edit Photos In Photoshop To Look Them Awesome. Remove Any Objects From Photo (Object Removal In Photoshop ...
Make your selection. Click the layer with your subject — the layer you want to mask — in the Layers panel. In the top menu, click Select › Select and Mask. Select your subject. Click Select Subject in the options bar. Photoshop will automatically select the most prominent subjects in the image.
Download Free Practice Image for Photoshop. 29. Prague, Czech Republic. Both the original image and the edit are included in the download, with the edit contained in non-destructive layers within the PSD file. Download Free Practice Image for Photoshop. 30. Paris, France.
You can also use the Opacity slider to fine-tune the effect of the layer---lower the opacity to reduce the impact of the changes---or hide or delete any if you don't need them. 3. Instant Automatic Photo Fixes. Photoshop offers various automatic options for simple tweaks like removing shadows from your photos .
By completing the assignment and marking this course as complete, you will receive a digital badge and a certificate for 2 hours of accredited professional learning. Learn to teach Photoshop & the creation of digital images. Develop a lesson plan today with exercises, projects & assignments from Adobe Education Exchange.
In this bundle you'll find tutorials to suit any purchaser: photo effects, text effects, making filters, photo manipulations, creating posters and many more. 1. Instagram Your Images Using Photoshop. View tutorial. 2. How to Slim a Face in Photoshop in just a few easy steps. View tutorial.
In the New Document dialog box, click a category tab: Photo, Print, Art & Illustration, Web, Mobile, and Film & Video. Select a preset. Optionally, change the settings for the selected preset in the Preset Details pane on the right. See Modify presets to understand how. Click Create.
Method 1. With the image open in Photoshop, select the Crop tool from the Tools panel. Click and drag to select the part of the image you want to keep, then release the mouse. Adjust the cropping handles if necessary. Press Enter on your keyboard to crop the image.
In the options bar, click one of the selection options: New, Add To, Subtract From, or Intersect With the selection. New is the default option if nothing is selected. After making the initial selection, the option changes automatically to Add To. Add to the selection: Hold the Shift key or select Add To Selection in the options bar, then hover over/draw a new rectangle or a lasso around the ...
In this tutorial, we will learn how to combine 2 different animals in Photoshop to create our own new species. There are 2 different tutorials using differen...
We've got plenty of handy Photoshop text effect tutorials on the Envato Tuts+ YouTube channel for you to check.. But now, let's browse the incredible selection of Photoshop font effects available through Envato Elements and GraphicRiver and check out a few of our favorites below!. 1. 12 Retro Photoshop Text Effects (PSD) Get inspired by this wonderful pack of retro-themed Photoshop font effects.
STEPS. Download the work file and open it in Photoshop. These are the pieces you are going to put together to create a face. Focus of this assignment is to practice the use of selection tools. Selection tools are grouped together. We are going to use many of them in this project. Some of them will be much easier than the others.
The new Surface Laptop (2024) will be sold in 13.8- and 15-inch sizes, available in Sapphire blue, a champagne-like hue Microsoft calls Dune, Platinum silver and Black. The 13.8-inch model starts ...