Got any suggestions?
We want to hear from you! Send us a message and help improve Slidesgo
Top searches
Trending searches


hispanic heritage month
21 templates

suicide prevention
9 templates

135 templates

16 templates

36 templates

dominican republic
About me presentation templates, do you want your classmates to know a bit more about you maybe you want to tell others what your favorite hobbies are these google slides themes and powerpoint templates are great for introducing yourself and sharing a bit about yourself..
- Calendar & Weather
- Infographics
- Marketing Plan
- Project Proposal
- Social Media
- Thesis Defense
- Black & White
- Craft & Notebook
- Floral & Plants
- Illustration
- Interactive & Animated
- Professional
- Instagram Post
- Instagram Stories

It seems that you like this template!

Register for free and start downloading now
All about me for high school students.
Download the "All About Me for High School Students" presentation for PowerPoint or Google Slides. The education sector constantly demands dynamic and effective ways to present information. This template is created with that very purpose in mind. Offering the best resources, it allows educators or students to efficiently manage their...

Premium template
Unlock this template and gain unlimited access
About Me Infographics
Download the "About Me Infographics" template for PowerPoint or Google Slides and discover the power of infographics. An infographic resource gives you the ability to showcase your content in a more visual way, which will make it easier for your audience to understand your topic. Slidesgo infographics like this set...

Create your presentation Create personalized presentation content
Writing tone, number of slides, about yourself.
Download the "About Yourself" presentation for PowerPoint or Google Slides and start impressing your audience with a creative and original design. Slidesgo templates like this one here offer the possibility to convey a concept, idea or topic in a clear, concise and visual way, by using different graphic resources. You...

Introducing Myself
You never know when a slideshow about yourself could come in handy. Be prepared and use this template to introduce yourself to the audience. Explain your work, your strengths, your personal goals, your values, whatever you can come up with! The slides are cool and contain lots of compositions where...

All About Me
Download the All About Me presentation for PowerPoint or Google Slides and start impressing your audience with a creative and original design. Slidesgo templates like this one here offer the possibility to convey a concept, idea or topic in a clear, concise and visual way, by using different graphic resources....

My Autobiography
Download the "My Autobiography" presentation for PowerPoint or Google Slides. The education sector constantly demands dynamic and effective ways to present information. This template is created with that very purpose in mind. Offering the best resources, it allows educators or students to efficiently manage their presentations and engage audiences. With...

Boho Rainbow About Me Slideshow
If you find yourself caught between your love for boho style and your fascination with rainbows, we have some exciting news for you! We've got the perfect template that combines these two. Say hello to your new all-time favorite design, complete with adorable rainbow illustrations scattered throughout. Not only will...

My Personal Story
Download the "My Personal Story" presentation for PowerPoint or Google Slides and start impressing your audience with a creative and original design. Slidesgo templates like this one here offer the possibility to convey a concept, idea or topic in a clear, concise and visual way, by using different graphic resources....

Introduce yourself in a new creative way with this design for Google Slides and PowerPoint! The 31 slides of this presentation will let you speak about your hobbies, favourite foods, favourite music and hobbies… presenting yourself in a fun, open way to your students will make them see you as...

Scrapbook Style Wrapped Theme
Download the Scrapbook Style Wrapped Theme presentation for PowerPoint or Google Slides and start impressing your audience with a creative and original design. Slidesgo templates like this one here offer the possibility to convey a concept, idea or topic in a clear, concise and visual way, by using different graphic...

My Favorite Playlists Lo-fi Style
It's raining in the street. You are in your room drinking freshly brewed coffee while working on your computer. You are very focused on what you are doing. You decide to put on some music so you can continue in that mood of maximum concentration. You go into your music...

All About My life Theme for Pre-K
Help your little students present themselves with this set of creative resources! It’s full of cute illustrations, pastel tones, waves and fun ways of helping children getting to know each other. Did you know that building relationships at this stage of life is one of the key components of children’s...

About Me: Printable Sheets
Do you want your friends or your classmates to know you better? And do it in a cool way too? Granted! We have a new template with printable sheets, which are very colorful and can be modified with your own content. What are your favorite books or movies? What do...

This is My Life Project
Download the This is My Life Project presentation for PowerPoint or Google Slides and start impressing your audience with a creative and original design. Slidesgo templates like this one here offer the possibility to convey a concept, idea or topic in a clear, concise and visual way, by using different...

All about me Worksheet
Download the All about me Worksheet presentation for PowerPoint or Google Slides and easily edit it to fit your own lesson plan! Designed specifically for elementary school education, this eye-catching design features engaging graphics, and age-appropriate fonts; elements that capture the students' attention and make the learning experience more enjoyable...

My Life Minitheme
Quoting a famous rock band, "it's my life!". You have your own way of living, with your own values and philosophy. You might have hobbies that not many people have, or you might have worked in many different places. You might even have been born on a plane mid-flight! Time...

Torn Paper Portfolio
Download the "Torn Paper Portfolio" presentation for PowerPoint or Google Slides. When a potential client or employer flips through the pages of your portfolio, they're not just looking at your work; they're trying to get a sense of who you are as a person. That's why it's crucial to curate...

- Page 1 of 10
Register for free and start editing online
Home Blog Presentation Ideas About Me Slides: How to Introduce Yourself in a Presentation
About Me Slides: How to Introduce Yourself in a Presentation
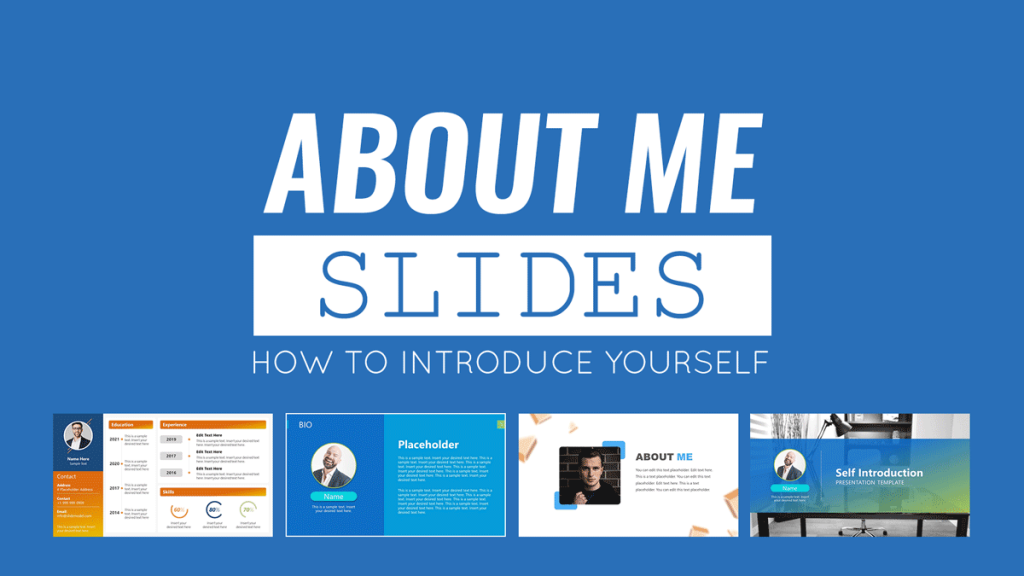
From conference talks to client demos, it’s always essential to include an About Me slide in any presentation you are giving. Introducing yourself early into the presentation helps build a better rapport with the audience.
You can start with several fun facts about me slide to break the ice or go for a more formal professional bio to explain your background and what makes you qualified to talk about the topic at hand. At any rate, your goal is to get the audience on your side by revealing some of your personality.
How to Introduce Yourself in a Presentation: 4 Approaches
It’s a good practice to include self-introduction slides at the beginning of your presentation. If you are looking to answer how to introduce yourself professionally, typically somewhere after the title, opening slide , and the main agenda. However, the presentation structure will be somewhat different depending on whether you are presenting to a new audience or a group of people familiar with (e.g., your team, clients, or business partners).
Here are four about me slide ideas you can try out, plus an About me template you can use to present yourself in a presentation.
1. Mention Your Name and Affiliations
Start with the introduction basics. State your name, company, title/position, and several quick facts about who you are and what you do. Even if you present to a familiar audience, a brief recap is always welcome.
To keep things a bit more engaging, consider adding some lesser-known facts about yourself. For example:
- Your interests
- Recent accomplishments
- Testimonial/quote from a team member
- Fun nicknames you got
The above can be nice ice breakers for less formal team presentations, project updates, or catch-ups with clients.
Here are several unique About Me examples you can try out:
For a client case study presentation :
“Hi, I’m Lynda, Chief Customer Success Specialist with Acme Corp. (Also, someone you thought was a chatbot for the first few encounters)
47 NPS | 15% Churn Rate | 40% repeat purchase rate”
For a team after-action review presentation :
Mike, Project Manager at Cool Project
(aka Maximizer)
Personal Project stats:
387 Slack messages answered
56 cups of coffee consumed
Project profit gross margin: $1.2 million
2. Work On Your Elevator Pitch
One of the best ways to introduce yourself in a presentation is to share a punchy elevator pitch. This works extra well if you are presenting to a new audience.
An elevator pitch is a concise statement (1-2 sentences) that summarizes your unique strengths, skills, and abilities and explains how these can benefit your listener.
It’s nice to have one ready for your presentations and networking in general since it helps you immediately connect with new people and communicate your value.
Writing a solid elevator pitch may require several attempts and iterations. But the sooner you start — the faster you’ll arrive at the best formula!
To get your creative juices flowing, here are several elevator pitch ideas you can incorporate in an introduction slide about yourself.
For professionals:
“Certified Salesforce Administrator, data visualization specialist, and analytics for top SaaS brands. I help businesses make more sense of their data to drive better outcomes”.
For a mentor :
“Adjunct professor of creative writing at Columbia University, published author, former lifestyle editor at Esquire, the New York Times. I can teach you how to find, shape, pitch, and publish stories for web & print.”
For a student:
“Third-year Marine Biology student at Denver State Uni. Volunteer at Lake Life Protection NGO, climate change activist, looking to expand my research about water conservation”.
3. Answer Popular Questions or Assumptions
If you are a frequent presenter , chances are you get asked a lot of the same “About Me questions” after your speeches and during the networking bits. So why not address a roaster of these in your About Me slide? Select 4-5 most common questions and list them as quick FAQs on your slide deck.
4. Focus on Telling a Story
Strong introductions are personable. They are meant to offer a sneak-peak into your personality and the passion behind your work. That’s why for less formal presentations, you can (and should!) start with a short personal story.
Remember: reliability is important to “click” with your audience.
For instance, neuroscience research of political ads recently found that ads featuring real people performed better than those with genetic stock footage. Among viewers, emotional engagement and memory encoding (recall) increased dramatically when political ads showed relatable people.
The same holds true for commerce. In 2015, GE launched a viral “What’s the Matter With Owen?” video ad series to attract more young talent to the company. The clips featured a relatable protagonist, struggling to explain what his work at GE entails e.g. that the company isn’t building railroads, but actually does some very innovative pilots. Many engineers related to the promo and work applications to GE shoot up by 800% !
As the above examples show, a good relatable story can go a long way. So think about how you can make a PowerPoint presentation about yourself more representative of who you really are as a person.
How to Give a Presentation About Yourself: 4 Fool-Proof Tips
On other occasions, you may be asked to give a full-length “about me” presentation. Typically, this is the case during a second interview, onboarding , or if you are in attending a training program or workshop where everyone needs to present themselves and their work.
Obviously, you’ll need more than one good about me slide in this case. So here’s how to prepare a superb presentation about me.
What to Put in a Presentation About Yourself?
The audience will expect to learn a mix of personal and professional facts about you. Thus, it’s a good idea to include the following information:
- Your name, contact info, website , social media handles, digital portfolio .
- Short bio or some interesting snippets.
- Career timeline (if applicable).
- Main achievements (preferably quantifiable).
- Education, special training.
- Digital badging awards , accolades, and other types of recognition.
- Something more personal — an interest, hobby, aspiration.
The above mix of items will change a bit, depending on whether you are giving an interview presentation about yourself or introduce yourself post-hiring. For example, in some cases a dedicated bio slide may be useful, but other times focusing on main achievements and goals can be better.
That being said, let’s take a closer look at how to organize the above information in a memorable presentation.
P.S. Grab an about me slide template to make the design process easier!
1. Create a List of “Facts About Me”
The easiest way to answer the “tell me about yourself” question is by having an array of facts you can easily fetch from your brain.
When it comes to a full-length about me presentation , it’s best to have a longer list ready. To keep your brainstorming process productive, organize all your ideas in the following buckets:
- Key skills (soft and hard)
- Educational accolades, training
- Accomplishments and other “bragging rights”
- Personal tidbits (a.k.a. fun facts )
Once you have a list, it gets easier to build a series of slides around it.
2. Think Like Your Audience
Most likely you’d be asked to make a presentation about yourself by a recruiter. There’s a good reason why many ask this — they want to determine if you are a good “cultural fit” for their organization.
After all, 33% of people quit within the first 3 months of accepting a new job. Among these:
- 43% of employees quit because their day-to-day role was different than what they were told it would be during the hiring process.
- 32% cite company culture as a factor for leaving within the first three months.
About me presentations often serve as an extra “filter” helping both parties ensure that they are on the same page expectations- and work style-wise. Thus, when you prepare your slide deck, do some background company research. Then try to align the presentation with it by matching the company tone, communication style, and cultural values.
3. Include Testimonials and Recommendations
Use the voice of others to back up the claims you are making in your presentation. After all, trumping your own horn is what you are expected to do in such a presentation. But the voices of others can strengthen the claims you are personally making.
Depending on your role and industry, try to sprinkle some of the following testimonials:
- LinkedIn recommendations
- Quotes from personal or professional references
- Social media comments
- Data metrics of your performance
- Funny assessments from your colleagues/friends
The above not just strengthen your narrative, but also help the audience learn some extras about you and your background. Testimonial slides can be of help for this purpose.
4. Include a Case Study
One of the best ways to illustrate who you are is to show what you are best in. Remember, an about me presentation often needs to “soft sell” your qualifications, experience, and personality.
One of the best ways to do that is to showcase how you can feel in a specific need and solve issues the business is facing.
So if you have the timeframe, use some of the ending slides to deliver a quick case study. You can present:
- Short retrospective of a past successful project
- Before-after transformations you’ve achieved
- Spotlight of the main accomplishments within the previous role
- Main customer results obtained
- Specific solution delivered by you (or the team you’ve worked with)
Ending your presentation on such a high note will leave the audience positively impressed and wondering what results you could achieve for them.
To Conclude
It’s easy to feel stumped when you are asked to talk about yourself. Because there are so many things you could mention (but not necessarily should). At the same time, you don’t want to make your introduction sound like a bragging context. So always think from the position of your audience. Do the facts you choose to share benefit them in any way? If yes, place them confidently on your About Me slides!
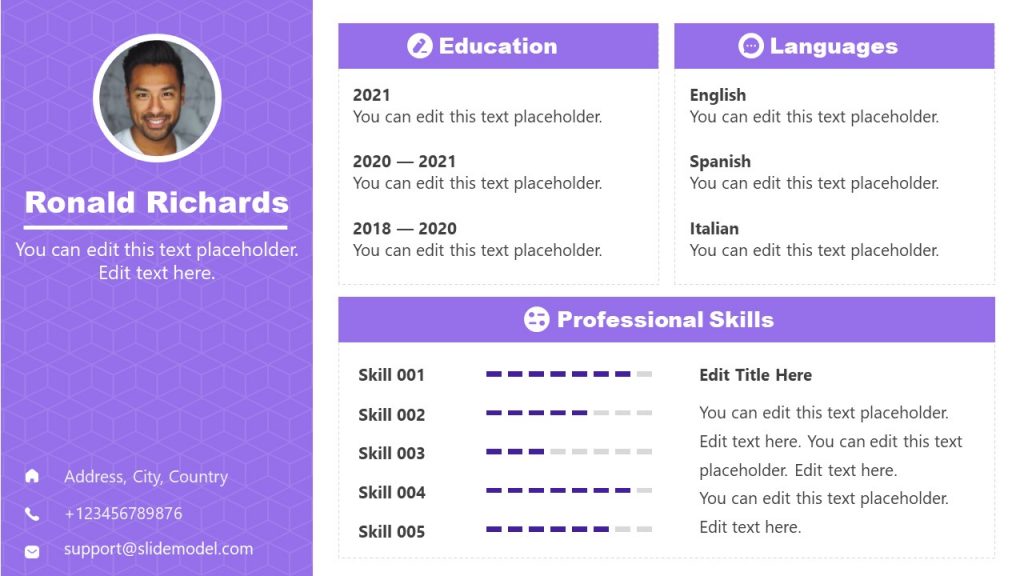
1. Personal Self Introduction PowerPoint Template
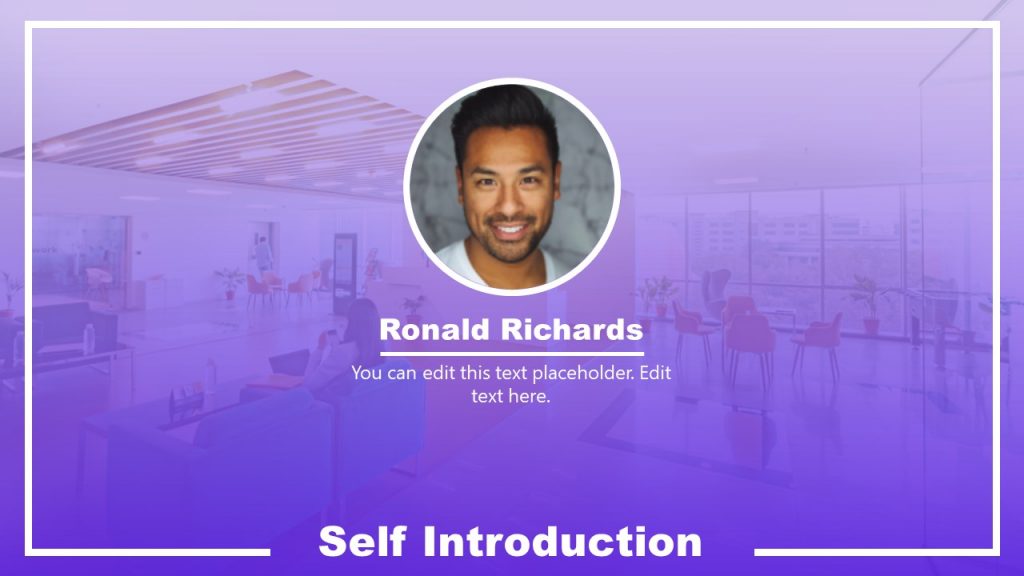
Use This Template
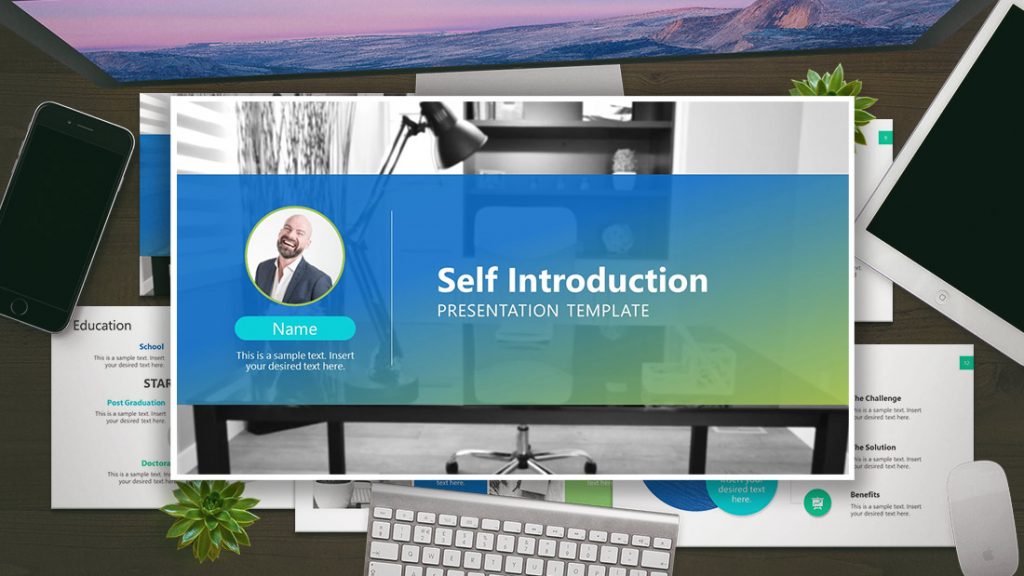
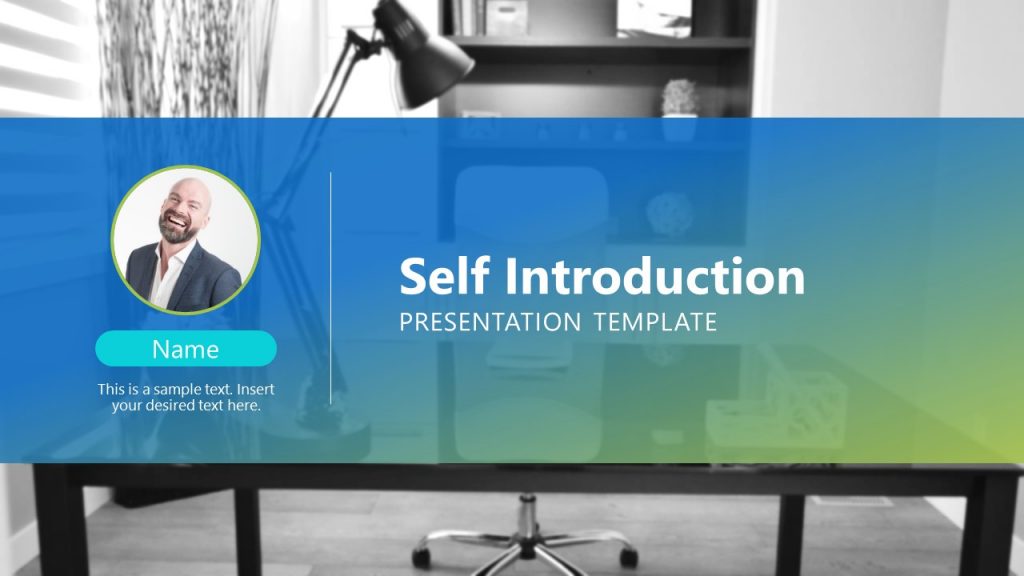
2. Self Introduction PowerPoint Template
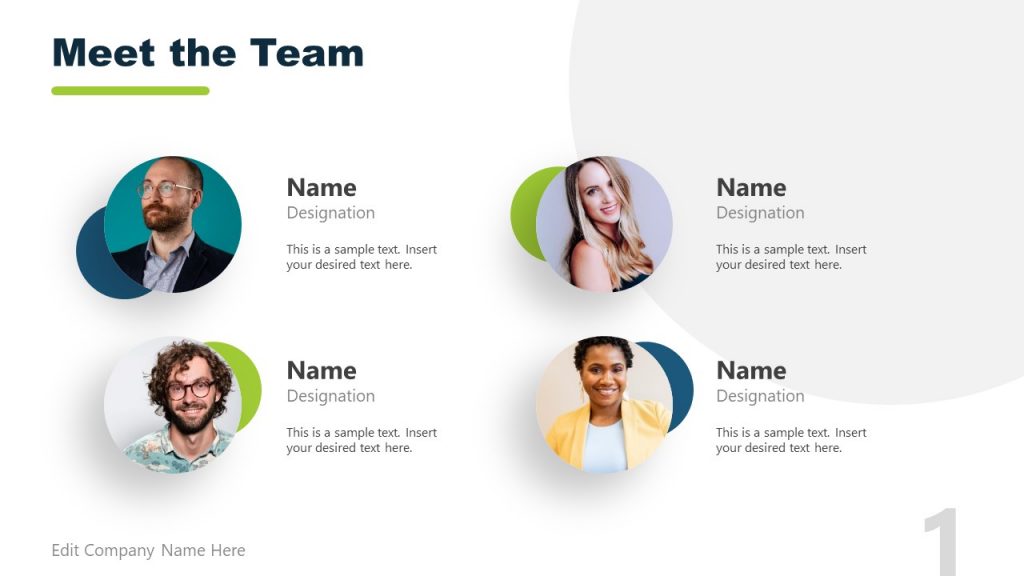
3. Meet the Team PowerPoint Template Slides
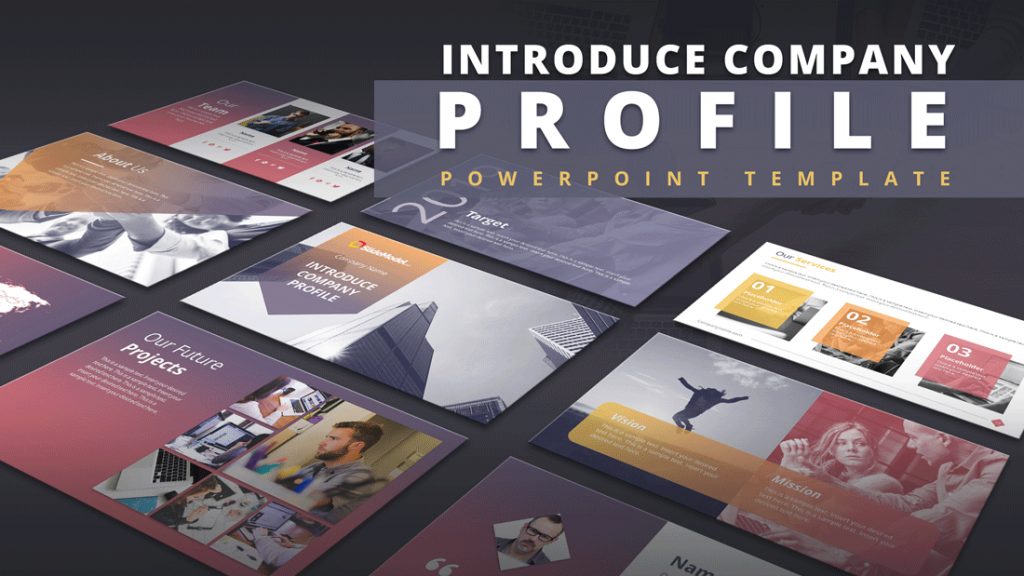
4. Introduce Company Profile PowerPoint Template
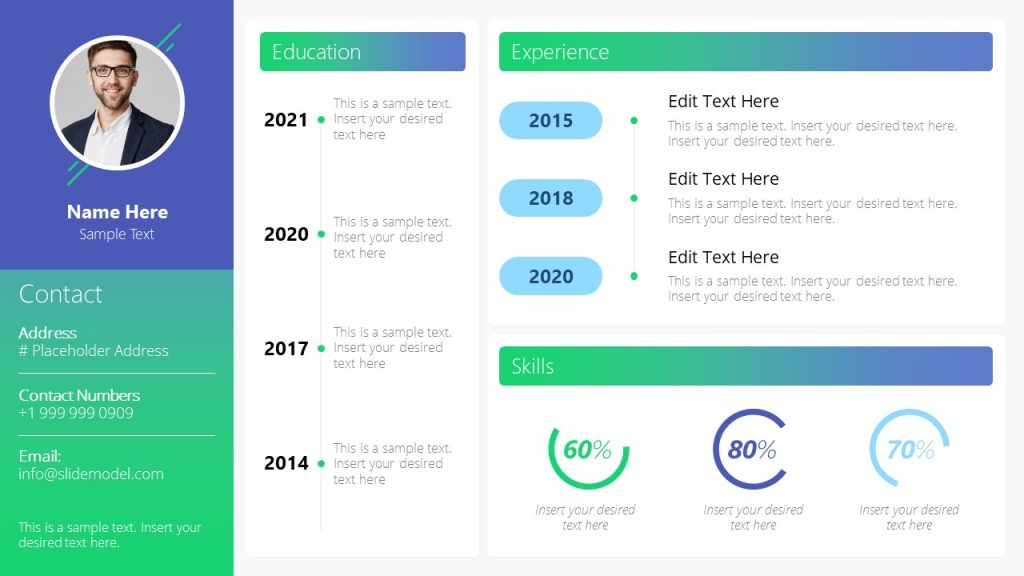
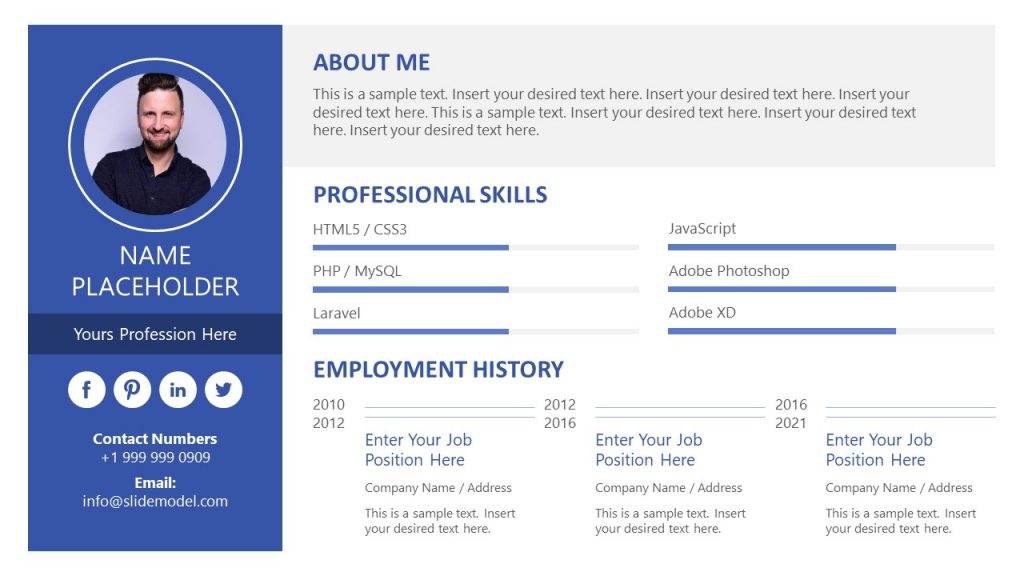
5. Modern 1-Page Resume Template for PowerPoint
6. Modern Resume Presentation Template
Like this article? Please share
Introduce Yourself, Introduction, Presentation Ideas Filed under Presentation Ideas
Related Articles

Filed under PowerPoint Tutorials • August 6th, 2024
How To Convert a PowerPoint Presentation to a HD Video in 3 Steps
Learn how to convert a PowerPoint presentation to video and prepare video presentations in minutes.

How to Add, Delete and Re-arrange PowerPoint Slides
Build a faster workflow in PowerPoint by learning how to add, delete and re-arrange PowerPoint slides with the help of this guide.

Filed under Business • July 24th, 2024
How to Create a Demo Presentation
Discover the secrets behind successful demo presentations and what they should contain with this article. Recommended PPT templates included.
Leave a Reply
How to Create the Perfect Professional Presentation in Canva

Your changes have been saved
Email is sent
Email has already been sent
Please verify your email address.
You’ve reached your account maximum for followed topics.
This Note-Taking System Finally Made Schoolwork Easier for Me
This task management tool is the best i've found for actually getting things done, the geoguessr world cup is the entertainment i didn't know i needed this week.
These days there's a lot of options for creating workplace presentations, ranging from old-school classics like Microsoft PowerPoint to relative newcomers like Google Slides. Another platform that you can use to create a presentation is Canva.
As a template design site where you can craft beautiful documents, Canva makes the act of creating presentations as simple as Google Slides---perhaps even simpler. Here's how to design a workplace presentation in Canva.
Step 1: Launch Canva

If you don't have an account with Canva yet, check out our rundown on what the site is and what it's good for . If you already have an account, log in and go to your homepage.
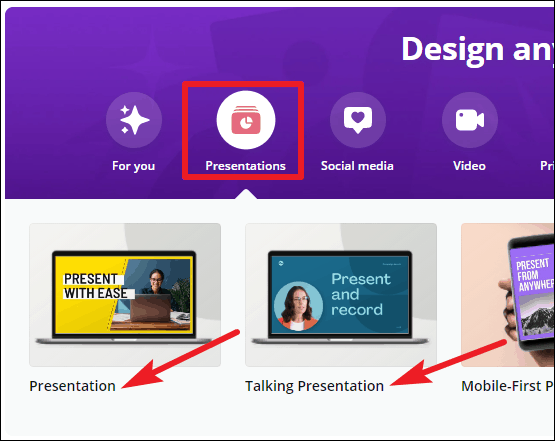
Under Create a design , click Presentation .
You can also look for Presentation in the search bar, under the sign that says Design anything .

After you click on Presentation , you'll be taken to a blank workspace. Like all Canva's workspaces, you'll see a collection of pre-made templates along the left-hand side.
If you want to create a presentation from the ground up, you can. We've already got a great tutorial on how to create a resume from scratch using Canva , and it uses very similar principals.
If you're creating this presentation for work, however---and you're short on time---then it's probably best to go with a template.
Canva divides these templates based upon their stated purpose, ranging from creative applications to pitch decks. For this tutorial, let's go to the Professional Presentation section, as it has templates that are well suited for our purpose. Pick one that you like.

Once you click on a design, you'll see a bunch of different pages displayed along your sidebar. Each of these pages has a slightly different layout, but they all use similar elements and color schemes.
Step 2: Pick a Page Design, Change Your Text

The great thing about Canva is that there's no order in which these individual pages have to be arranged. You can use one or several designs multiple times, back-to-back, or never use them at all.
To apply a design to your first page, simply click on your blank workspace so the page is active. Then click on one of the premade designs sitting to the left. Canva will automatically load it into the page and you can begin modifying.
For this tutorial, I've decided to pick a design that would work well as a title page. By clicking on the individual text boxes within this page, I can erase the placeholder text and put down my own.
If you want to further adjust the size, color, weight, and spacing, you can do so in the Text editing box, seen here highlighted in red.
Step 3: Adjust Your Visual Elements

Having the right text---but not too much text---is one of the most important things you can consider when you're putting together your presentation. Making sure the visual elements match up is really important too.
In Canva, you can keep or delete however many graphic elements you want. You can also move them around.
To Delete an element, click on it so its bounding box shows up. Press Delete .
To Move an element, click and drag it around the page.
If you want to change the color of an element, go to the color swatch icon at the top of the screen. You can pick a color swatch from the premade palette, or you can choose a custom color with the color picker by clicking on the + .
Step 4: Add Page Notes

One of the last things that you'll want to add to your page is your presentation notes. Notes are not required, of course, but they can help you remember what you're going to say, especially if you're presenting in front of a group.
To add notes in Canva, go to the top right-hand corner of your page and click on the Add notes icon, seen here in red. When you do, another pop-up box will emerge.
Start typing your notes into the box. There's a word limit, of course, but we doubt you'll run over it. When you're done, click Save .
Step 5: Add a New Page

The whole point of slideshows is that you're showing off a series of pages. If you just had one page, for example, it would technically be a poster, so chances are high you'll want to add more.
After you finish your first page, go to the bottom of your workspace and click on +Add a new page . Canva will add another page to your presentation.

If you want to switch this page to a different style, go to the page designs on the left-hand side of your screen. Click on the one that you want.

Once you create more than one page, you might want to label them to keep your workspace organized.
To label your pages, go to the top left-hand corner of your active page where you see the dotted line. Click on it and start typing. From there you'll be able to enter a new title.

If you're not happy with this new page at all, you can delete the whole thing. At the top right-hand corner of the page, you'll see a trash can icon. Click on it.
Did you hit delete by accident, or have you changed your mind? No worries: just use the Undo button in the top left-hand corner of your workspace.
Step 6: Add a Graph

One of the best features about Canva is its ability to easily insert graphs into your presentation. It then allows you to customize those graphs to your needs.
To add a graph, find a page design that has a graph in it. Once that page is applied to your presentation, double-click on the graph inside that page so its bounding box lights up.
In the left-hand toolbar, you'll see your graph controls emerge. At the top of those controls is a dropdown menu showing you what type of graph you're using. Beneath that is a list of items, along with their values.
To change the name of these items, click on each individual box and start typing. To change the values, click on the box and insert the appropriate number.
Every time you change these values, Canva will automatically update your graph in real time, so you can see how it looks.

If you want to change the style of the graph you're using, click on the dropdown menu and choose another. Canva will automatically change the appearance of your graph while keeping your values intact.

Finally, you can also adjust the color of your graph.
Make sure your graph's bounding box is active, then go to your Edit controls in the top left-hand corner of your screen, seen here in red. Start experimenting with them to get the right effect.
Step 7: Check Your Presentation and Add Transitions

As you wrap things up, you'll want to check your presentation for errors. You might also want to add transitions between your pages.
To add transitions, go to the Present button at the top right-hand corner of your screen. Click on the icon.

When you click on that icon, Canva will open up a dropdown menu where you can pick the Transition style that you want.
After you choose your Transition style , you can also choose your Type . Type allows you to control the speed at which your presentation plays.
When you have all these things squared away, click on the blue Present button to watch your slideshow play out. It will take you to a full-screen version of it, where you can scan for errors.
When you're done checking your presentation for errors, press the Escape key to exit out of the window. Make any changes that you need to---if applicable---then finalize the design.
Step 8: Download Your Presentation for Work

Once your presentation is finished, you're ready to download. To download your presentation---or use it in another format---click on the dropdown menu beside the Present button.
Most of these options are free-to-use with a basic account, but for those that aren't, you'll see a gold "crown" symbol beside it. There's also a ton of options, ranging from downloading the file, emailing it to your coworkers, or embedding the file on another platform.
And that's it. You're done.
Ace That Slideshow Presentation
Now that you've seen how to put together a workplace presentation in Canva, you can start exploring. There's a lot of customization options, so it's best if you fiddle with those settings yourself.
Looking for other things you can design? Here's how to create a cover letter with Canva .
- Productivity
- Presentations
How to Create Presentations in Canva

Parth Shah is an evergreen freelance writer covering how-tos, app guides, comparisons, listicles, and troubleshooting guides on Android, iOS, Windows, Mac, and smart TV platforms. He has over five years of experience and has covered 1,500+ articles on GuidingTech and Android Police. In his free time, you will see him binge-watching Netflix shows, reading books, and traveling.

Afam has been a content writer with Guiding Tech Media since August 2023. However, his experience in tech writing dates back to 2018, when he worked as a freelance writer for Make Tech Easier. Over the years, he has grown a reputation for publishing quality guides, reviews, tips, and explainer articles. His work is featured on top websites, including Technical Ustad, Windows Report, and Next of Windows. He has training as a Microsoft Certified Professional and has covered more Microsoft-related guides on these platforms.
- You can easily customize templates, add graphics, and animate slides without needing extensive design skills.
- Canva’s collaboration features allow for real-time editing and sharing of presentations.
- Canva provides various export options, including PDF, PPTX, MP4, and image formats.
How to Create Canva Presentations
To create Canva presentations, you must follow a few steps. We break them down into the headings below.
Pick Up an Aspect Ratio and Template
Pick a relevant aspect ratio for your presentation. If it’s a traditional PPT, go with a 16:9 aspect ratio. If you plan to show your PPT on mobile, use the 9:16 aspect ratio. Tablet users can start with a 4:3 aspect ratio. Canva also offers some ready-to-use templates to get started. We highly recommend starting with a template to save some time.
Step 1: On the left pane, click Templates .
Step 2: Choose a template from the options or search for one using the search field.

Step 3: Click Customize this template once satisfied with your choice.

Note: You can filter templates via style, theme, feature, and color. For example, you can check company, marketing, corporate, marketing, school, and other templates. Under templates, you also find an option to create instant presentations. You can enter a prompt and check Canva’s suggestions to get started.
Customize a Page With Editing Features
Once you select a template, you can add all pages to your presentations and customize other pages.
Step 1: To select a page for customization, click on it at the bottom of the interface.

Step 2: At the bottom of the interface, click the three-dot icon for a page and select any of the available options.

Step 3: When you click on a page, Canva lets you change every aspect of the template with different text styles, filters, and image editing tools. You can change color, tweak transparency, copy style, and more.

We suggest editing tools to customize your Canva presentation and add personal touches.
Add Graphics, Stickers, and Images
Your presentation will not seem attractive without graphics, stickers, images, and videos. Unlike Google Slides or PowerPoint, you don’t need to import media files to Canva to complete your slides. You can easily add relevant elements from the sidebar.
Step 1: Open a slide in your Canva presentation.
Step 2: Select Elements from the sidebar. You can add graphics, icons, stickers, tables, videos, and more.
Step 3: You can explore the AI image generator and turn your creative ideas into images and videos with a single click.

You can add simple descriptions and even turn generated images into videos. Canva also offers a long list of graphics packs in several categories. The possibilities are endless here. It’s up to you to make a compelling slide using useful tools.
Tweak Page Animation
Once you create a page, tweak its animation to smoothly transition between pages.
Step 1: Select a slide in Canva.
Step 2: Click Animate at the top.

Step 3: Check Basic , Exaggerate , Photo Movement , and other animation types from the left sidebar.

You can also tweak the animation intensity, which is great.
Add Presenter Notes
Do you plan to present your Canva PPT on a video conference? You can add notes to each slide so they appear during the Presenter view (more on that later).
Step 1: When you create a PPT, select a slide and hit Notes at the bottom.

Step 2: Enter the notes you want to remember or discuss during a video meeting.

Collaborate and Edit in Real Time
Like Google Slides and Microsoft PowerPoint, Canva lets you share and edit a presentation in real-time. You can take your colleagues’ input and create a share-worthy presentation quickly.
Step 1: When you are done making changes to your presentation, click Share at the top.
Step 2: Enter people, groups, or your team. Expand the collaboration link menu and select Anyone with the link .
Step 3: Expand the permission menu and select Can edit .

You can also share a link with view or comment-only permission. Select the Copy link and share it with your co-workers.
Enable Presenter View or Download and Share Your Presentation
Presenter view is a thoughtful touch from Canva to give presentations over a Google Meet or Teams call.
Step 1: Open a presentation in Canva and select Present at the top.
Step 2: Click Presenter View and check two windows opening up on your computer.

One window shows your presentation with notes open on the sidebar. Another window displays the current slide you are sharing with others over a call.

As expected, Canva offers several options for sharing and exporting your presentation. When you complete your presentation, click Share in the top-right corner and expand Download .
You can convert a presentation to PDF, PPTX (Microsoft PowerPoint compatible), MP4, JPG, PNG and SVG formats. Check our dedicated post if you wish to print your Canva presentation .

1. Can you customize a PowerPoint presentation (.PPTX) in Canva?
Yes, you can customize a PowerPoint presentation (PPTX) in Canva. You will need to upload the presentation, edit it, customize your slides, and then download it.
2. Can you edit a Canva presentation in the Microsoft PowerPoint?
Yes, you can edit a Canva presentation using Microsoft PowerPoint. You will need to download it from Canva, open it in Microsoft PowerPoint, edit the presentation, and save your changes.
Was this helpful?
Last updated on 27 August, 2024
The above article may contain affiliate links which help support Guiding Tech. However, it does not affect our editorial integrity. The content remains unbiased and authentic.
Leave a Reply Cancel reply
Your email address will not be published. Required fields are marked *

The article above may contain affiliate links which help support Guiding Tech. The content remains unbiased and authentic and will never affect our editorial integrity.
DID YOU KNOW

More in Internet and Social

5 Fixes for Telegram Voice Messages Not Working on Android and iPhone

2 Ways to Fix Google Meet “Not Allowed to Join” Error
Join the newsletter.
Get Guiding Tech articles delivered to your inbox.
How to Create a Talking Presentation in Canva using 'Present and Record' Feature
Cannot present in a live session? No worries, pre-record your presentations with Canva's Talking Presentations.

Canva is a great tool for creating presentations, professional as well as personal. With thousands of templates and a rich content library for images, videos, and graphics, the presentations you can create with Canva are sure to stand out.
But that’s not all Canva is great for. Have you ever seen the words ‘Talking Presentation’ on Canva’s Home Page and wondered what they are? It’s Canva’s solution to a very real problem people face all the time.
A lot of people use presentations in webinars these days, or it’s a part of their website. The point being, presentations aren’t confined to just conference rooms these days. They have far greater reach. But presenting on the internet can be daunting. Talking presentations can help with that. They’re also great for when you cannot be present in person or maybe when some other people couldn’t attend.
Now, obviously, it isn’t really a presentation that talks, as in it doesn’t have any talking elements. You’re the one doing all the talking. It is basically a recording of the presentation with your video and voice-over. Canva studio makes the task so easy that you could do it with your eyes shut (metaphorically speaking, of course).
Creating a Talking Presentation
Go to canva.com and click on ‘Presentations’ to get started. It’s better to start with a template instead of a blank slate, but you can do either. Canva has a different category for ‘Talking presentations’. But it doesn’t matter whether you choose ‘Presentations’ or ‘Talking Presentations’, you can record for both types.
Create your presentation as you normally do. You can also go to Canva and open any of your existing presentations to convert them into a talking presentation.
Once your presentation is complete, go to the toolbar at the top of the editor.
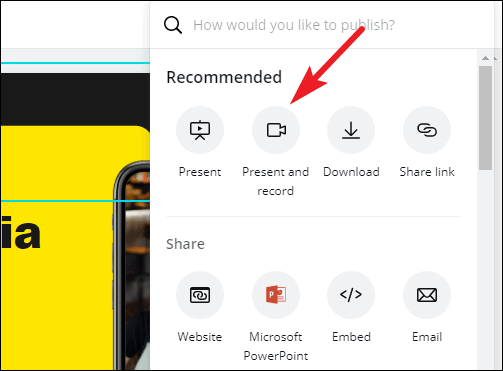
Now, if you chose ‘Talking Presentations’ while creating the presentation, the option for ‘Present and Record’ will appear on the toolbar itself.
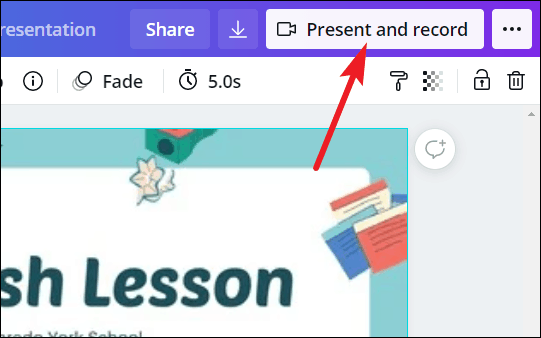
Otherwise, click the ‘three-dot’ icon next to the ‘Present’ button.
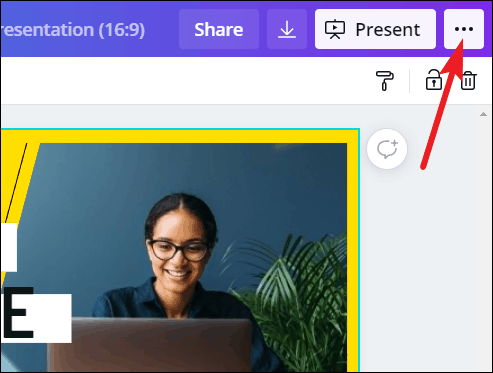
Then, select ‘Present and Record’ from the menu that appears.
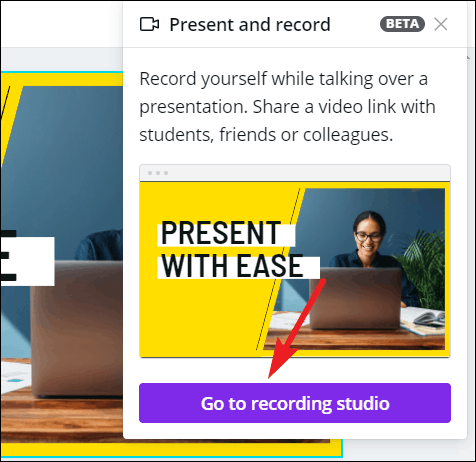
Click the ‘Go to Recording Studio’ button.
Recording the Presentation
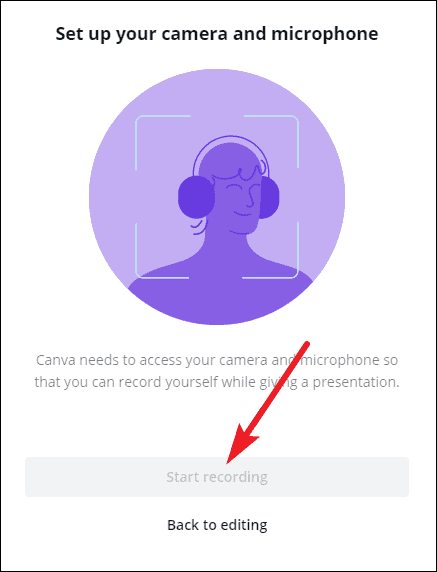
Your browser will display a pop-up that Canva wants access to your camera and microphone. Click ‘Allow’.

Once Canva has access to both, the ‘Start Recording’ button will become clickable. Canva needs access to both your camera and microphone for the Present and Record feature. If for some reason, access to either of these being blocked, you won’t be able to use the functionality.
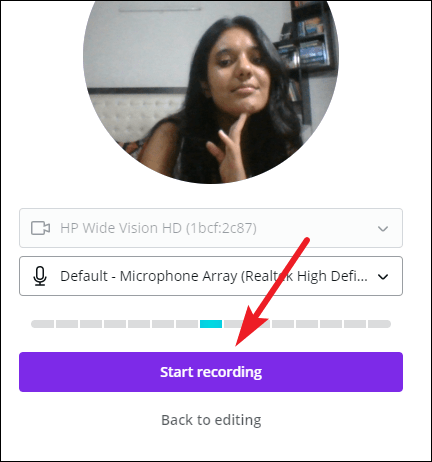
Before proceeding, check that your camera and microphone are working. You can see the preview of your video in the pop-up. You can also adjust your camera based on this preview, as this bubble represents how your video will appear while recording the presentation.
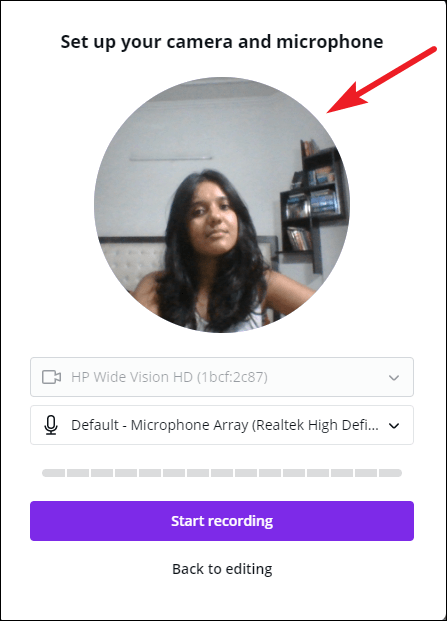
To check your microphone, say something. The bar beneath the microphone option will turn blue from gray if your microphone is working properly and Canva detects sound.
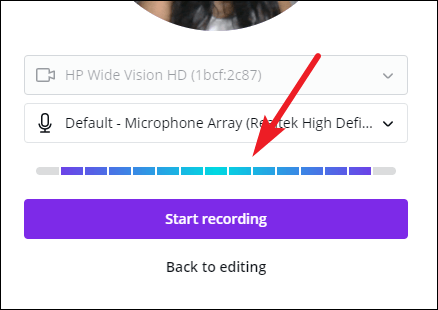
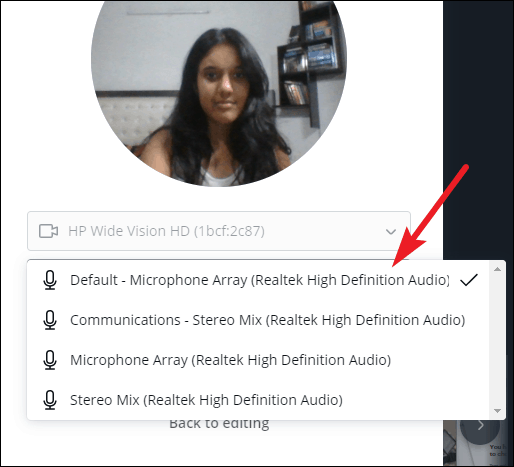
You can also change which camera or microphone to use (in case you have multiple) from the drop-down menus.
Once everything is spick and span, click the ‘Start Recording’ button to begin.
A 3-second timer will display on your screen; ready yourself for the recording during this time.

The recording screen will show all the slides in thumbnails and your notes in the right panel. But in the actual recording, only the presentation part (with your video in the lower-left corner) will be visible, which is highlighted in red during the recording session.
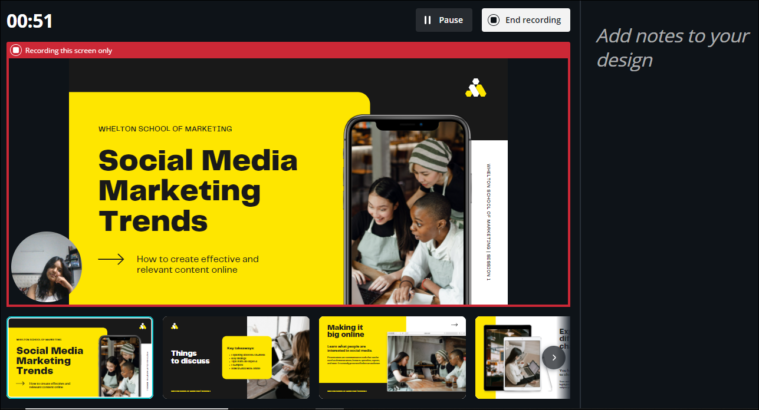
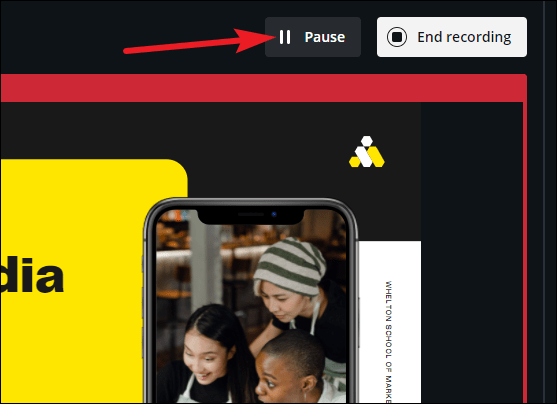
You can pause the recording at any time for a breather. Click the ‘Pause’ button to pause the recording.
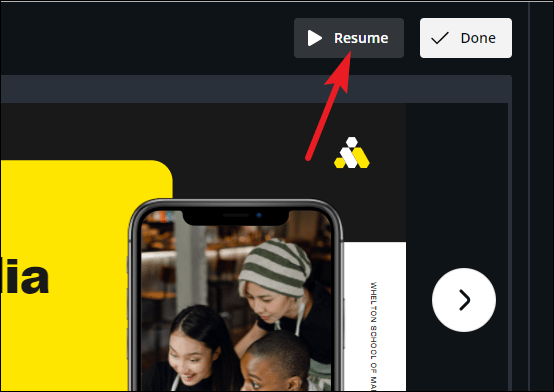
It’ll become the ‘Resume’ button when the recording is paused, click it restart the recording.
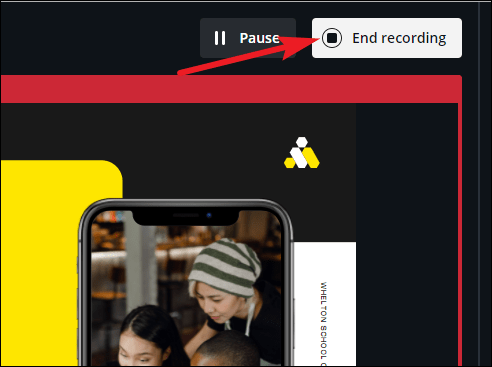
When you’re done, click the ‘End Recording’ button next to pause.
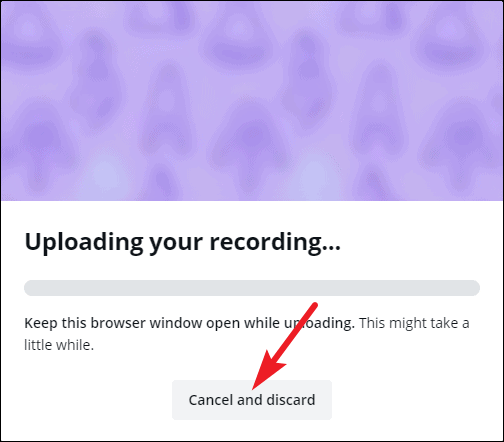
Sharing the Presentation
It’ll take a few seconds for your recording to process and upload. You can discard the recording at this stage if you weren’t happy with it and begin again.
Once it uploads, the link for your recording will be ready. You can share it with others directly. Or you can download it on your computer. If you want to watch the recording before sharing it with others, you can either go to the recording link yourself or download it and then watch it.
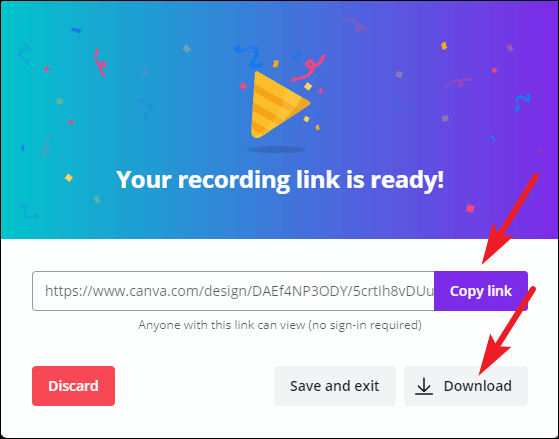
You can also just ‘Save and exit’ instead of choosing from either of the above options. Or click ‘Discard’ if you want to record again.
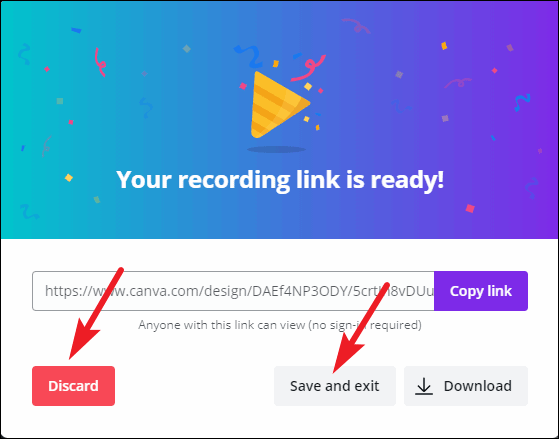
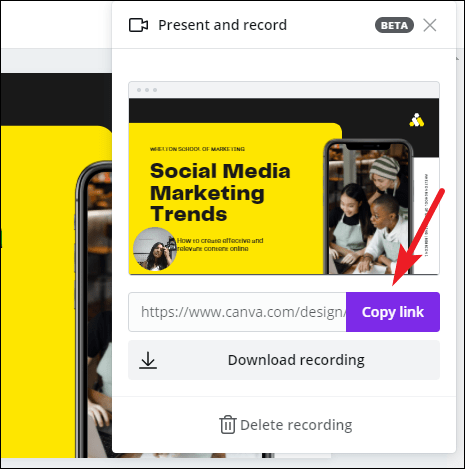
If you click ‘Save and exit’, you can access the recording again at any time. Open the presentation, and click the ‘Present and Record’ button.
The Present and Record menu will open, and it will have the link to the recording as well the options to download and delete it. If you want to re-record, you’ll first have to delete this recording.
Anyone can go to the link and watch the presentation without any requirement for a sign-in. Or you can download it and upload it to your website, or use it in your webinar. The options are boundless and it’s up to you.
If you want people to no longer be able to watch the presentation recording, simply delete it from the ‘Present and Record’ menu, and the link will no longer show the recording.
Canva is the perfect tool for your presentations. Not only can you create amazing presentations, but it also provides tools for what comes after. Like presenting it in circumstances when you cannot do it live. Recording the presentation adds that personal touch that simply sending it to people cannot capture.
Claude Sonnet 3.5 vs. ChatGPT-4o: Which is better?

5 best AI Web Browsers in 2024

7 best AI search engines in 2024
Get all the latest posts delivered straight to your inbox., member discussion.

How to view Clipboard history on Mac

How to fix ERR_CACHE_MISS in Google Chrome

How to fix the "Conversation not found" error on ChatGPT

How to get the Dynamic Island on any iPhone and Android

How to create a dashboard in Excel
How-To Geek
How to use canva to design like a professional.

Your changes have been saved
Email is sent
Email has already been sent
Please verify your email address.
You’ve reached your account maximum for followed topics.
Quick Links
What is canva, canva's templates and resources, the design process, publishing and exporting your designs.
Sometimes a tool like Photoshop may be too heavy for your simple image editing needs. In those cases, Canva might be a better fit. Find out how to use it to design clean, attractive materials---without any knowledge of design.
Canva is a popular online graphic design application that makes it easy to create high-quality images and materials. Millions of people use Canva to create social media images, posters, digital invitations, presentations, and physical materials like brochures and business cards.
Unlike high-powered tools, such as Adobe Photoshop and Adobe Illustrator, Canva has a low barrier to entry because of its simple intuitive interface. It's available on the web or as a mobile app for Android and iOS.
Canva offers several pricing plans for individual users, with varying levels of functionality:
- Free: This has most of the functionality needed to make simple designs.
- Pro ($9.99/month): The Pro plan contains additional templates, graphics, fonts, and photos. It also allows users to save transparent PNGs, create custom templates, and upload their own fonts.
- Enterprise ($30/month): Specifically meant for corporations, this plan features project workflows, group resources, and unlimited cloud storage.
Related: How to Work Faster in Photoshop

Canva's most useful feature is its wide array of templates. Even with a free account, there are thousands of templates across over a hundred design types. There are templates for nearly every use you can think of, from a personal resume to an Instagram post for your band's upcoming live performance. However, it should be noted that many templates are only accessible to Pro or Enterprise users.
To select a template, go to the Canva home page. From here, you can use one of the recommended templates on the home page, or hover over the "Templates" button at the menu bar. In the menu, you'll find an array of layout types categorized by usage.

These categories include "Social Media," "Personal," "Business," "Marketing," and "Study." Clicking on Personal > Cards brings up all the templates that can be used to make personalized greeting and holiday cards.
Most templates contain several of the following:
- Vectors and Graphics: These are additional elements used to add character to a template, such as shapes, stickers, frames, or in some cases, animated icons.
- Stock Images: These are stock images that are directly available from Canva's library. You can decide to keep these or upload your photos and replace them.
- Color Palettes: To have a cohesive style, most templates follow a specific color palette for across its various elements.
- Font Groups: These are combinations of fonts selected by Canva's designers.
- Page Layouts: This is especially true for templates that span multiple pages, such as presentation decks or brochures. There will typically be several layout options for each page, similar to Google Slides or Powerpoint.

On top of pre-included assets, you can add additional elements from Canva's comprehensive resource library. On the left side of the design screen, you'll find a wide variety of graphics, stock images, and fonts that you can use on top of what's in each template.

Related: The Best Sites for Building a Resume
To best illustrate the process, let's edit a simple photo in Canva Web. This design will be posted on social media to promote an upcoming virtual talk about internet privacy and cybersecurity . First, select Templates > Social Media > Instagram Post.

From here, select a template close to your planned design. We've selected this template intended to advocate for remote learning.

In the primary Canva screen, you'll see several pages of the particular template. If you're making a single material, select one of these pages for your final design and disregard the rest. Alternatively, if you're making a multipage creative, you can easily create a cohesive album with a template.
Here, we've edited the first page to fit our event, changing the text, the background color, and a bit of the layout. Now, all that's left is to export this design and to load it on Instagram.

Related: 5 Simple Photo Editing Tips to Make Your Photos Pop
You have several options when publishing your designs. First, you can save it locally as either a PNG or JPG file; take note that only Pro users can export their images as transparent PNGs. You can also send it directly to your printer to ensure a high-quality print.

If you made a presentation, you could set it to "Presentation Mode." This will bring the deck full-screen and allow it to function similarly to any other kind of presentation software. If you're showing the design to someone online, you can create a viewing link that can be accessed by anyone.
Lastly, you can directly export your design to a linked social media platform, such as Facebook, Twitter, and Instagram.
- Apps & Web Apps
- Disk & Data Manager
- Partition Wizard
- Power Data Recovery
- ShadowMaker
- Media Toolkit
- uTube Downloader
- Video Converter
- Download Video Converter
How to Record on Canva & Record a Presentation on Canva [PC/Phone]
When using Canva to create a video tutorial or presentation, you may want to record it and share it with others. Fortunately, you can complete the task within Canva via its screen recording feature in the editor. The below content covers how to record on Canva on a PC and mobile phone and how to record a presentation on Canva. As a bonus, we also recommend an effective alternative to Canva for video and presentation recording. Now, let’s explore this useful post.
How to Record on Canva on PC
This section will show you how to record the screen, webcam, or both screen and webcam.
Step 1. Visit and log in to your Canva account. After logging in successfully, click the Create a design button and select the Video option to access its editor.

Step 2. Click the Upload tab in the left sidebar and hit the Record yourself button.

Step 3. A new window will pop up. There are three recording modes, including Camera , Camera & Screen , and Screen . Take the Screen as an example: click the Screen option, choose to record the Chrome tab or certain window, and click the Share tab.

Step 4. Click the Record button and the recording will begin after a 3-second countdown. To end the recording, just hit the Done button. Then click on Save and exit and the recording will appear in the Canva editor.
Step 5. In this editor window, you can trim, rotate , split, speed up, or slow down the video, add captions , filters, or other elements, make color corrections, and others. Next, click the Share button and choose the Download option to save your recording. Alternatively, you can choose to directly share the recording on social media or save it to Google Drive.

How to record Tango video calls on iPhone, Android, and PC? What is the best Tango screen recorder? Read this article and you’ll find the answer.
How to Record on Canva on Mobile Phone
You can use Canva on your phone by accessing its website or using its mobile app. Its operating steps are similar. You can refer to the below guidance on how to record in Canva on your phone.
Step 1. Tap the + icon at the bottom of the screen, select the Videos option, and choose the needed video aspect ratio.
Step 2. Swipe left to tap on the Uploads option and tap the Record yourself button. Then you need to allow it to access your camera and microphone.

Step 2. When you want to start recording, just tap the Record button. Later, tap the Done tab to finish the recording. Hit the back icon at the higher left corner and choose Save and exit .

Step 3. Edit the recording as you like. Later, click the Share icon at the higher right corner and choose Download to save the recording to your phone.
![How to Record Bigo Live Easily in 3 Ways [PC/iPhone/Android]](https://images.minitool.com/videoconvert.minitool.com/images/uploads/2024/08/record-bigo-live-thumbnail.jpg "presentation about yourself canva")
Do you want to record Bigo Live? How to record Bigo Live without black screen? What is the best Bigo Live screen recorder? Just read this post.
How to Record a Presentation on Canva
Canva also enables users to record talking presentations. Currently, this feature is only available when using Canva on a computer. How to record a presentation on Canva? The following are detailed steps:
Step 1. Click the Create a design button and select Presentation .
Step 2. Hit the Present button at the top right corner, click the Present and record option, and click Next .

Step 3. Click the Go to recording studio button, select the camera and microphone, and click Start recording . When the presentation ends, you can click End recording .
Step 4. A new screen will pop up. On this screen, you can choose Download to save the recording to your computer or click Copy link to share the recording to others via a link.
An Effective Alternative to Canva for Video/Presentation Recording
Though the screen recording feature of Canva enables you to record videos and presentations, it also has drawbacks. One of the prominent drawbacks is that it doesn’t support recording the part of the screen.
MiniTool Video Converter is a worthwhile alternative to Canva for screen recording. It is a completely free screen recorder that can record the whole screen or selected region with the option to record the microphone audio and system sounds. You can use it to record video conferences, online videos, Zoom presentations , game tutorials, and others easily.
MiniTool Video Converter Click to Download 100% Clean & Safe

Besides, MiniTool Video Converter is a video and audio converter that supports a wide range of formats. Also, it can convert videos for iPad , Samsung, or other mobile devices. Meanwhile, it is a downloader that allows you to download videos, audio, playlists, and subtitles from YouTube.

Have you ever encountered the problem of an MKV file with no sound? What factors lead to the problem? How to solve the MKV no sound issue?
Wrapping Up
Canva’s built screen recording feature enables you to record video tutorials or talking presentations. This post has shown you detailed guidance on how to record on Canva in the editor and how to record a presentation on Canva. You can also try to use MiniTool Video Converter for screen recording.
About The Author

Position: Columnist
- Recent Courses
- Online Courses
- Communities
تحميل و مشاهدة Creating amazing presentations with canva for beginners
معلومات عن الكورس.
تحميل الكورس بجودة عالية مجانا
ماذا سوف تتعلم داخل الكورس ؟.
Bee Bot App iPad Coding and Computing Apps reviewed Giveaway Engage Students Today and Flip your classroom How to use Edpuzzle App Review Coding for the Youngest with Code a Pillar by Fisher Price How to effectively Flip your classroom today Get a Professional Email Signature NEW 2017 Video There is a New Google Earth and it s Amazing NEW APRIL 2017 Have fun with Music Videos and quotes in Class Ditty App Overview Edit Photos and Images in the Cloud for Free THE Photoshop ALTERNATIVE for Chromebooks Photopea Google s Be Internet Awesome Program teaches eSafety with GAMES Amazing way of giving student feedback Vocal recall the app with built in QR codes Interactive and more engaging lessons with Thinglink How To use Keynote Complete Beginners Tutorial on iPad 2019 How to SCAN documents to PDF on ANDROID How to start with Online Learning Remote teaching made easy Movavi Video Suite 2021 Complete Overview How to add live captions to any website Insert Voice Notes in Gmail and Google Forms Turn YouTube videos into lessons with Edpuzzle Teachers love this Why you should use Nearpod FREE Create amazing presentations with Canva Amazing NEW Google EDU updates Incredible image generation with AI and Adobe Firefly How to help students improve their Vocabulary with Verbal Workout How to convert Video to GIF for FREE How to Mirror and Control your Android to PC or Mac with SCRCPY Fast and reliable Top 10 features in Edge for 2023 How to use Split Screen on Windows macOS and Chromebooks How to Copy text from a YouTube Video on Mac AND Windows Jamboard is NO MORE Here are 7 Alternatives Create and Save Tab Groups in Chrome Secret Hidden Feature This Educational AI Tool is Mindblowing Turn Audio into Animations for FREE
Enter a keyword or an item code

Canvas bag with multicolor FF embroidery

Expected shipping date: within 30 days from 09/16/2024
- store Find in store
- mail default Contact our Digital Stylists
- phone Call us: (+1) 8882910163
- shipping returns-lorry Shipping and returns
Product details drop up--btn
Iconic medium Baguette bag, created in 1997 which went on to become the leading It bag. Versatile and with timeless appeal, it features the iconic underarm design inspired by the French Baguette bread from which it takes its name. Made of beige canvas fabric with the iconic embossed FF motif embroidered in multicolor yarn. Trimmed in green calfskin and embellished with an FF clasp. Featuring a front flap, magnetic clasp, canvas-lined internal compartment with zipper pocket and gold-finish metalware. The bag can be carried by hand, or worn either on the shoulder or cross-body thanks to the handle and shoulder strap, both detachable. Made in Italy
Composition : 60% cotton, 25% polyamide, 15% polyurethane, 100% calf leather, inside: 100% cotton
Size worn : null. The model is null tall
Model height : null
Size worn : null
- Height : 15 cm
- Depth : 6 cm
- Width : 27 cm
- Weight : 0.59 kg
- Strap length (min) : 90 cm
- Strap length (max) : 90 cm
- Shoulder strap drop : 41 cm
Product Code : 8BR600ANH4F1Q6O
Sustainability :
FENDI AT YOUR SERVICE drop up--btn
Shipping and returns.
Complimentary shipping on all orders. Free returns within 14 days, online or in store. Free exchange in store.
Book An Appointment
Get in touch for an in-store or virtual appointment.
In-store Pickup
The best of both worlds: shop online and pick up your order at your convenience in selected Fendi stores.
Your order will be elegantly wrapped in our signature Fendi package. Add a personal message to send an exclusive gift.

Other sizes

GET NOTIFIED
By entering your email address, you authorise us to use your data in accordance with our Privacy Policy and email you when the item is in stock.
Shipping and returns
Free shipping
1. SHIPPING TIMES AND COSTS drop up--btn
Shipping is always free unless otherwise stated at checkout. Delivery usually takes 3-5 business days from the date of the purchase. The same order may be shipped in separate parcels, and some items may require 3 additional days for delivery. All available shipping methods and the estimated delivery times for your order will be clearly displayed at checkout.
We will send you the Tracking Number for your package by email. You can also follow the delivery online through the Track Your Order page.
Signature is required at delivery of all orders for security purposes. In case nobody is available to sign for the package for two consecutive working days, the courier will leave a notification and a contact number.
Please note working days are Monday through Friday, excluding local and national holidays
2. TRACKING YOUR ORDER drop up--btn
3. countries/regions we ship to drop up--btn, 4. special packaging and gifts drop up--btn.
Free returns within 14 days
1. ONLINE RETURNS drop up--btn
Items purchased on Fendi.com can be returned within 14 days from the delivery of your order, using our free delivery service.
1. Fill in the online Return Form (or log in to your account and return your purchase from the Orders section). 2. Prepare the items in the original order box. Kindly ensure the products are in perfect condition, with all their packaging and accessories, and that the security tag and seal are intact. The return box must be safely sealed. 3. Attach the Return Label you received with your parcel to the outside of the box. 4. Call the courier to organise pick-up/drop-off within 14 days.
You will not be charged for shipping costs. These will only be at your expense if you decide to ship the return with a different shipping company and we will not be able to accept liability for lost or damaged returns. Please note it is not possible to return personalised items or to request exchanges. Before requesting a return, please make sure the products comply with our return conditions. You can find more information in the Terms and Conditions of Sale.
2. ONLINE RETURNS IN-STORE drop up--btn
Items purchased on Fendi.com can also be returned in selected Fendi stores within 14 days from the delivery of your order. You can find the nearest Fendi store where the in-store return service is availble through the Store Locator page . We suggest packing the items in the original order box, bringing with you any documents you received in the order to facilitate the return. Kindly ensure the products are in perfect condition, with all their packaging and accessories, and that the security tag and seal are intact. If you wish, you can choose the day and time through the Book An Appointment page , selecting "In-Store Return". Please note it is not possible to return personalised items or to request exchanges. Before requesting a return, please make sure the products comply with our return conditions. You can find more information in the Terms and Conditions of Sale .
3. EXCHANGE IN STORE drop up--btn
Items purchased on Fendi.com can be exchanged in selected Fendi stores within 14 days of the order's delivery.
You can find the nearest Fendi boutique that offers exchange services on the Store Locator page . If you wish, you can choose the day and time through the Book an Appointment page , selecting In-Store Exchange.
We suggest bringing the item(s) you want to exchange in the original order box, including any documents you received with the order. Kindly ensure the products are in perfect condition, with all their packaging and accessories, and that the security tag and seal are intact.
Please note it is not possible to exchange personalized items. Before requesting an exchange, please make sure the products comply with our return conditions. You can find more information in the Terms and Conditions of Sale .
4. RETURN CONDITIONS drop up--btn
Before requesting a return or an exchange, please make sure the products comply with the following conditions, in accordance with our Terms of Sale :
- The products must be in their unused original condition, with all tags and the security seal still attached and any special packaging and accessories included - incomplete, damaged, worn or altered items cannot be accepted - Returns must be requested online or brought to the store within 14 days of the order's delivery - Exchanges must be brought to the store within 14 days of the order’s delivery - Online returns must be handed to the courier within 14 days of the return authorization - The parcel can only be returned/exchanged within the original shipping Country/Region - The products were purchased online on Fendi.com and not in Fendi stores
5. REFUND TIMING drop up--btn
Items shipped to our warehouse or returned in-store will be verified before being accepted. Verifying the items may take up to 5 business days.
The refund will be issued as soon as possible after the return has been accepted through the same payment method used for the original purchase, and in the same currency.
You should see the credit approximately within one week from our refund confirmation email. Exact timing will depend on the different banking procedures.
Find in store

Complete the look

Light brown cashmere mini skirt
View more colours

Light brown cashmere pullover

Burgundy leather medium-heeled thigh-high boots

Multicolor leather Bangles

Brown FF leather earrings

Brown leather bracelet

Brown nylon pantyhose

Beige acetate sunglasses
Select size
Remove item.
Are you sure you want to remove the following item from your Bag?
- Black Shoes
- Leather Wallets
- Silver Fashion Jewellery
- Black Wallets
- Gold Fashion Jewellery
- Leather Bags
- Black Dresses & Jumpsuits
- White Dresses & Jumpsuits
- Black Shoulder & Crossbody Bags
- Black Mini Bags
- Black Tote Bags
- Leather Shoes
- Black Lace Ups & Boots
- Black Backpacks
- Black Belt Bags
- Black Pouches
- White Sneakers
- Black T-shirts & Polos
- White T-shirts & Polos
IMAGES
VIDEO
COMMENTS
About Press Copyright Contact us Creators Advertise Developers Terms Privacy Policy & Safety How YouTube works Test new features NFL Sunday Ticket Press Copyright ...
Download and open in Canva . Register for free and start downloading now Register on our website to download 5 FREE templates every month, or GO Premium for unlimited downloads! ... Download the "About Yourself" presentation for PowerPoint or Google Slides and start impressing your audience with a creative and original design. Slidesgo ...
Self Introduction PowerPoint Template by SlideModel. 1. Create a List of "Facts About Me". The easiest way to answer the "tell me about yourself" question is by having an array of facts you can easily fetch from your brain. When it comes to a full-length about me presentation, it's best to have a longer list ready.
Presentation Tutorial: How To Make a Presentation in Canva (FREE & EASY) // In this video, I'm going to show you a simple presentation tutorial on how use (F...
I've made the switch! Presentations on Canva are SUPER EASY and convenient to put together. In this Canva tutorial video, I'll show you how to put a great lo...
Free Google Slides theme, PowerPoint template, and Canva presentation template. These Introducing Myself slides are cheerful and bold. We chose a vibrant color scheme of orange, blue, yellow and red to make heads turn. There is plenty of space for adding text about yourself and uploading your favorite photos.
These presentation templates are suitable for self-introduction purposes. They can be used by individuals who want to introduce themselves in a professional or personal setting, such as job interviews, networking events, or personal presentations. Download these self-introduction templates to make a memorable first impression with your audience.
Another platform that you can use to create a presentation is Canva. As a template design site where you can craft beautiful documents, Canva makes the act of creating presentations as simple as Google Slides---perhaps even simpler. Here's how to design a workplace presentation in Canva. Step 1: Launch Canva
Step 1: Open a slide in your Canva presentation. Step 2: Select Elements from the sidebar. You can add graphics, icons, stickers, tables, videos, and more. Step 3: You can explore the AI image ...
Unlock your potential to create stunning visuals in this comprehensive guide to Canva Presentations. This tutorial will walk you through all the key features...
Now, if you chose 'Talking Presentations' while creating the presentation, the option for 'Present and Record' will appear on the toolbar itself. Otherwise, click the 'three-dot' icon next to the 'Present' button. Then, select 'Present and Record' from the menu that appears. Click the 'Go to Recording Studio' button.
Millions of people use Canva to create social media images, posters, digital invitations, presentations, and physical materials like brochures and business cards. Unlike high-powered tools, such as Adobe Photoshop and Adobe Illustrator, Canva has a low barrier to entry because of its simple intuitive interface. It's available on the web or as a ...
How to Record a Presentation on Canva. Canva also enables users to record talking presentations. Currently, this feature is only available when using Canva on a computer. How to record a presentation on Canva? The following are detailed steps: Step 1. Click the Create a design button and select Presentation. Step 2.
Creating amazing presentations with canva course, in this course we will explore the art of Creating Amazing Presentations with Canva, a user-friendly design platform that empowers you to create professional and visually appealing presentations effortlessly. You'll learn how to choose from Canva's v...
In this step-by-step tutorial, I'll guide you through Canva's awesome features for recording yourself, your screen, or both at the same time! Whether you're ...
In this episode, learn how to create Canva Talking Presentations™ Simply start inspired with a Presentation Template, set up the recording studio, start reco...
Iconic medium Baguette bag, created in 1997 which went on to become the leading It bag. Versatile and with timeless appeal, it features the iconic underarm design inspired by the French Baguette bread from which it takes its name. Made of beige canvas fabric with the iconic embossed FF motif embroidered in multicolor yarn. Trimmed in green calfskin and embellished with an FF clasp. Featuring a ...
Here's a great feature built right into Canva! You can record yourself talking over your slides without having to use any third-party service. Design your pr...