Talk to our experts
1800-120-456-456
- Lava Lamp Experiment


What is a Lava Lamp?
Lava lamps, also known as liquid motion lamps, have been doing the rounds for ages. The lava lamp science project hypothesis talks about the density of two liquids and the solubility of the two same liquids. In the lava lamp, we have liquids that are very close to each other in density and are insoluble in each other. Many people often end up using oil and water because they are insoluble in each other. But the two liquids have densities that are very different from one another. So you need to find two liquids with very close densities for the experiment to work.
(Image to be added soon)
Once you have found the two liquids, heat the bottom of the mixture with a light bulb. The denser liquid will absorb the heat and expand. While expanding it low becomes less dense. As both the liquids have similar densities, the previously denser liquid becomes lighter and rises over the other liquid. All of this happens in very slow motion, and the density changes that occur are very mild.
When Does a Lava Lamp Expire?
A bottle of a lava lamp is said to last nearly 2000 hours. After this, you can either replace it with a new lava lamp or bring a new bottle. A lava lamp usually starts working an hour after turning them on. Most lava lamps run on battery nowadays. You can change the batteries too in case the lamps stop working.
Lava Lamp Experiment
The lava lamp experiment works on the principle of density and polarity. Let us see how to make a lava lamp.
Apparatus Needed For Lava Lamp Experiment:
Flask or a bottle
Water
Vegetable oil
Alka-Seltzer or some other fizz tablets
What is to Be Done
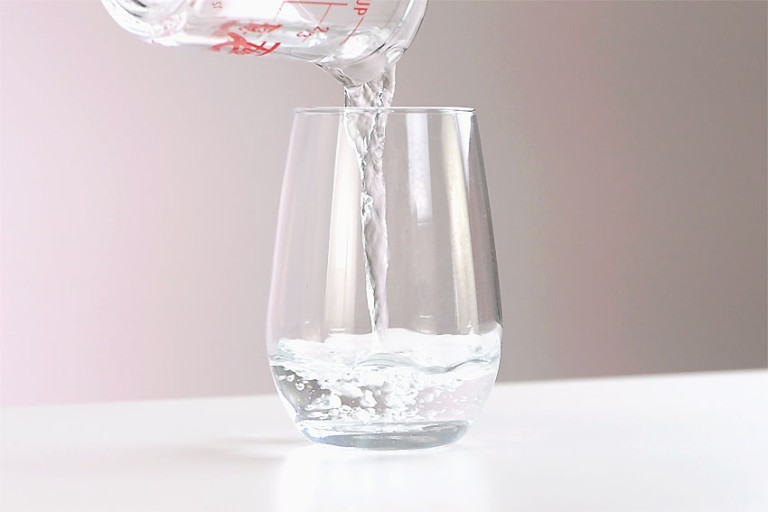
Fill the bottle or flask with water. Fill it to a quarter. It is advised to use a funnel so that the water doesn’t spill outside.
Now add vegetable oil to the bottle until it is full to the brim.
Wait for some time. Let the vegetable oil and water levels separate.
Add food coloring to the mixture. Pick any color, think of any choice. Since the food coloring is also water-based, it will sink and settle at the bottom of the flask.
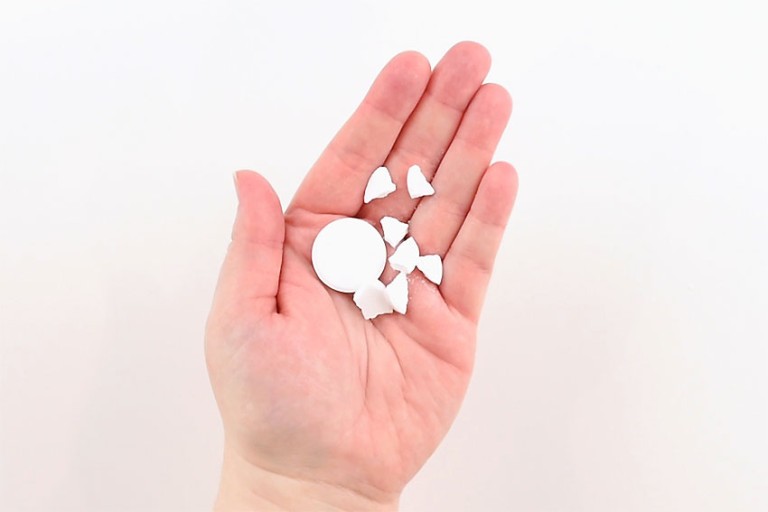
Take an Alka-Seltzer tablet and break it into small pieces. Start adding them to the flask one by one.
The reactions will start inside the bottle as soon as the tablets are added.
In case the lava lamp reaction stops, keep adding more tablets.
What Do We Observe
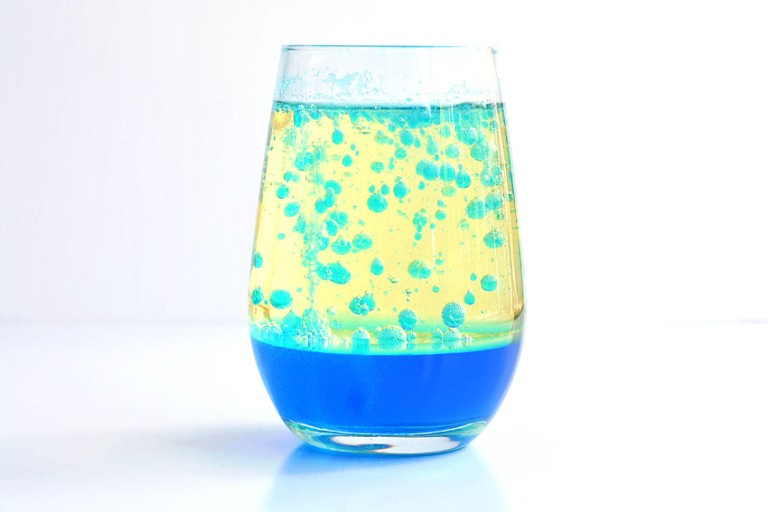
We observe that in the lava lamp experiment, the density of oil is much lower than that of water. Although the water and oil layers separate due to the densities the food couriering has the same density as that of water. As soon as we add the fizz tablets, small bubbles appear that come to the top and bring some water along with it. The bubbles disaster as soon as the reaction stops. You can keep your lava lamp actively working by adding more tablets from time to time.
Solved Examples
What Chemical Reactions Take Place in The Lava Lamp Experiment?
Ans: The Alka seltzer, when reacted with water, produces carbon dioxide gas bubbles. They stick to the water droplets. The water and gas combination is less dense than oil, and hence they rise to the top of the flask. The real lava lamps use polar and nonpolar liquids, just like the homemade ones do. The lava lamp experiment measures density and polarity.
Can Wax Be Used in Some Lava Lamps?
Ans: Yes. Lava lamps are often filled with wax, water, and other chemicals to make them look brighter and colorful.
Fun Facts About The Lava Lamp Experiment
The lava lamp was first discovered in the year 1948. The ideal lava lamp took 15 years to design.
There can never be two same lava lamps.
Initially, lava lamps were considered to be unusual and luxurious items, but over time, they have become accessorized products.
Lava lamps can be highly expensive too.
The lava lamp experiment is a widespread and fun experiment for kids nowadays.
The most massive lava lamp is said to hold thousands of gallons of lava.
FAQs on Lava Lamp Experiment
1. Who Invented a Lava Lamp?
Sir Edward Walker first introduced the lava lamp in the year 1963. He is the founder of the lighting company Mathmos. His company has been designating lava lamps for more than 55 years now. Before him, many other people tried inventing the perfect lava lamp, but it took about 15 years for the ideal lava lamp to be made. Walker’s business became a huge success in the early ’60s and ’70s. Initially, the light bulb was not the beating source. But the founder was desperate to place a light bulb at the bottom as a beating source. Eventually, the plan worked, and we got the very first customized lava lamp. These lava lamps do not cast much light as compared to other light fixtures.
2. Why Does Their Given Name Know Lava Lamps?
Lava lamps are called so because when they are lit up, it looks like burning lava inside. But it is merely a lucid substance inside the fire consisting of water and oil. Lava lamps are used by children and adults alike for room decoration and as a light source too. During the night, kids can turn in the lava lamp and sleep peacefully without fearing the dark. The lamps emit some light, but it is not as bright as other light bulbs. Some lava lamps have unique wax coating material inside. This particular wax expands, and as a result, the liquid becomes less dense. Lava lamps are also known as artificial lamps.
- Properties Of Fluids
Can you recall the mesmerising feel of watching a lava lamp, with its large coloured bubbles rising, sinking and morphing? Guess what! You can make your lava lamp by using materials that are present at home. This is a science experiment for class 5 , which explains the concepts of liquid density and chemical reactions.

Lava Lamp Experiment
Lava lamp works based on two important scientific principles – density and polarity. This can explain why oil and water don’t mix. Understand the working principle of a lava lamp clearly by performing the lava lamp experiment given here.
Materials for Lava Lamp Experiment
- A plastic bottle.
- Food colouring
- Vegetable oil
- Fizz tablets like Alka-Seltzer
- Fill the bottle with a quarter full of water. Use the funnel to fill the water so that water doesn’t spill outside.
- Add vegetable oil in the quarter-filled water bottle until it is full.
- Now, wait for a few minutes until the water and oil get separate.
- Add food colouring into the bottle.
- Now we can see that food colouring goes through oil and get mixed with water.
- Cut Fizz tablet into a few smaller pieces and drop only one piece in the bottle. This will start reacting and appears like a lava lamp.
- Whenever required, drop another piece of the tablet to make a flow of bubbling in case the lava lamp stops.
Observation
The density of oil is lower than the density of water, and both don’t mix well. The water and oil that is added in the bottle stay separately due to its density. Meanwhile, the food colouring goes through oil and mixes with water because the food colouring has the same density of water.
When you drop a piece of fizz tablet in the bottle, it releases carbon dioxide that appears as a small bubble and reaches the top by taking some of the water along with it. Now the interesting part is when the bubbles disappear on the top, and the colour falls back. Adding more tablet keeps the reaction for the longer time so that you can enjoy the lava lamp for an extended period of time.
For more interesting experiments, below are the links:
- Tornado In a Bottle
- Anemometer – Measurement of Wind Speed
Frequently Asked Questions – FAQs
What are the scientific principles on which the lava lamp works, state true or false: the density of oil is higher than the density of water., does the oil mix with water, what is the relationship between density and temperature, what happens when the fizz tablet is dropped in the bottle.

Put your understanding of this concept to test by answering a few MCQs. Click ‘Start Quiz’ to begin!
Select the correct answer and click on the “Finish” button Check your score and answers at the end of the quiz
Visit BYJU’S for all Physics related queries and study materials
Your result is as below
Request OTP on Voice Call
Leave a Comment Cancel reply
Your Mobile number and Email id will not be published. Required fields are marked *
Post My Comment
- Share Share
Register with BYJU'S & Download Free PDFs
Register with byju's & watch live videos.


A variety of lava lamps (Dean Hochman [CC BY 2.0], Wikipedia)
How does this align with my curriculum?
Share on: facebook x/twitter linkedin pinterest.
Lava lamps are very interesting to look at. But they are also interesting examples of buoyancy, heat transfer and solubility!
What do you think about when you hear the word “groovy”? Bell bottom pants? Flowers? What about lava lamps?
Lava lamps were very popular back in the groovy 1960s! Many people still have them at home today.
Most lamps light up a room. But lava lamps are mainly just fun to look at. They have coloured wax globules floating around in a transparent liquid.
Did you know? Edward Craven-Walker designed the lava lamp. He based it on an egg timer he saw in a pub! The egg timer had a ball of wax suspended in water. When the wax melted, the egg was ready to eat.
Lava lamps are also a “groovy” way of seeing physics and chemistry principles in action.

What is the Kinetic Molecular Theory?
To understand how lava lamps work, you have to understand Kinetic Molecular Theory . It states that all matter is made up of molecules that are always moving. These molecules have kinetic energy . The amount of energy depends on the temperature. When it’s hotter, molecules have more energy. And when they have more energy, they move faster. There are three most common states of matter.
The molecules in solids have the least energy. That means they move more slowly than molecules in liquids and gases.
The molecules in gases have the most energy of all. They move the fastest.
How Is Kinetic Energy Related to Density?
Kinetic molecular theory can help you understand density . Density refers to how much matter there is in a given volume of space.
Have you ever thrown a coin into a fountain or a rock into a pond? You probably noticed that these objects sink in water. And you’ve probably noticed that other objects, like twigs, float on water. The objects that are denser than water sink. And the objects that are less dense than water float.
But what does this have to do with lava lamps? Remember the globules - let’s call them “globs” for short - that float around? At room temperature, the globs are a bit denser than the surrounding liquid. That’s why they sit at the bottom of the lamp. But when you turn the lamp on, the globs heat up. The molecules move faster. The globs become less dense than the surrounding liquid. They rise and start to float around!
Did you know? Hot air balloons work the same way as the globs in the lava lamp.
How does the ability to mix affect how a lava lamp works?

So why don’t the globs of wax in a lava lamp mix with the surrounding liquid?
Think about chocolate syrup and milk. They’re miscible liquids. That means they can mix to form a homogeneous mixture . The chocolate syrup mixes completely with the milk to form yummy chocolate milk!
But some liquids are immiscible . They don’t mix with each other. It all depends on the force of attraction between the molecules in the two liquids.
For example, what happens when you try to mix oil and vinegar - like in a salad dressing? The molecules in the vinegar are more attracted to each other than to the molecules in oil. The molecules in oil are more attracted to each other than to the molecules in the vinegar. No matter how much you shake or stir your dressing, they will never stay mixed together.
But chocolate syrup molecules are attracted to milk molecules. And milk molecules are attracted to chocolate syrup molecules. That’s why you get chocolate milk and not a lava lamp in a glass!
Each immiscible liquid is called a phase . A mixture with two immiscible liquids is called a biphasic mixture . A mixture with more than two immiscible liquids is called a multiphasic mixture .
When you watch the globs float around in a lava lamp, you’re looking at a biphasic mixture!
Did you know? The globs in a lava lamp are made of paraffin wax . That’s the same type of wax used in many candles and crayons !
Why Do the Globs in a Lava Lamp Move Around?
One of the most interesting features of a lava lamp is the way that the globs float around. But why does this happen? You know that the globs are less dense than the surrounding liquid. And you know that the globs and the liquid are immiscible. So why don’t the globs just rise to the top of the lamp and stay there?
Well, lava lamps are designed so that the temperature at the top is a bit cooler than at the bottom. And what happens to molecules when they cool down? That’s right! They lose energy and move closer together. So when a glob reaches the top of the lava lamp, it contracts . It becomes denser than the surrounding liquid and begins to sink. When it reaches the bottom, the whole cycle repeats!
A lava lamp is an example of a convection current . Convection currents cause liquids and gases to rise and fall because of changes in their density. There are convection currents all around you, even in the Earth’s crust!

Want to Try a Lava Lamp Experiment?
You can build your own lava lamp in your classroom or at home! Here’s what you’ll need:
A transparent container, like an empty water or soda bottle
Vegetable oil
Food colouring
An effervescent tablet (like Alka-Seltzer®)
A flashlight (optional)
How to make a lava lamp:
Fill one quarter of the bottle with water
Add food colouring
Fill the rest of the bottle with vegetable oil
Add half an effervescent tablet
Optional: if you have a flashlight, go to a dark room, turn on the flashlight and watch your groovy new lamp in the dark!
And there you have it: your very own lava lamp. Watch what happens to these immiscible liquids. Pretty groovy, don’t you think?
Starting Points
Connecting and relating.
- Have you observed a lava lamp first-hand? What did you think of it?
- Would you like to own a lava lamp? Why or why not?
- Can you think of any mixtures you have seen that have globules in them? Is there anything you have tried to mix that has distinct layers?
Relating Science and Technology to Society and the Environment
- Provide examples of convection currents in the natural environment.
- You might have seen the word “homogenized” on a carton of milk or on a jar of peanut butter. What does this mean? Why is this done by food manufacturers?
Exploring Concepts
- What is kinetic energy? How does kinetic energy change matter?
- How does the Kinetic Molecular Theory help explain changes in the density of matter?
- How does the Kinetic Molecular Theory explain what happens to water as it changes states from solid ice to liquid water and then to water vapour or steam?
- How are convection currents formed in a lava lamp? How are convection currents formed under the Earth’s crust?
Nature of Science/Nature of Technology
- In which fields of science and technology would it helpful to understand the Kinetic Molecular Theory?
Media Literacy
- How would you market a lava lamp to kids so that it was both cool and educational? What message would you give about the product so that kids would want to buy one?
Teaching Suggestions
- This article supports teaching and learning of Science, Chemistry, Physics, and Heat and Energy related to buoyancy, fluids, heat transfer, and mixtures & solutions. Concepts introduced include globules, Kinetic Molecular Theory, kinetic energy, solids, liquids, gases, density, miscible, homogeneous mixture, immiscible, phase, biphasic mixture, multiphasic mixture, contracts and convection current.
- Before reading this article, teachers could have students complete a Vocabulary Preview learning strategy to engage prior learning and introduce new terminology. Ready-to-use Vocabulary Preview reproducibles for this article are available in [ Google doc ] and [ PDF ] formats.
- To consolidate understanding after reading the article, teachers could have students complete a Concept Definition Web learning strategy for the concept of Kinetic Molecular Theory . Ready-to-use Concept Definition Web reproducibles for this article are available in [ Google doc ] and [ PDF ] formats.
- To consolidate an understanding of different types of mixtures, teachers could have students create a graphic organizer, like a T-chart, to compare and contrast heterogeneous and homogeneous mixtures.
- To further explore miscible and immiscible mixtures, teachers could have students do the hands-on activity What happens when we mix liquids? (Hands-on Activities).
- There are various applications of mixtures that could be used for cross-curricular art projects as well. For example, wax resist art and paper marbling.
Chemistry for Kids: Chemical Mixtures (2019) A plain-language, illustrated description of mixtures, including the difference between a solution and mixture.
The Kinetic Molecular Theory (2016) A video (1:30 min) Scámarca Productions describing the theory. Based on an old junior high school assignment by the filmmaker!
How Liquid Motion Lava Lamps Work (2019) A How Stuff Works description of lava lamps, including their history.
How Do They Make Lava Lamps? (2016) A video(3:02 min.) from Science Channel giving a behind-the-scenes look at how commercial lava lamps are made.
What is immiscibility? (2019) A Let’s Talk Science Hands-on Activity.
Why do oil and water not mix? (2019) A Let’s Talk Science Hands-on Activity.
Lumen Learning. (n.d.). Kinetic Molecular Theory of Matter .
Maggie's Science Connection. (n.d.). How a lava lamp works .
McVean, A. (2018, July 19). The Luminescent Chemistry of Lava Lamps . McGill University.
Scamarca Productions. (2016, May 24). The Kinetic Molecular Theory (Animation ) .
Related Topics

Homemade Lava Lamps: Chemistry in action!
Sharing is caring!
- Pinterest 2
Did you have a lava lamp growing up? As it turns out, it is easy and inexpensive to create your own lava lamp while learning a thing or two about chemistry.
Creating your own lava lamp is a great way to showcase the reaction between vinegar and baking soda to your child in a colorful way. Plus, given the nature of this experiment, the reaction continues for quite some time!
It’s easy to set up and there are tons of lessons you can teach your child with this experiment, including chemistry, how colors mix to create new colors, and challenging their fine motor skills.
How to make the Lava Lamp science experiment
Supplies you will need.
For the Lava Lamp experiment, you’ll need:
- A container (we used a tall mason jar)
- Cooking oil
- Baking soda
- Food coloring
Before you start
Due to the reaction occurring in this experiment, do not use a lid on your container!
Instructions
Here is how to do the Lava Lamp science experiment with your toddler:
Step 1: Add baking soda to the container
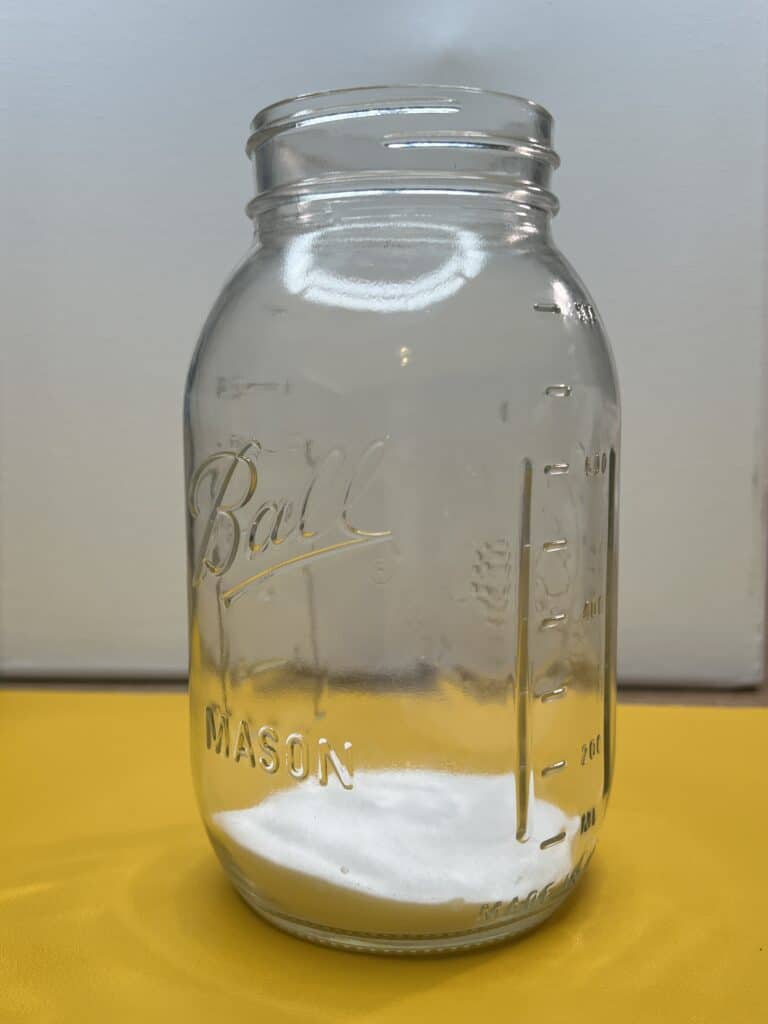
Add enough baking soda to cover the bottom of your container, plus a little extra.
Get your child involved : Have your child add the baking soda to the container! I helped guide the baking soda to the container and then let her pour it. It’s great for helping your child follow directions!
Step 2: Add cooking oil to the container
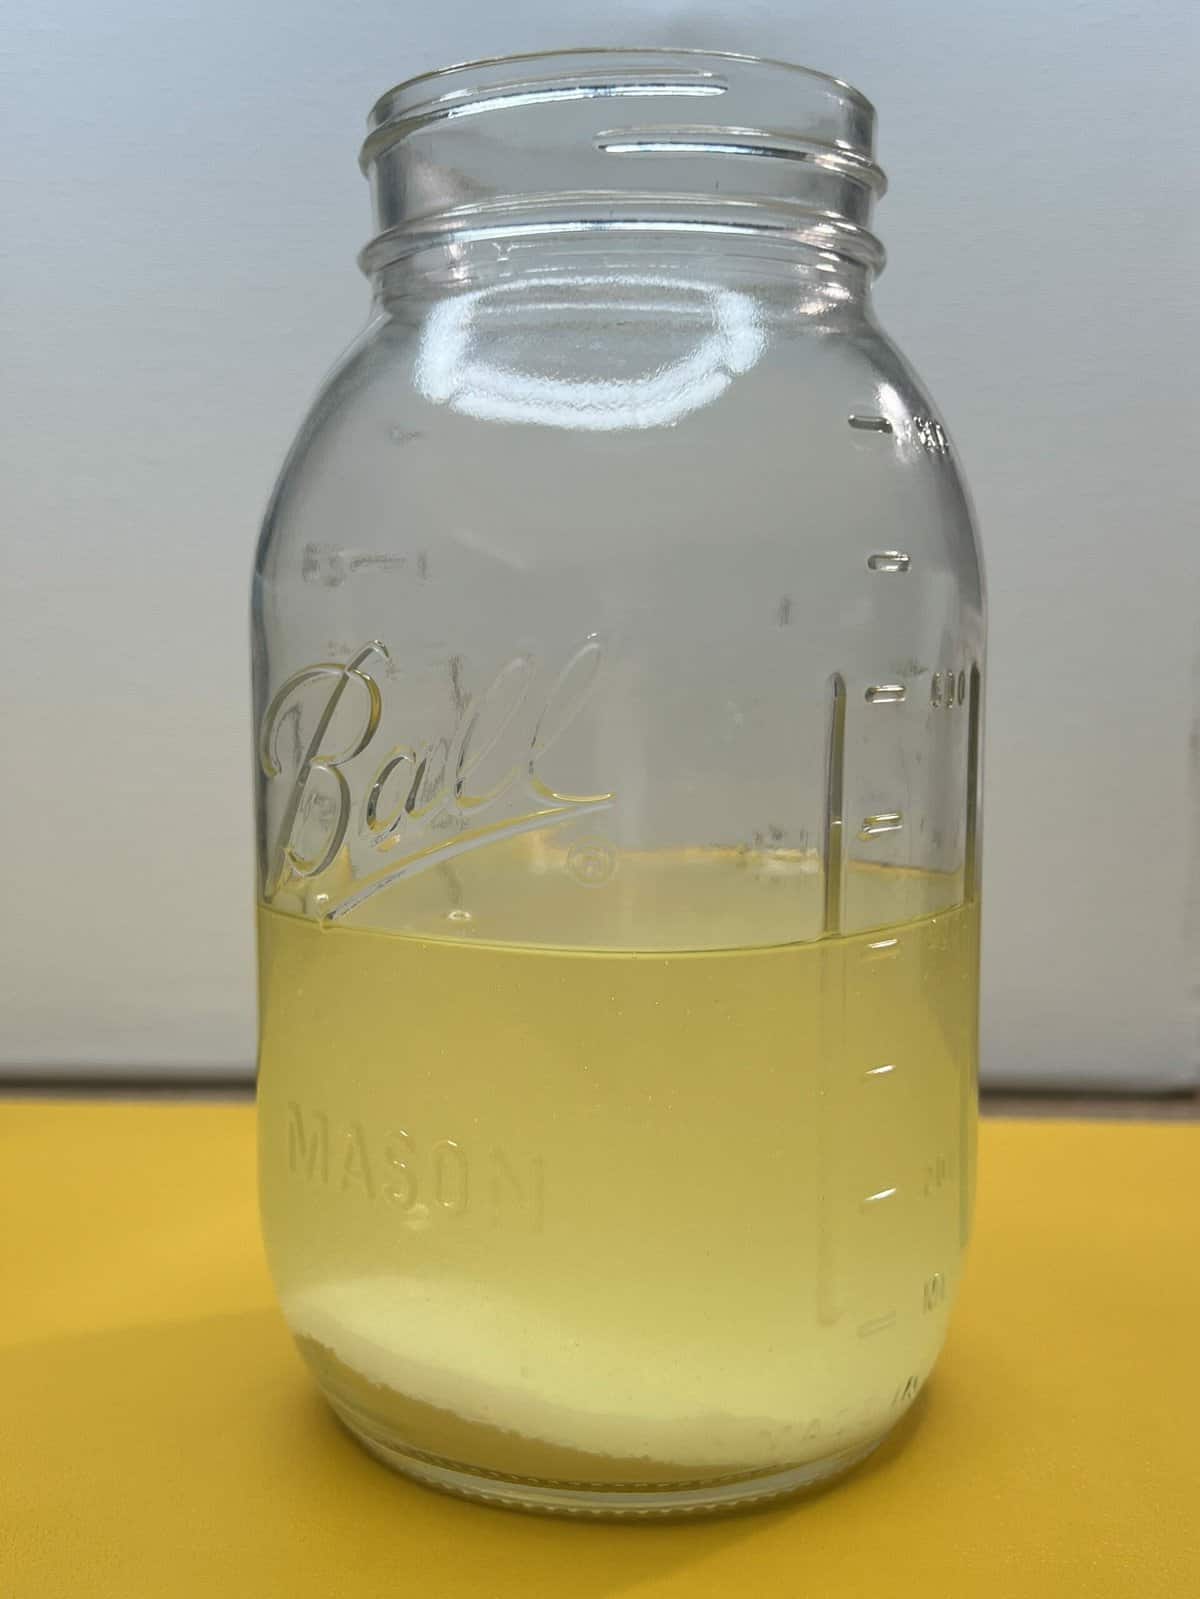
Start pouring the cooking oil directly on top of the baking soda. Don’t worry – they won’t mix. Even if they mix at first, the baking soda will settle back to the bottom of your container.
Since the cooking oil is where you will see the action of this experiment – don’t skimp! I filled my container about 1/2 full with cooking oil, but that’s because we were running low. Ideally, I would have filled it about 2/3 full!
Get your child involved : I also let my child pour in the cooking oil. Since the cooking oil bottle was pretty large and heavy, I helped her get the bottle up to the mason jar and helped her start pouring. From there, she poured the rest.
Step 3: Create your colored vinegar in a separate container

I used a small ramekin for my colored vinegar. I filled it about halfway full, then added 3-4 drops of food coloring (you can add more if you want a deeper color). Then, use your pipette to give it a good swirl to mix it together.
Get your child involved : Let your child add however many droplets of food coloring to your vinegar. Even better if you can mix colors to create new colors, then talk about it!
Step 4: Use a pipette to add colored vinegar to the container

The reaction will be pretty slow at first because there is quite a bit of baking soda at the bottom of the mason jar and very little vinegar.
The more colored vinegar you add, the bigger the reaction!
Get your child involved : Allow your child to do this step entirely on their own! It’s fantastic for fine motor skills and it lets them take charge of the reaction.
Try experimenting
We wanted to see what would happen if we added multiple colors to the experiment at once.
- Would the colors mix into one color?
- Would each individual color stay intact?
We found that each color stayed separate from the others, giving us a pretty neat-looking lava lamp! Be sure to hit play in the video below to watch the individual colors in the lava lamp.
The science behind the Lava Lamp science experiment
The Lava Lamp experiment is excellent for learning about chemistry and seeing the reaction between an acid and a base!
How it works
The Lava Lamp experiment is a classic vinegar-baking soda experiment. The difference this time is that the reaction takes place in the cooking oil, creating colorful beads bouncing around.
As we add the colored vinegar to the container, it sinks to the bottom because vinegar is more dense than oil.
Once it reaches the baking soda at the bottom of the container, it creates carbon dioxide bubbles mixed with vinegar, which float to the surface of the oil. When it reaches the surface, the bubble pops and colored vinegar sinks back down to cause another reaction. This is how you see dancing colored bubbles.
More chemistry experiments to try out with your child
- Fizzing lemons experiment – using lemons and baking soda to make a lemon volcano
- Magic Milk experiment – an explosion of colors with a chemical reaction lesson
- Fizzing paint experiment – another vinegar and baking soda reaction, but with an artistic twist!
FAQ about the Lava Lamp Science Experiment
How do you make the lava lamp experiment with alka seltzer.
Since Alka Seltzer provides carbon dioxide bubbles without the use of vinegar and baking soda, you will need fewer ingredients for the lava lamp experiment.
Simply fill the bottom of your container 1/3 of the way full with water, add the food coloring you desire, fill the rest of your container with oil, and add the Alka Seltzer.
Recent Posts
Symmetry Safari: Discovering nature's hidden patterns
If you take the time to look, you'll find a surprising amount of symmetry when you step outside. Symmetry in nature is all around us! This experiment takes kids on an excursion to find symmetry in...
The Science Scoop: How to make ice cream in a bag (and learn while you do!)
I've got a very tasty science experiment to do today! Making ice cream in a bag is all science! This exciting experiment allows you to create your own frozen treat while delving into the world of...
- Science Projects
- Project Guides
- STEM Activities
- Lesson Plans
- Video Lessons
Make an Alka-Seltzer Powered Lava Lamp

Introduction
- Tall identical jars or bottles, such as empty, clear, plastic 1-liter or 2-liter bottles (2)
- Cutting board
- Timer or clock that shows seconds
- Food coloring
- Vegetable oil (enough to fill the jars nearly full)
- An Alka-Seltzer tablet. Only one tablet is needed for the activity, but having additional tablets can be fun if you wanted to repeat lava lamp action.

Instructions

- Somehow make one of the prepared jars be hot and one be cold. For example, to make one hot you could let it sit in a large bowl of hot water, and to make one cold you could store it in a refrigerator or freezer. Be careful when handling hot water.

- When you are done playing with the lava lamps, do not pour them down the drain. That quantity of vegetable oil can lead to clogs in the sewer system. Instead, pour the contents of the lava lamps into a compost pile or dig a hole in your yard, away from any plants you care about, and pour the contents in the hole. If neither of those are an option, simply screw the cap on tightly and throw the lava lamp jar in your regular trash.
What Happened?
The ingredients in Alka-Seltzer combine with water to form a gas called carbon dioxide. The oil and Alka-Seltzer do not combine in this way though. The Alka-Seltzer tablets sink through the vegetable oil until they reach the layer of colored water. There the Alka-Seltzer dissolves in the water and forms a gas called carbon dioxide. The gas is lighter than the water and oil, so it bubbles up, taking a bit of colored water with it as it moves through the oil layer. You should have seen those bubbles, looking like colorful blobs, float through the oil layer to the top of the jar. At the top the bubbles should have burst (releasing the carbon dioxide gas), and then the colorful blobs should have sunk back to the bottom (now without carbon dioxide gas). The effect should have been reminiscent of a lava lamp.
The chemical reaction that causes the carbon dioxide to form happens more quickly in warmer water. For this reason, you should have seen that the Alka-Seltzer tablet dissolved more quickly in the hot water, in approximately 20-30 seconds depending on the temperature. This should have resulted in lots of rapid bubbling and an energetic lava lamp display. In contrast, the Alka-Seltzer tablet in the cold water should have dissolved more slowly, with most of it should disappearing in the first two to three minutes, resulting in a calmer and longer lasting lava lamp effect.
Digging Deeper
Alka-Seltzer is a medical drug that works as a pain reliever and an antacid (antacids help neutralize stomach acidity, such as heartburn). The pain reliever used is aspirin and the antacid used is baking soda, or sodium bicarbonate. To take the tablets, they are fully dissolved in water, where they famously undergo a chemical reaction that produces lots of carbon dioxide bubbles. Why is this? As the tablets dissolve, the sodium bicarbonate splits apart to form sodium and bicarbonate. The bicarbonate reacts with hydrogen (from citric acid, another ingredient in the tablets) to form carbon dioxide gas (and water). This is how the bubbles are made.
How is temperature related to this reaction? For the reaction to occur, the bicarbonate must come into contact with the hydrogen in just the right way. The chance of the bicarbonate and hydrogen doing this is affected by temperature: the higher the temperature, the faster the molecules move; the lower the temperature, the slower they move. The faster they move, the more likely they are to come into contact with each other.
Ask an Expert
For further exploration.
- Test Alka-Seltzer tablets in a wider range of temperatures, and then graph the time it takes a tablet to dissolve in water at each temperature (check with a thermometer). What temperature change is required to increase the reaction time by a factor of two? What about decreasing the reaction time by a factor of two?
- Compare whole Alka-Seltzer tablets to pieces of Alka-Seltzer tablets. If there is a greater surface area (i.e., a tablet is broken up into more pieces), does the same amount of tablet result in the reaction happening faster or slower, or in a different way?
Related Resources
Project ideas.
- Show Others Like This

Explore Our Science Videos

Table of Contents
Lava lamps are also known as liquid motion lamps. The hypothesis of a lava lamp is about the density of two liquids and the solubility of the two same liquids. The two liquids used in lava lamps are very close to each other in density and are insoluble in each other. Mostly, people use oil and water as they are insoluble in each other. But these liquids have different densities from each other. So, we need liquids whose densities are very close to each other.
Fill Out the Form for Expert Academic Guidance!
Please indicate your interest Live Classes Books Test Series Self Learning
Verify OTP Code (required)
I agree to the terms and conditions and privacy policy .
Fill complete details
Target Exam ---
Also Check: Mercury Metal
When the two liquids are found, heat the bottom of the mixture using a light bulb. The liquid with a higher density will absorb the heat and expand. While expanding, low becomes less dense. Both liquids have similar densities; the previously denser liquid becomes lighter and rises over the other liquid. This happens in a passive motion. Density change occurs very mildly.

When does a Lava Lamp expire?
Lava Lamp lasts nearly 2000 hours. After this, the bottle should be changed or replaced with a new lava lamp. The lava lamp starts working after one hour of turning on. Nowadays, most lava lamps run on batteries. Batteries can be changed if the lamp stops working.
Also Check: Nitrogen
Lava Lamp Experiment
The principle of the Lava Lamp Experiment is density and polarity. The Lava Lamp experiment explains why oil and water don’t mix. Let’s see how to make a Lava Lamp:
Apparatus Needed
- A flask or a bottle
- Vegetable Oil
- Alka- Seltzer or some other fizz tablets
Also Check: Magnesium
- Fill the bottle with water upto quarter. Use a funnel to fill so that the water doesn’t spill out.
- Add vegetable oil to the bottle. Keep adding until it is full to the brim.
- Wait until the vegetable oil and water levels separate.
- Add food color to the mixture. Food color is water based, it will sink and settle at the bottom.
- Break Alka- Seltzer tablet into small pieces. Add them to the flask one by one.
- As soon the tables are added, the reactions will start inside the bottle.
- Keep adding more tablets if the lava lamp reaction stops.
Also Check: Mercury Element
Observation
The oil density is lower than the water’s in the lava lamp experiment. The water and oil stay separate due to their density. Food colouring mixes with water as it has the same density as that of water. When we add Alka- Seltzer tablets in the bottle, carbon dioxide is released, appearing as small bubbles. It reaches the top by taking some water along with it. The colour falls back when the bubbles disappear on the top. If we add more tablets, the reaction will go for a longer time.
Lava Lamp Experiment Explanation
- Oil has a less dense composition than water, so it stays afloat on top of the water. The density of food coloring and water is the same; it sinks through the oil and combines with it.
- When the tablet is dropped in it, it settles to the bottom and starts to dissolve, and carbon dioxide is emitted. As the gas is lighter than water, it hovers to the surface. Air bubbles carry colored water to the surface.
- When air escapes from the color water, water becomes heavy and sinks. The process is repeated until the tablet is entirely dissolved.
- We can add more tablets to run the Lava Lamp Experiment for a longer period of time.
Also Check: Chlorine
Fun Facts About the Lava Lamp Experiment
- The Lava Lamp was discovered in 1948. It took about 15 years to design the ideal lava lamp.
- No two lava lamps can be the same.
- Earlier, the lava lamps were considered as unusual and luxurious items. But now they have become accessorized products.
- Lava Lamps can be highly expensive.
- Nowadays, the lava lamp experiment is a widespread and fun experiment for kids.
- The most massive lava lamp holds thousands of gallons of lava.

What is Density?
Density is a measurement of how compact or denser a substance is. It is also defined as the mass per unit volume.
Density Formula:
The formula to calculate density is:
Density=MassVolume
This formula helps determine how much mass occupies a specific volume.
Density of Water:
The density of water is around 1 gram per cubic centimetre, providing a baseline for understanding this essential property of liquids.
Density of Air:
Referring to how much mass of air is present in a certain volume, the density of air is a key factor in various scientific and atmospheric discussions.
Density Units:
Density is commonly measured in units like grams per cubic centimeter. Understanding these units is crucial in expressing and comparing the density of different substances.
What is Polarity?
Polarity refers to the positive or negative charge of an atom or molecule. Or it can be defined as the distribution of electrical charge within a molecule.
Lava Lamp: FAQs
On which principle does the lava lamp experiment work.
The Lava Lamp Experiment works on the principle of density and polarity.
What happens when fizz tablets are dropped in the bottle?
When fizz tablets are dropped in the bottle, carbon dioxide is released in the form of small bubbles. It reaches the top by taking some of the water along with it.
What is the relation between temperature and density?
Density is inversely proportional to temperature.
What are the reactions taking place in the Lava Lamp Experiment?
Alka Seltzer, when reacted with water, produce bubbles of carbon dioxide. They stick to the water droplets. The combination of water and gas is less than the oil. They rise to the top of the flask. The real lava lamp uses polar and non-polar liquids. The Lava Lamp measures density and polarity.
Related content
Talk to our academic expert!
Language --- English Hindi Marathi Tamil Telugu Malayalam
Get access to free Mock Test and Master Class
Register to Get Free Mock Test and Study Material
Offer Ends in 5:00
Your browser is not supported
Sorry but it looks as if your browser is out of date. To get the best experience using our site we recommend that you upgrade or switch browsers.
Find a solution
- Skip to main content
- Skip to navigation
- Back to parent navigation item
- Find resources
- Experiments and investigations
- Cross-curricular activities
- Meet the scientists
- Boost your knowledge
- Beyond the classroom
- Get funding
- About the RSC

- More from navigation items
Primary science investigations
- 2 Air pressure and the antigravity bottle
- 3 Air pressure, gases and the leaky bottle
- 4 Dissolving, density and ‘heavy’ sugar
- 5 Fizzy irreversible changes and bath bombs
- 6 Irreversible changes and the ‘fire extinguisher’
- 7 Irreversible changes and the ‘freaky hand’
- 8 Properties of gases, air pressure and ‘sticky’ cups
- 9 Properties of solids and ‘biscuit bashing’
- 10 Viscosity and ‘racing’ liquids
- 11 Freezing and the ‘intriguing ice’ experiment
- 12 Liquids, gases and the ‘lava lamp’
Liquids, gases and the ‘lava lamp’
- No comments
Try this investigation to explore liquids and gases, and practise taking accurate measurements
This resource is also available in Welsh and Irish

Get the Welsh language version .

Get the Irish language version .
This experiment focuses on carbon dioxide gas fizzing through liquids. First watch the video of the ‘lava lamp’ demonstration, then find out how you can investigate the mass of carbon dioxide in fizzy drinks with your learners.
Learning objectives
- To show understanding of solids, liquids and gases.
- To understand that gases have mass.
Enquiry skills:
- To take accurate measurements.
- To apply maths skills in science.
Watch the video
The video below shows how to carry out the ‘lava lamp’ demonstration.
Source: Royal Society of Chemistry
Make a lava lamp to explore mixing liquids and more concepts in primary science.
Download the supporting materials
Set up and run the investigation with your class using the teacher notes and classroom slides, featuring a full equipment list, method, key words and definitions, questions for learners, FAQs and more.
- Teacher notes
PDF | Editable Word document
Classroom slides
PDF | Editable PowerPoint document
DOWNLOAD ALL
What do learners need to know first?
Learners should already know that there are three states of matter: solids, liquids and gases. They should have a basic understanding of the properties of each state of matter.
Equipment list
Each group of learners should have:
- A set of electronic scales
- A 500 ml bottle of fizzy drink
- Measuring jug (with a capacity of at least 500 ml)
- Spoons, straws or something else to stir the drinks with
Additional resources
- Investigate the properties of liquids and gases further in our leaky bottle investigation , or explore the amount if sugar in fizzy drinks with our heavy sugar investigation .
- Try our particle disco demonstration from our collection of video demonstrations exploring liquids .
- Read up on solids, liquids and gases in this That’s Chemistry! textbook chapter .
- Introduce your learners to solids, liquids and gases with our primary science podcast .
Lava lamp: teacher notes
Lava lamp: classroom slides, additional information.
Primary science investigations were developed in collaboration with the Primary Science Teaching Trust

Air pressure and the antigravity bottle

Air pressure, gases and the leaky bottle

Dissolving, density and ‘heavy’ sugar

Fizzy irreversible changes and bath bombs

Irreversible changes and the ‘fire extinguisher’

Irreversible changes and the ‘freaky hand’

Properties of gases, air pressure and ‘sticky’ cups

Properties of solids and ‘biscuit bashing’

Viscosity and ‘racing’ liquids

Freezing and the ‘intriguing ice’ experiment

- Practical experiments
- Properties of matter
- Observing and measuring
Related articles

Illustrate polymer properties with a self-siphoning solution
2024-04-22T05:38:00Z By Declan Fleming
Demonstrate the tubeless siphon with poly(ethylene glycol) and highlight the polymer’s viscoelasticity to your 11–16 learners

Revealing blueberries’ nanostructure
2024-03-22T11:00:00Z By Nina Notman
Find out how microscopic, self-assembling particles give blueberries their characteristic blue hue

Chromatography challenge | 16–18 years
By Andy Markwick
Explore analytical techniques and their applications with a chromatography investigation and research activity
No comments yet
Only registered users can comment on this article., more from primary science.

Catherine’s chemistry practical skills sessions
Find out how Catherine organised her chemistry practical skills sessions and get tips for applying to the RSC Primary Science Teaching Empowerment Fund

CPD support from the Primary Science Teaching Trust
Explore professional development resources, webinars and support from the Primary Science Teaching Trust.

STEM careers and skills activities
Five out of five
Introduce primary learners to STEM careers and encourage them to explore their own skills. Includes a game, colouring poster, fact files and teaching notes.
- Newsletters
- Find your local education coordinator
Site powered by Webvision Cloud
Science Fun
DIY Lava Lamp Chemical Reaction Science Experiment
In this fun and easy science experiment, we are going to show you how to make a DIY lava lamp by using a chemical reaction. Most do-it-yourself lava lamp science experiments require the use of an Alka-Seltzer tablet, but in this version we are going to show you how to make an awesome lava lamp with a few items you probably already have in your kitchen. This is a great visual science experiment to observe and also provides insight into density.
- 1 cup of vegetable oil
- 1/4 cup of vinegar
- Food coloring
- 1 tablespoon baking soda
- 1 tablespoon water
- Clear cup or glass
- Small bowl or cup
- Tray to catch and contain any spills caused by the bubbling chemical reaction.
Instructions:
- Place the glass in the tray.
- Add the 1 cup of vegetable oil to the glass.
- Next, add the 1/4 cup of vinegar.
- Add 4 to 8 drop of food coloring.
- Mix well with the spoon.
- Now mix the baking soda and water in the small bowl.
- Pour the baking soda and water mixture into the glass.
- Observe what happens.
EXPLORE AWESOME SCIENCE EXPERIMENT VIDEOS!
How it Works:
The oil is less dense and thus seems to float on the vinegar. The oil is also less dense than the baking soda and water mixture. When the mixture is poured into the glass, it sinks to the bottom and the chemical reaction occurs between the baking soda and vinegar. This endothermic chemical reaction creates carbon dioxide as well as causes the glass to cool noticeably. As the carbon dioxide bubbles rise toward the surface, little globs of colored water stick to the bubbles creating the lava lamp effect. As the bubbles reach the surface, they pop, and the colored water sinks back toward the bottom of the glass.
Make This A Science Project:
Does the temperature of the vinegar effect the chemical reaction? Do other types of oil behave differently than the vegetable oil. Do different amounts of water or baking soda cause any noticeable changes in the chemical reaction?
EXPLORE TONS OF FUN AND EASY SCIENCE EXPERIMENTS!
SUBSCRIBE AND NEVER MISS A NEW SCIENCE FUN VIDEO!
previous experiment
Next experiment.
- Hands-On Science Night!
- Getting Started -1/06/12
- Experiments Showcase - 1/13/12
- How to Submit a Proposal - 1/20/12
- Searching for Experiments - 1/27/12
- Submitting Proposal - 2/6/12
- Project Review - 2/10/12
- You Eat With Your Eyes First
- Rapid, Rainbow, Bounce
- Homemade Hand Warmers
- Enviro Power
- Electric Gas
- Blowing Up Balloons with CO2
- Tusker Toothpaste
- Balloon Experiments
- Elephant Toothpaste
- The Secret of Diapers
- Super Absorbent Crystals
- Rainbow Milk
- The Amazing Static Balloon
- Bubbling Lamps of Lava
- The Floating Egg
- Marshmallow Cannon
- Dry Ice Bubbles
- Fog Tornado
- Fun with Electromagnets
- Poke that Polymer
- The Square Bubble
- How to Make an Egg Float
- Super Can Crusher
- How to Make a Homemade Lava Lamp
- Monster Bubble
- Levitating Orb
- Magical Egg Bottle
- Power of the Metal
- The Screaming Balloon
- Dancing Craisins
- Colorful Densities
- Color Separation
- Center of Gravity
- Sensory Analysis
- Sweet Polymers
- Awesome Bubbles
- Balloon Expansion
- Breaking Up Molecules
- Cabbage Chemistry
- Color Explosion
- Colored Bubbles
- Fizz Inflator
- Fool's Gold
- Glowing Water
- Gooey Gluey Slime
- Holly and Jennie's Lava Lamp
- Making Bubbles
- Colorful Convection Currents
- Ice Ice Baby
- Boo Bubbles
- Bouncing Sounds
- Can Crushers
- Candle Vacuum
- Colors of Light
- Floating Paper Clip
- Magical Bottle
- Rainbow Density
- Ready, Set, ... Throw!
- Sink or Float?
- Surface Tension
- Air Vortex Cannons
- Chip Ship Challenge
- Lemon Power
- Wing Or No Wing?
- Electrolyte Challenge
- Homemade Hand Warmer
- Elephant Toothpaste I
- Elephant Toothpaste III
- Tasty Frozen Science
- Purple Cabbage and Bases and Acids
- Pop Rocks and Soda
- World's Simplest Motor
- Magnetic Levitation Train
- Water Filter
- Stacking Liquids
- Egg in a Bottle
- A Helpful Presentation Board - 2/10/12
- Hands-On all the way - 2/17/12
- Practice, Practice , Practice - 3/02/12
- More Practice 3/2/12
- Rehearsal Afternoon - 3/15/12
- Run your own Science Night
- Who are we?
L a v a L a m p s
Qu estion : why do lava lamps bubble, hypothesis: we predict that the lava lamp will bubble due to the reaction cause by adding the effervescent tablets. , the science behind it, conclusion: in conclusion, we determined why lava lamps bubble. they bubble because when the tablet starts to dissolve in the water, they begin to fizz. the fizzing is carbon dioxide gas, which forms bubbles that rise up through the bottle..
TeachersCollegesj
Knowledge repository and useful advices
What are the variables in a lava lamp experiment?

Table of Contents
- 1 What are the variables in a lava lamp experiment?
- 2 Is a lava lamp a homogeneous mixture or a heterogeneous mixture?
- 3 How do you make a lava lamp experiment?
- 4 Which is the best lava lamp to use?
INDEPENDENT VARIABLE- The temperature of the water. DEPENDENT VARIABLE- We are measuring how well the lava lamp works. CONSTANTS- The amount of water, oil, and salt put in the the container will be about the same.
Is a lava lamp physical or chemical change?
We made a lava lamp. It was a chemical change because you can’t change it back to oil, water and barocka’s!!!
Is a lava lamp a homogeneous mixture or a heterogeneous mixture?
The lava lamp shows in an esthetic way that heterogeneous systems are composed of several phases―here two―at whose interfaces the physical-chemical properties change abruptly.
Is a lava lamp a heterogeneous mixture?
A mixture with two immiscible liquids is called a biphasic mixture. A mixture with more than two immiscible liquids is called a multiphasic mixture. When you watch the globs float around in a lava lamp, you’re looking at a biphasic mixture!
How do you make a lava lamp experiment?
What You Do:
- Fill the flask most of the way with your choice of oil.
- Fill the rest of the flask with water.
- Add a few drops of food coloring; your choice of color.
- Break an Alka-seltzer tablet into a few small pieces, and drop them in the flask one at a time.
- Watch your lava lamp erupt into activity!
What is a good hypothesis for the lava lamp experiment?
Which is the best lava lamp to use?
Which is the best lava lamp oil or Alka Seltzer?
Privacy Overview
Get Your ALL ACCESS Shop Pass here →
How To Make A Lava Lamp
Have you ever made a DIY lava lamp? We love to explore science with common items found around the house. A homemade lava lamp (or density experiment) is one of our favorite science experiments for kids . Combine two fun science concepts for a cool lava lamp experiment the kids will love to do over and over again!

EASY DIY LAVA LAMP
Get ready to add this simple lava lamp experiment to your science lesson plans this season. If you want to explore liquid density and chemical reactions, this is the science activity to try! While you’re at it, make sure to check out these other fun chemistry experiments .
Our science activities are designed with you, the parent or teacher, in mind! Easy to set up, quick to do, most activities will take only 15 to 30 minutes to complete and are heaps of fun! Plus, our supplies lists usually contain only free or cheap materials you can source from home!
We have heaps of fun variations of this alka seltzer lava lamp that are perfect for different themes and holidays during the year.
- Valentine’s Day Lava Lamp
- Earth Day Lava Lamp
- Halloween Lava Lamp
LAVA LAMP SCIENCE
There are quite a few things going on here with both physics and chemistry ! First, remember liquid is one of three states of matter . It flows, it pours, and it takes the shape of the container you put it in.
However, liquids have different viscosity or thicknesses. Does the oil pour differently than the water? What do you notice about the food coloring drops you added to the oil/water? Think about the viscosity of other liquids you use.
Why don’t all liquids simply mix together? Did you notice the oil and water separated? That’s because water is heavier than oil. Making a density tower is another great way to observe how not all liquids share the same density.
Liquids are made up of different numbers of atoms and molecules. In some liquids, these atoms and molecules are packed together more tightly, resulting in a denser liquid. Learn more about density here.
Now for the chemical reaction ! When the two substances combine (alka seltzer tablet and water), they create a gas called carbon dioxide, which is all the bubbling you see. These bubbles carry the colored water to the top of the oil, where they pop, and the water then falls back down.
YOU MAY ALSO LIKE: DENSITY TOWER EXPERIMENT

Click here to get your FREE Science Challenges Calendar

LAVA LAMP EXPERIMENT
You can also do this lava lamp experiment with salt instead of alka seltzer tablets!
- Water Bottles, Mason Jars, or Plastic Cups
- Food Coloring
- Baby Oil or Cooking Oil
- Alka Seltzer Tablets (generic is fine)
Lava Lamp Tip: Set up this experiment on a plastic tray or dollar store cookie sheet to minimize the mess. Dollar stores also have nice little mason jar-like jars you can use too. Science in a jar is quite fun, so we picked up six of them the last time we were there!
Check out our homemade science kit or STEM kit for more ideas about science supplies!
LAVA LAMP INSTRUCTIONS:
STEP 1: Gather your ingredients! We started with one cup, and then we decided to make a rainbow of lava lamps.
STEP 2: Fill your cup or jar(s) about 2/3 of the way with oil. You can experiment with more and less and see which one gives the best results. Make sure to keep track of your results. This is a great way to turn a science activity into an experiment.

STEP 3: Next, you want to fill your jar(s) the rest of the way with water. These steps are great for helping your kids practice fine motor skills and learn about approximate measurements.
Make sure to observe what happens to the oil and water in your jars as you add each ingredient.
STEP 4: Add drops of food coloring to your oil and water and watch what happens. However, you don’t want to mix the colors into the liquids. It’s ok if you do, but I love how the coming chemical reaction looks if you don’t mix them!

STEP 5: Now it’s time for the grand finale of this lava lamp experiment! It’s time to drop in a tablet of Alka Seltzer or it’s generic equivalent. Make sure to watch closely as the magic starts to happen!
When the lava lamp chemical reaction slows down, add another tablet. What do you think will happen? How is the colored water moving up through the oil? Ask plenty of questions to get your kids thinking!
You can really get your lava lamp experiment going crazy by adding more tablet pieces but watch out… It might erupt out of the bottle! Be prepared for a little mess, but this homemade lava lamp is so much fun!
What else can you do with those aka seltzer tablets? What about making alka seltzer rockets !

LAVA LAMP SCIENCE FAIR PROJECT
Want to turn this lava lamp into a cool lava lamp science project? Check out these helpful resources below.
- Easy Science Fair Projects
- Science Project Tips From A Teacher
- Science Fair Board Ideas
What is a good question to explore for this lava lamp project? What if you didn’t add oil at all? Or what if you change the temperature of the water? What would happen? Learn more about variables in science.
MORE FUN SCIENCE EXPERIMENTS TO TRY
- Skittles Experiment
- Baking Soda and Vinegar Volcano
- Growing Borax Crystals
- Elephant Toothpaste
- Magic Milk Experiment
- Egg In Vinegar Experiment
Printable Science Projects Pack
If you’re looking to grab all of our printable science projects in one convenient place plus exclusive worksheets and bonuses like a STEAM Project pack, our Science Project Pack is what you need! Over 300+ Pages!
- 90+ classic science activities with journal pages, supply lists, set up and process, and science information. NEW! Activity-specific observation pages!
- Best science practices posters and our original science method process folders for extra alternatives!
- Be a Collector activities pack introduces kids to the world of making collections through the eyes of a scientist. What will they collect first?
- Know the Words Science vocabulary pack includes flashcards, crosswords, and word searches that illuminate keywords in the experiments!
- My science journal writing prompts explore what it means to be a scientist!!
- Bonus STEAM Project Pack: Art meets science with doable projects!
- Bonus Quick Grab Packs for Biology, Earth Science, Chemistry, and Physics
- Science Fair Project Pack with experiments to try!

14 Comments
Amazing. I’m a counselor for children and adolescents of all different functional levels and I love incorporating art into therapy. Thank you for this idea. It is so cool!
Your welcome! So glad that this can be useful to you. My son loves anything that will erupt too!
Baby oil works the best for this experiment. It is clear, so it allows for the food coloring to really stand out.
Baby oil is great for this experiment but regular oil works well too in case you don’t have any on hand.
- Pingback: Liquid Density Tower Physics Activity and Experiment for Kids
- Pingback: Marshmallow Edible Slime Recipe or Putty Idea for Kids
Thank you for the idea , I might use it for an extra credit project
- Pingback: Simple and Educational STEM Projects for Toddlers
This science experiment, this is what I’m going to to do for a science fair project!!!
- Pingback: Science Activities For Kids « Craft Supplies
- Pingback: Walking Water Science Experiment for Kids STEM and Rainbow Science
- Pingback: Peeps Slime Candy Science for Easter Science and Sensory play
How can I download instructions for the experiments? I’d rather have a print out to check with during experiments than my phone.
Check out my classic science pack in the SHOP! https://little-bins-for-little-hands.myshopify.com/products/classic-science-pack
Comments are closed.
~ Projects to Try Now! ~


Make Your Own Lava Lamp

Introduction: Make Your Own Lava Lamp

The purpose of this experiment is to show the density in a lava lamp. Our hypothesis is when the temperature increases, then the time taken for the reaction to be complete decreases because the temperature gives more kinetic energy for the molecules, and so they will collide faster.
Step 1: Materials

- 1 plastic soda bottle with cap or any long cup
- Vegetable oil
- Baking soda or salt
- Food coloring
Step 2: Procedure

1. Get a tall cup
2. Add two thirds of water into the cup
3. Add two or three teaspoons of oil
4. Add two or three teaspoons of salt or baking soda until a reaction occurs
5. Add food coloring
6. Tip the bottle back and forth to observe the reaction properly
Step 3: Data and Photos

Step 4: Data Analysis

The oil floats on to if the water because it is less dense or lighter than water. The food coloring has the same density as the water, so it sinks through the oil and mixes with the water. When you add the salt, it sinks to the bottom then starts to dissolve. We tried this experiment twice to make sure our data was correct, so that our experiment resulted with proper measurement and no mistakes. When we recorded the measurements of the temperature of the lava lamp and when it erupts, it did not come to the same results as all temperatures were completely different from one another, but the hot and room temperature lava lamps were similar, which we also tried twice.
Step 5: Results and Conclusion

Our results were that when oil is applied to water, they separate. When we applied the food coloring, it dissolves in the water rather than the oil. Chemicals react with water when the baking soda is added, creating bubbles. The impact is similar to that of a lava lamp. Like lava, the food coloring flows around the container. So, our lava lamp experiment was successful and worked just as planned.
Our conclusion was that after trying different household products, the baking soda, oil and water mixture made the best lava lamp other than the salt, oil, and water lava lamp. It had more active bubbles that rose to the surface and was more interesting than the other one and also worked better and in a proper way.
Step 6: Application

This experiment is important because many people can’t go out during this time or can’t afford to buy a lava lamp, so we can ease their problems by applying science and fun into an experiment while also learning how it works. It can also be important to teach people the chemistry behind lava lamps and how various substances react with other substances, so it can be applied for learning or something like cooking. This can also be applied in practice to learn more about dissolving and mixtures.
In this experiment I learned many things, like the chemistry behind a lava lamp and how various substances react with each other. For example, the baking soda reacts with the water to produce carbon dioxide gas bubbles and stick to the water droplets. This experiment was something I’ve never tried before, and it was very fun to learn something new in this experiment while having fun too.

Recommendations

Engineering in the Kitchen - Autodesk Design & Make - Student Contest

Big and Small Contest

Green Future Student Design Challenge

Babble Dabble Do
How To Make A DIY Lava Lamp With Baking Soda
July 28, 2020 by Ana Dziengel 1 Comment
Let’s learn how to make a DIY lava lamp using Arm & Hammer Baking Soda ! This is a mess-free chemical reaction that will mesmerize kids!
This post is sponsored by Arm & Hammer. All opinions are my own.
I have made DIY lava lamps many different ways over the years but this is the first time I tried it with a layer of baking soda at the bottom. What I love most about this method is you can continue to activate it for a loooooong time and that means parents, you might just get an extra 5 minutes to yourself today.
Today’s project is the second science experiment of Arm & Hammer Summer Camp! I’ve had the pleasure of being a part of this fantastic summer resource as the science counselor!
DIY Lava Lamp
Downloadable directions here.
- 1 clear plastic bottle or jar with cap
- 4 tablespoons of ARM & HAMMER™ Baking Soda
- 12 ounces of vegetable oil (may need more or less depending on the bottle size)
- ¼ cup vinegar
- Food coloring
- Plastic cup
- Pipette or eye dropper
- Measuring cup
Instructions
Time needed: 15 minutes.
Using the funnel, pour 4 tablespoons of ARM & HAMMER™ Baking Soda into the bottle or jar. Let it settle into a flat layer at the bottom of the bottle.
Pour in the vegetable oil carefully to avoid disturbing the layer of ARM & HAMMER™ Baking Soda and set aside.
Pour vinegar into the plastic cup. Add 3-4 drops of food color and stir to combine.
Use the pipette to add 5-6 drops of colored vinegar to the plastic bottle. Watch the reaction.
Continue to add drops of vinegar until bubbles stop floating to the surface. If your pipette is long enough you can also stick it down into the layer of baking soda for a big burst of action!
Tips/Suggestions:
- Even though this DIY lava lamp is a mess free chemical reaction, I recommend doing this on a tray to protect the surface below during the pouring process.
- If you use multiple colors of vinegar eventually the colors will combine.
- Try doing this in different sized containers. Does the container shape alter or change the look of the lava lamp reaction?
The science behind a DIY lava lamp
Acid/base chemical reactions.
Baking soda is sodium bicarbonate, a chemical compound known as a base . A base is substance that releases hydroxide ions when combined with water. An acid is a substance that contains a high concentration of positive hydrogen ions. In this experiment vinegar is the acid.
When an acid and a base are combined, a chemical reaction occurs. During a chemical reaction, chemical bonds in a substance are either destroyed or created. When sodium bicarbonate and vinegar are combined they react and produce carbon dioxide, a gas which you see bubble up as soon as the vinegar droplets come into contact with the baking soda.
We have more chemical reactions you can try here!
Oil and vinegar do not mix because of polarity. Polarity is a concept used to describe how certain molecules are attracted to or repel other molecules. Vinegar is an acid and its molecules are polar, meaning the molecules have slightly charged poles. Polar molecules are attached to each other.
Oil contains fatty acids and non-polar molecules which are attracted to other non-polar molecules. Polar and non-polar molecules repel each other, therefore the vinegar droplets will not mix with the oil, giving you a colorful lava lamp style display.
I love this simple DIY lava lamp experiment because you can make it using just a few simple pantry ingredients and recycled jar. It doesn’t get any easier than this! If you missed yesterday’s camp science experiment, go here.
If you enjoyed this experiment and would like to see the other fun Arm & Hammer Summer Camp activities, check out Arm & Hammer’s YouTube channel.
Brenda Lang says
December 22, 2020 at 5:54 am
Omgosh! This is too cool. Can’t wait to try this out but not until after Christmas.
Leave a Reply Cancel reply
Your email address will not be published. Required fields are marked *
Save my name, email, and website in this browser for the next time I comment.
Pin It on Pinterest
404 Not found
- Skip to primary navigation
- Skip to main content
- Skip to primary sidebar
Love to cook, bake, craft, create?
One Little Project
Cook, bake, craft, create, one little project at a time!
How to Make a Lava Lamp
Learn how to make a lava lamp in the simple tutorial below. These DIY lava lamps are SO COOL and completely mesmerizing to watch! The bubbles float up and fall back down in this simple science experiment that’s fun for both kids and adults.

DIY Lava Lamp
Lava lamps were created in the 1960’s and have amazed generations of people. The original, store bought lava lamps typically contain water and wax. A light bulb creates heat which melts the wax and causes it to rise. Then when it cools the wax falls down again.
But did you know that you can make a different type of lava lamp at home using water, oil, and Alka-Seltzer? They’re really simple to make and just as much fun to watch!
It takes only a few ingredients and a couple of minutes to make a DIY lava lamp. Kids and adults alike will love watching the colourful bubbles flow up and down.
Have fun watching the bubbles flow while teaching kids about science!
Check out our Homemade Lava Lamp video tutorial:
*Note: Scroll down for the step-by-step photo tutorial.
Looking for more mesmerizing experiments? Here’s some of our favourites:
Snowstorm in a Jar
Underwater Magic Sand
Tornado in a Jar
Here’s what you’ll need:
This post contains affiliate links. If you use these links to buy something we may earn a small commission which helps us run this website.
The full printable instructions are at the end of this post, but here’s a list of products on Amazon that are similar to the supplies we used:
- Food colouring
- Canola oil (or vegetable oil)
- Alka-Seltzer tablets

- 1/2 cup Water (less or more, depending on container size)
- 8-10 drops Food colouring
- 1-2 cups canola or vegetable oil (less or more, depending on container size)
- 1-2 tablets Alka-Seltzer (broken into small pieces)
- tall clear container
- Measuring cup
- spoon or stir stick
Instructions:
Step 1: add the liquids.
Step 2: Add Alka-Seltzer tablet
Step 3: Be amazed!
Helpful Tip:

What oil can I use for a homemade lava lamp?
We highly recommend using canola or vegetable oil in your lava lamp, but you can also use baby oil.
We experimented with baby oil (see our Snowstorm in a Jar Experiment for a similar reaction), and even a mixture of baby oil and canola oil. Baby oil is awesome because it makes your lava lamp completely clear instead of yellow. But the bubbles were smaller than the bubbles in the cooking oil.
Baby oil is thinner than canola oil which means the bubbles move up and down faster in the baby oil so the “lava” effect wasn’t quite as good. We also noticed that the Alka-Seltzer fizzed up a little bit more in our lava lamps with baby oil, which sometimes made it harder to see the bubbles clearly.
What container is best for a DIY lava lamp?
You will need a tall, clear container such as a drinking glass, mason jar, or soda bottle. We used drinking glasses that held 1-3/4 cups of liquid because they had a cool lava lamp shape to them.
I don’t recommend using a large container because it will be more difficult to throw away the oil when you’re done (see the next section on how to clean it up when you’re done). Plus the bubbles are more impressive in a container that’s 2 cups or less.
You can also make your lava lamp in a jar or bottle that has a lid. This will allow you to close it off and use the lava lamp again. Make sure the Alka-Seltzer has stopped bubbling before you put the lid on!
How do you clean it up when you’re done?
Oil shouldn’t be poured down the drain since it could clog your pipes. When we were done with our lava lamps we poured the oil into a container with a lid and threw it in the garbage. Be sure to follow your local guidelines for disposing of oil.

How many times can you use the DIY lava lamp?
You can use your homemade lava lamp over and over until it stops reacting with the Alka-Seltzer. We dropped in at least 6 tablets into each of the lava lamps you see in the photos and they were still going strong.
By the end of the 6 tablets the oil was a tiny bit cloudy, but we were still getting a good, strong chemical reaction.
How to make a lava lamp without Alka-Seltzer?
Using Alka-Seltzer, oil, and water is the easiest way to make a DIY lava lamp, but you can definitely make a similar chemical reaction without the Alka-Seltzer.
The first option is to use baking soda and vinegar. Pour 1 cup of oil and 1/4 cup of of vinegar in your container. Drop the food colouring in. Mix 1 teaspoon of baking soda with 1 teaspoon of water and slowly pour it into the container.
You can also make a lava lamp with salt. Fill your container 3/4 full of water, top it up with oil, and then scoop in tablespoons of salt at a time and watch the reaction make bubbles.
What’s the science behind this homemade lava lamp?
The oil sits on top of the water because it is lighter, or less dense than the water. You might have heard the saying “oil and water don’t mix”, which is completely true.
Oil is hydrophobic, literally meaning that it fears water. Oil repels, or doesn’t absorb, water, which is why they don’t mix.
The Alka-Seltzer tablet contains both an acid (citric acid) and a base (sodium bicarbonate aka baking soda). As the Alka-Seltzer comes into contact with the water the two ingredients react and become a gas: carbon dioxide.
The carbon dioxide is lighter than the water and oil, so bubbles rise up, but they bring water droplets with them. As the gas escapes, the bubbles sink back down to the bottom. This creates the lava lamp effect in this experiment.

Homemade lava lamps are such a cool science experiment. You can try different types of oil, different glass shapes and different colours to see what you like best. It’s so much fun to watch the colourful bubbles rise and fall!

Here’s even more science experiment ideas:

Where to buy:
You can purchase Low-Mess Crafts for Kids from Amazon , or wherever books are sold:
Amazon | Barnes and Noble | Books- A- Million | Indiebound | Indigo | Amazon Canada
More from One Little Project

About Debbie Chapman , the Author of this Post
I'm Debbie Chapman, founder of One Little Project and author of the book Low-Mess Crafts for Kids . I love creating fun and easy crafts and cooking up delicious recipes for my husband and 3 kids.
Join the e-club for the latest

Low-Mess Crafts for Kids
72 Projects to Create Your Own Magical Worlds
Reader Interactions
Let us know what you think: cancel reply.
Your email address will not be published. Required fields are marked *
Save my name, email, and website in this browser for the next time I comment.
Universal source of knowledge
What is the hypothesis of a lava lamp?
Table of Contents
- 1 What is the hypothesis of a lava lamp?
- 2 What type of light source would a lava lamp be?
- 3 What happens when you make a homemade lava lamp?
- 4 What do you need for a homemade lava lamp?
- 5 What is a lava lamp science project?
- 6 What happens when you put food coloring in a lava lamp?
When enough bubbles pop, the water-and-remaining gas becomes more dense than the oil. So the ball of water sinks down through the oil and joins the rest of the water. Changes in density as gas is added to or taken away from water cause it to float up and sink down through the oil. Thus the lava lamp is created!
What type of light source would a lava lamp be?
The majority of lava lamps use 40-watt incandescent bulbs. These bulbs create light by heating a carbon filament to around 4600 degrees Fahrenheit.
What is the dependent variable of a lava lamp?
INDEPENDENT VARIABLE- The temperature of the water. DEPENDENT VARIABLE- We are measuring how well the lava lamp works. CONSTANTS- The amount of water, oil, and salt put in the the container will be about the same.
What is a lava lamp an example of?
A lava lamp is an example of a convection current. Convection currents cause liquids and gases to rise and fall because of changes in their density.
What happens when you make a homemade lava lamp?
The denser liquid sinks to the bottom, but the lava lamp light heats it up until it expands and becomes less dense, causing it to rise upward. Instead of using a light, in our homemade lava lamp, we used Alka-seltzer to power the lamp. The Alka-seltzer reacts with the water to produce carbon dioxide gas bubbles.
What do you need for a homemade lava lamp?
- A clean plastic bottle, try to use one with smooth sides.
- Vegetable Oil (or you could use Mineral or Baby Oil instead)
- Fizzing tablets (such as Alka Seltzer)
- Food Coloring.
What do you need to make a lava lamp?
What is the difference between oil and water in a lava lamp?
What is a lava lamp science project?
What happens when you put food coloring in a lava lamp.
- ← Do salamanders need oxygen?
- How long after an earthquake can a tsunami happen? →
Privacy Overview
IMAGES
VIDEO
COMMENTS
What is a Lava Lamp? Lava lamps, also known as liquid motion lamps, have been doing the rounds for ages. The lava lamp science project hypothesis talks about the density of two liquids and the solubility of the two same liquids. In the lava lamp, we have liquids that are very close to each other in density and are insoluble in each other.
Lava lamp works based on two important scientific principles - density and polarity. This can explain why oil and water don't mix. Understand the working principle of a lava lamp clearly by performing the lava lamp experiment given here. Materials for Lava Lamp Experiment. A plastic bottle.
A lava lamp is an example of a convection current. Convection currents cause liquids and gases to rise and fall because of changes in their density. There are convection currents all around you, even in the Earth's crust! When globs get warmed by the light bulb they rise to the top of the lamp, where they cool and sink.
Video of multiple colors (red, green, and purple) in lava lamp experiment The science behind the Lava Lamp science experiment. The Lava Lamp experiment is excellent for learning about chemistry and seeing the reaction between an acid and a base! How it works. The Lava Lamp experiment is a classic vinegar-baking soda experiment.
While you are heating and cooling the jars, cut an Alka-Seltzer tablet into quarters. Only two quarter pieces are needed for the activity, but having additional pieces can be fun if you wanted to repeat lava lamp action. Image Credit: Teisha Rowland, Science Buddies / Science Buddies. Once one jar is hot and one is cold, get a timer or clock ...
Lava Lamp Contributed by the Chi Epsilon Mu (XEM) Chemistry Club at Austin Peay State University Main Science Idea for Kids The main idea for kids is the concept of density, in particular, the idea that things that are more dense than a liquid sink and things that are less dense than a liquid float. This
The hypothesis of a lava lamp is about the density of two liquids and the solubility of the two same liquids. The two liquids used in lava lamps are very close to each other in density and are insoluble in each other. Mostly, people use oil and water as they are insoluble in each other. But these liquids have different densities from each other.
write down their hypothesis of whether or not the oil and water will mix. Making of Lava Lamp (20-Making of Lava Lamp (20 ---25 min)25 min)25 min) • Younger students may need instructors to help pour the water and liquid into the water bottles. 1. ¼ of the bottle should be filled with water. 2.
A lava lamp works because of two different scientific principles: density, and polarity. Concept 1: Density. Density is the measurement of how compact a substance is - how much of it fits in a certain amount of space. (The scientific equation is density = mass/volume.) If you measure an equal volume of oil and water, you'll find that the water is heavier than the same amount of oil.
This experiment focuses on carbon dioxide gas fizzing through liquids. First watch the video of the 'lava lamp' demonstration, then find out how you can investigate the mass of carbon dioxide in fizzy drinks with your learners. Learning objectives. To show understanding of solids, liquids and gases. To understand that gases have mass ...
Materials: A clean plastic bottle, try to use one with smooth sides water Vegetable Oil (or you could use Mineral or Baby Oil instead) Fizzing tablets (such as Alka Seltzer) Food Coloring Watch Scientist Joe as he makes the Lava Lamp Experiment here! Instructions: Fill the bottle up about 1/4th (1 quarter) with water. Pour the vegetable oil in the bottle until is almost full. You may want to ...
What is a good hypothesis for a lava lamp? Hypothesis:We think that adding oil, water, and food coloring together will make a lava lamp effect because we alredy know that water and oil separate because of their complete density contrast. The alka-seltzer will make it have a lava lamp effect. Click to see full answer.
Instructions: Place the glass in the tray. Add the 1 cup of vegetable oil to the glass. Next, add the 1/4 cup of vinegar. Add 4 to 8 drop of food coloring. Mix well with the spoon. Now mix the baking soda and water in the small bowl. Pour the baking soda and water mixture into the glass. Observe what happens.
Hypothesis: We predict that the lava lamp will bubble due to the reaction cause by adding the effervescent tablets. This is a homemade lava lamp Materials. ... Conclusion: In conclusion, we determined why lava lamps bubble. They bubble because when the tablet starts to dissolve in the water, they begin to fizz. The fizzing is carbon dioxide gas ...
What is a good hypothesis for the lava lamp experiment? When the bubbles pop, the color sinks back to the bottom of the bottle. Also, what is a good hypothesis for a lava lamp? Hypothesis:We think that adding oil, water, and food coloring together will make a lava lamp effect because we alredy know that water and oil separate because of their ...
LAVA LAMP INSTRUCTIONS: STEP 1: Gather your ingredients! We started with one cup, and then we decided to make a rainbow of lava lamps. STEP 2: Fill your cup or jar (s) about 2/3 of the way with oil. You can experiment with more and less and see which one gives the best results. Make sure to keep track of your results.
Make Your Own Lava Lamp: The purpose of this experiment is to show the density in a lava lamp. Our hypothesis is when the temperature increases, then the time taken for the reaction to be complete decreases because the temperature gives more kinetic energy for the molecules…
Let it settle into a flat layer at the bottom of the bottle. Add oil. Pour in the vegetable oil carefully to avoid disturbing the layer of ARM & HAMMER™ Baking Soda and set aside. Color the vinegar. Pour vinegar into the plastic cup. Add 3-4 drops of food color and stir to combine. Add vinegar to lamp.
Make Your Own Lava Lamp: The purpose of to choose is to show one density in a lava tube. Our hypothesis is when the temperature rise, then the zeitraum taken for the reaction to be complete decreases because who temper gives more kinetic energy for the molecules… Learn show: Rubber Band Guitar at Science Sparked. Assemble Archimedes' screw
Pour 1 cup of oil and 1/4 cup of of vinegar in your container. Drop the food colouring in. Mix 1 teaspoon of baking soda with 1 teaspoon of water and slowly pour it into the container. You can also make a lava lamp with salt. Fill your container 3/4 full of water, top it up with oil, and then scoop in tablespoons of salt at a time and watch the ...
How will the diffrent denitys of water and oil interact with an Alka-Seltzer tablet to create a lava lamp. Fill the plastic bottle three quarters of the way with canola or vegetable oil. Then the bottle the rest of the way leaving a 1.5cm space. Next add 10 drops of food colouring. Lastly cut 1 to 2 alka-seltzer tablets into four pieces each.
5.Slowly rock the bottle forth and back, watch the wave! 6.Report Your Results. Our experiment was to see if oil and water would mix and the oil and water did't mixunless we shook it. So our first step wa sto, put 1 3rd of vegetable oil in the bottles. Then, we put any color of food coloring in with the oil.
What is the hypothesis of a lava lamp? When enough bubbles pop, the water-and-remaining gas becomes more dense than the oil. So the ball of water sinks down through the oil and joins the rest of the water. Changes in density as gas is added to or taken away from water cause it to float up and sink down through the oil.